Announcement

Collapse
No announcement yet.

Carb tuning, last part of the project

Collapse
X
 
  • Filter
  • Time
  • Show
Clear All
new posts

  • #16
    Hey again,

    Okay, first off, the sharing tunnel would be ABOVE the pilot jet looking at the carbs upside down...and in that photo, I don't see one...so you've eliminated that as a problem...so no caps on the pilot jet towers.

    Next, the long brass tube on the edge of the carb body in the lower right corner of your photo is the enrichener tube...it's NOT the jet...the JET is in the float BOWL. But anyways....carb cleaner or fuel should flow thru that brass tube upwards and into the enrichener chamber....you should unscrew the enrichener plunger and remove it so you can better access that pathway. Sounds like you need to get some fine wire and start probing and spritzing with carb cleaner up into that brass enrichener tube to get it open and flowing. Also ensure that the JET in the float bowl is open and free flowing as well. THEN you should be able to start the bike with the enrichner.

    As for the 3500 rpm...you said you turned the pilot screw all the way OUT!
    OUT or CCW is increasing/richening the Air/Fuel ration providing more air/fuel. Turning it IN or CW is reducing/leaning the A/F ratio supply. I didn't reread this whole thread so I can't recall if you have Genuine Mikuni jets..mains and pilots vs. Generic...can't see the top of the main jet very clearly to see if it has the Mikuni superimposed diamonds/squares on it?

    Bench synching the carbs using the opening/exposure of one of the 3 small ports in the upper carb throat that the butterfly will partially close/cover.... can provide a more accurate bench synch than the breadstick tie method!

    T.C.
    T. C. Gresham
    81SH "Godzilla" . . .1179cc super-rat.
    79SF "The Teacher" . . .basket case!
    History shows again and again,
    How nature points out the folly of men!

    Comment


    • #17
      Well, not reading any of the replys, you got pilot circuit restriction for one thing. Secondly, stretching those diaphram springs wasa HUGE mistake. Replace them with stock ones as there is no other fix for what you have done. Thirdly, quit reading the net BS on bike carbs. IT will ALWAYS lead you down the perverbial rabbit hole to no return. ALWAYS follow advice from the REAL experts here on Mikuni carbs. Finially, remove the dern carb bank, disasemble each ccrb incncluding ALL jets and floats. Spray QUALITY carb cleaner thru ALL ports to make sure they are open,including enricher circuit with plunger pulling enricher shaft outward. Use a pointy tooth pic(no metal) and run in those pilot jet sideholes.
      81H Venturer1100 "The Bentley" (on steroids) 97 Yamaha YZ250(age reducer) 92 Honda ST1100 "Twisty"(touring rocket) Age is relative to the number of seconds counted 'airing' out an 85ft. table-top.

      Comment


      • #18
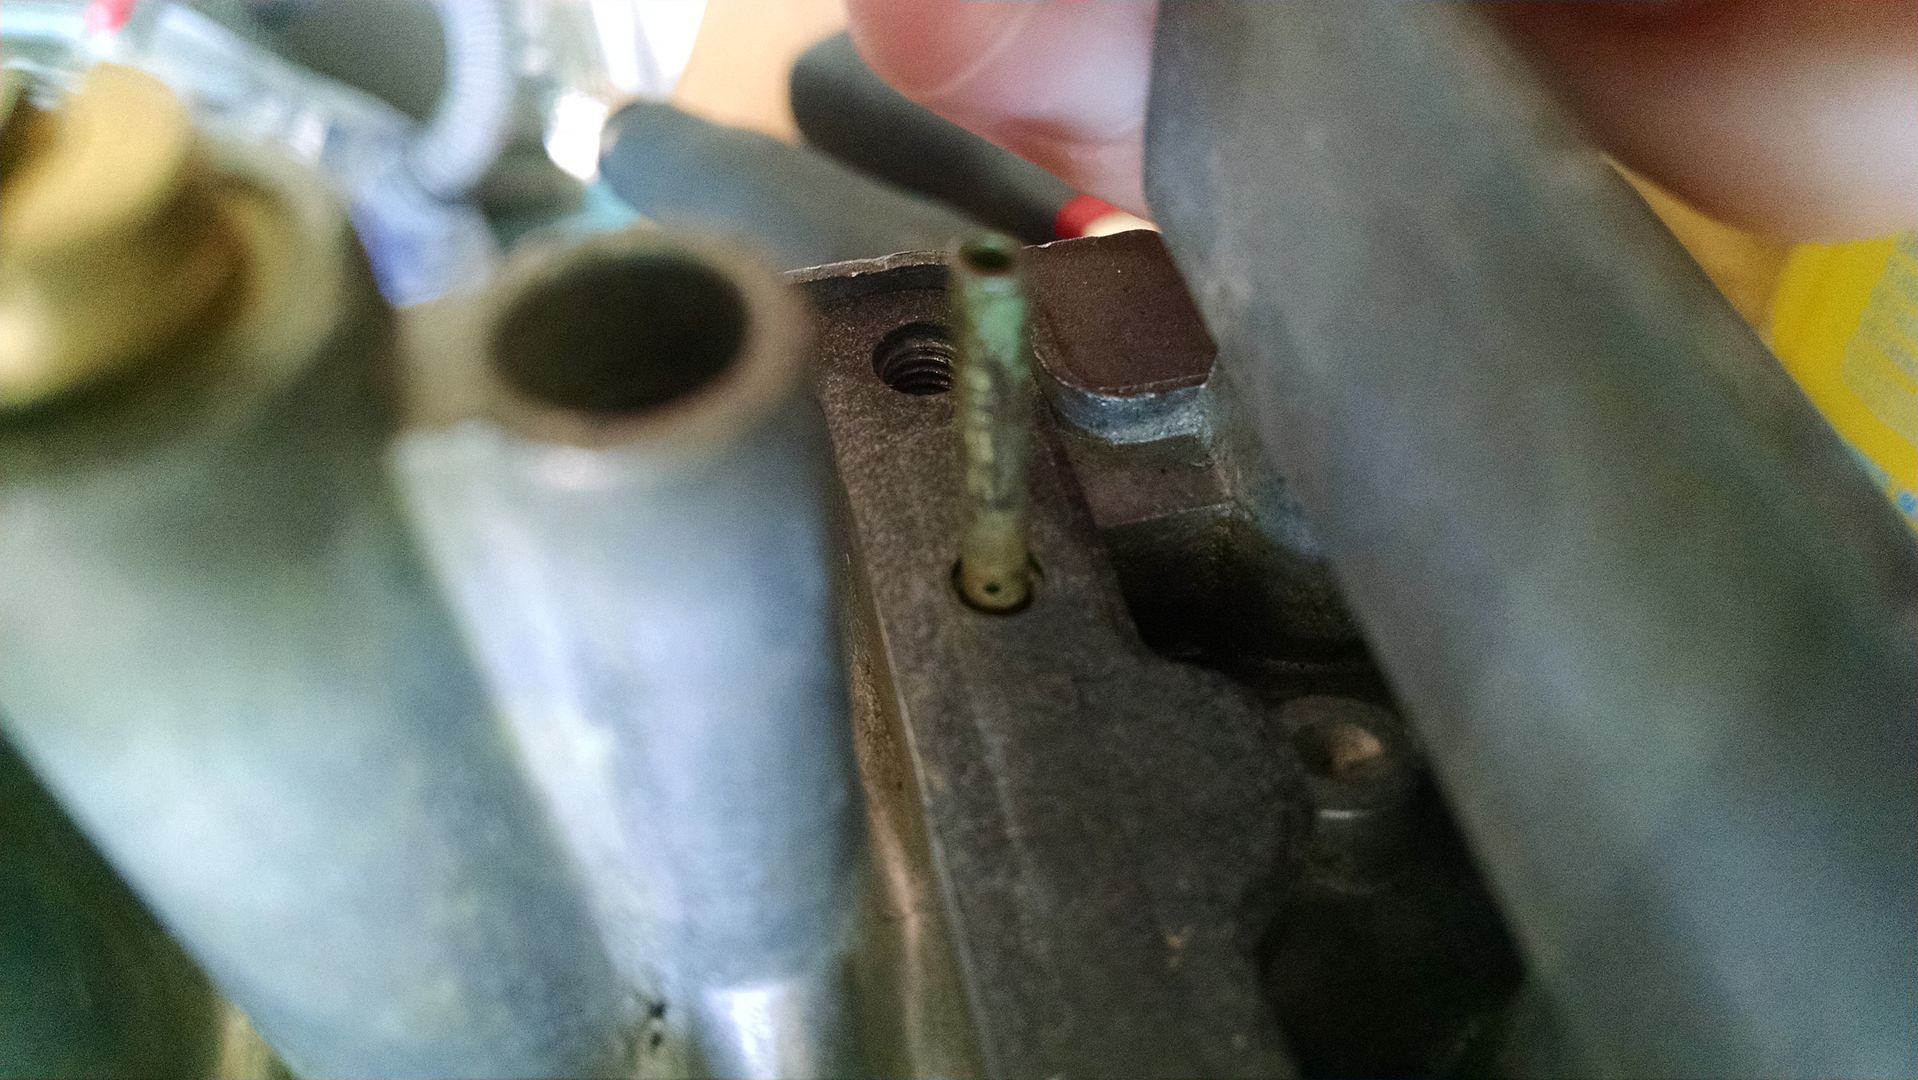
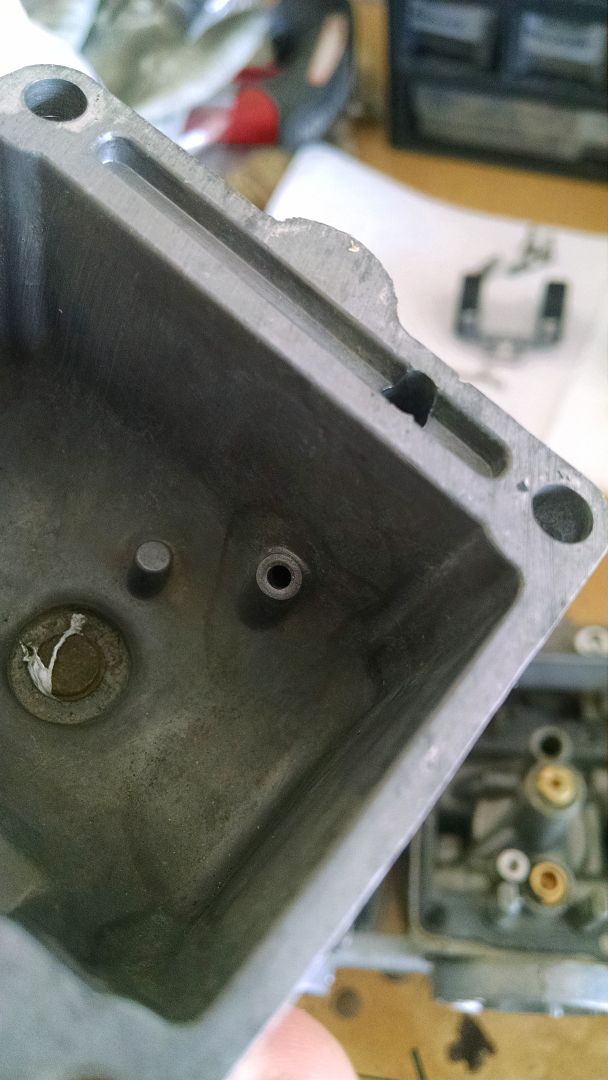
        The enricher jet is presumably this:

        All the these enricher jets are clean but they appear to have a pressed in plug in the bottom of the port which prevents liquid from flowing from the vertical section of the port to the angled section of the port. All four of them are liquid tight and carb cleaner cannot pass through them.

        As I said before the enricher tubes do not appear to go anywhere. There is a horizontal port near where the tube mates up with the aluminium carb body on 3 of the 4 carbs that points in a random direction but that appears to be the only outlet. Are you suggesting that the enricher tubes can be unscrewed? They look and feel like they are pressed in.

        I did not unscrew the pilot screws at all. I unscrewed the idle adjustment screw which adjusts the resting position of the 4 butterfly valves. Even with the butterfly valves completely closed the bike was still running at 3500 rpm.

        Comment


        • #19
          There is a jet, not a plug in there! I soak it in carb cleaner, and then use a VERY FINE wire to get the gunk out. Also, if you put the tube on the spray can you can put it down the hole in the bottom of the bowl and it should spray out of the hole near the lip. If not, keep cleaning!
          Ray Matteis
          KE6NHG
          XS1100 E '78 (winter project)
          XS1100 SF Bob Jones worked on it!

          Comment


          • #20
            When I spray carb cleaner in the enricher tubes it does come out the horizontal hole at the top but the horizontal hole at the top points in a random direction for each carb, is this normal or are they all supposed to point in the same direction? Are the enricher jets removable? I previously gave the carbs a multi day soak in berryman's B12 carb cleaner and a run through the dishwasher. Despite this carb cleaner spray does not pass through the enricher jet on any of the 4 carb bowels.

            Comment


            • #21
              Originally posted by 1980cm400t View Post
              When I spray carb cleaner in the enricher tubes it does come out the horizontal hole at the top but the horizontal hole at the top points in a random direction for each carb, is this normal or are they all supposed to point in the same direction? Are the enricher jets removable? I previously gave the carbs a multi day soak in berryman's B12 carb cleaner and a run through the dishwasher. Despite this carb cleaner spray does not pass through the enricher jet on any of the 4 carb bowels.
              Soaking thirty some year Butterfly shaft seals in carb cleaner will most likely warrant replacement. Every rebuild, on older carbs with original parts, I do gets new butterfly shaft seals. Then they're good for another thirty years or until someone soaks them in carb cleaner
              1980 XS1100G "Dolly G" Full Dresser (with a coat of many colors )
              1979 XS1100SF (stock-euro mods planned)
              1984 XV700L Virago (to be hot-modded)
              1983 XJ750MK Midnight Maxim (semi-restored DD)
              1977 XS650D ( patiently awaiting resto)

              Sometimes it takes a whole tank of gas before you can think straight.

              Comment


              • #22
                Originally posted by 1980cm400t View Post
                The enricher jet is presumably this:

                All the these enricher jets are clean but they appear to have a pressed in plug in the bottom of the port which prevents liquid from flowing from the vertical section of the port to the angled section of the port. All four of them are liquid tight and carb cleaner cannot pass through them.

                As I said before the enricher tubes do not appear to go anywhere. There is a horizontal port near where the tube mates up with the aluminium carb body on 3 of the 4 carbs that points in a random direction but that appears to be the only outlet. Are you suggesting that the enricher tubes can be unscrewed? They look and feel like they are pressed in.

                I did not unscrew the pilot screws at all. I unscrewed the idle adjustment screw which adjusts the resting position of the 4 butterfly valves. Even with the butterfly valves completely closed the bike was still running at 3500 rpm.
                Okay, I can't see ANY jet in the float bowl..wondering if the PO removed it?? The enrichener tube should NOT have a hole in the side of it anywhere...that is most likely just age/corrosion of the brass until it developed a HOLE. You can TRY to use a dab of solder to close it off...that way the fuel will be able to suck thru that tube from the bowl....with that hole it's like sucking on a straw with a hole in it....you don't get much! There is probably still a ton of gunk in the float bowl in that channel/tube down to the jet...so like suggested, get some fine wire and probe down in there, squirt repeat! Find a wire small enough to stick thru the bowl JET opening as well, again repeat until you get carb cleaner squirting out of the bowl jet when squirted down into the bowl tube/tunnel! Same for the enrichner circuit on the carb body itself....it HAS to flow into the carb enrichener plunger chamber or it won't work!

                Regrettably, as SCHMING said, with your history of soaking the carb bodies in B-12 chemtool dip, you've probably destroyed the butterfly shaft seals, and so now have severe vacuum leaks anyways, and all of those seals will need to be replaced...a bit more bothersome due to the peened screws that hold the butterflies onto the shafts.

                Also...the screws you are turning that open/close the butterflies are the Vacuum SYNCRHONIZING screws.....they are NOT the Pilot A/F screws. The Pilot A/F screws are on the top front of the carb bodies directly over the throat of the carbs. SO...you first need to reset the SYNCH screws to re-Bench Synch the carbs/butteflies so that they just barely partially cover/close the last of the 3 small ports in the top of the carb throats...and then LEAVE THEM ALONE until you get the bike running, and have verified that you do NOT have any vacuum leaks from the butterfly shaft seals! Then you adjust those screws while you have the carbs attached to vacuum gauges.

                Do a search for replacing butterfly shaft seals to read up on the techniques for both getting the screws out, as well as being able to put them back in SECURELY so that they don't work loose again and get sucked into the engine to get chewed by the pistons!

                T.C.
                T. C. Gresham
                81SH "Godzilla" . . .1179cc super-rat.
                79SF "The Teacher" . . .basket case!
                History shows again and again,
                How nature points out the folly of men!

                Comment


                • #23
                  You guys were right on the enricher jets in the bowls being plugged. I had to take a copper wire to them to get them unstuck. The bike now starts without needing ether.

                  Interestingly when I have the stock air pilot jets installed (185) the bike once started immediately revs to 3500 rpm and stays there no matter what I do. When I removed the 185 pilot air jets and installed pilot jet plugs I made instead the bike starts just fine and behaves normally. In fact with the enricher jets unplugged it runs better than it has ever run before. I can even kickstart it now and it fires up perfectly every time.

                  It is not quite perfectly smooth when idling but I am going to run it to work a few times this week and see if that clears it up. That is an interesting thought on the butterfly shaft seals. If running it for a week doesn't clear everything up I may have to look into that.

                  Thanks for your help on that enricher circuit!

                  Comment


                  • #24
                    Okay, glad you got the Enrichener circuits working.

                    BUT being able to run/idle with the pilot air jets CAPPED points to vac leaks!

                    Secondly....the 3500 rpm issue....did you read this part of my previous reply?

                    Also...the screws you are turning that open/close the butterflies are the Vacuum SYNCRHONIZING screws.....they are NOT the Pilot A/F screws. The Pilot A/F screws are on the top front of the carb bodies directly over the throat of the carbs. SO...you first need to reset the SYNCH screws to re-Bench Synch the carbs/butteflies so that they just barely partially cover/close the last of the 3 small ports in the top of the carb throats...and then LEAVE THEM ALONE until you get the bike running, and have verified that you do NOT have any vacuum leaks from the butterfly shaft seals! Then you adjust those screws while you have the carbs attached to vacuum gauges.
                    Hopefully while you had the bowls off you had the carbs out, and re-bench synched them. Next, you can use some of that same starter spray while the bike is running....provided you can get the idle down closer to the 1100 range it's supposed to be at....then spritz the ether around the outside of the butterfly shaft seals...and listen to hear any rpm change/increase. IF so....then you do have seal leaks....and will need to replace them. Capping off the pilot air jet ports is a bandaid for the probable real problem!!!

                    T.C.
                    T. C. Gresham
                    81SH "Godzilla" . . .1179cc super-rat.
                    79SF "The Teacher" . . .basket case!
                    History shows again and again,
                    How nature points out the folly of men!

                    Comment


                    • #25
                      Originally posted by TopCatGr58 View Post
                      Okay, I can't see ANY jet in the float bowl..wondering if the PO removed it?? The enrichener tube should NOT have a hole in the side of it anywhere...that is most likely just age/corrosion of the brass until it developed a HOLE. You can TRY to use a dab of solder to close it off...that way the fuel will be able to suck thru that tube from the bowl....with that hole it's like sucking on a straw with a hole in it....you don't get much!


                      T.C.
                      From the looks of the hole, it is too round and smooth to be corrosion, so I went and looked at my spare set of carbs, and the enricher tubes all have the hole. I think what it is for is to provide some emulsifying action to the fuel being sucked up, so that raw gas is not introduced into the carb throat. The direction of the hole shouldn't matter, since it is drawing air from the passage that it is in.
                      JAT

                      CZ

                      Comment


                      • #26
                        I am aware of the function of the synchronizing screws. I set them by making the gap equal in all 4 carbs and have not moved them since. I have a dial type carb synchronizer but the needles seem to jump around too much to be useful.

                        After riding it to work for a week it is apparent that I still have an issue. I am only getting 14 mpg which suggests I am very rich. Also when started cold the engine revvs high for ~20 sec before settling down to an uneven idle.

                        I pulled the carbs off and there is a lot of carbon on the inlet side which also suggests that they are rich. I tried swapping out my pilot fuel jets from 40 to 32.5 to compensate. I also turned the pilot screws in to 3/4 of a turn from seated. Once I put the carbs back on the bike and started it, it exhibited the same behavior it did when i installed the air jets instead of plugs. It instantly revvs to 4 or 5 grand and stays there. I adjusted the pilot screws back to their original position which had no effect. But when I put the size 40 pilot jets back in the behavior returned to "normal".

                        While I had the bike running "normally" (idle at ~1000-1500 rpm and somewhat uneven) I went around with a can of ether and sprayed it on the butterfly valve shafts, the intake boots, and anything else I would expect to have a possible vacuum leak. I did not detect any change in idle speed at any location. I am not sure that is a particularly conclusive test as afterwards is sprayed ether directly onto the pod filters and that did not effect the idle speed to any considerable degree. Maybe I am currently running to rich for that test to be accurate.

                        So from the tests I have run it looks like the problem is in the pilot circuit. If I add more air by swapping pilot air jets for plugs the idle is high and cannot be brought down. But if I reduce the fuel being added by making the pilot fuel jet smaller I get the same effect; high idle that cannot be brought down. I am thinking of having the carbs "smoke tested" as this will definitively tell me if I have butterfly shaft leaks regardless of whether the bike is running properly or not.

                        Comment


                        • #27
                          Originally posted by CaptonZap View Post
                          From the looks of the hole, it is too round and smooth to be corrosion, so I went and looked at my spare set of carbs, and the enricher tubes all have the hole. I think what it is for is to provide some emulsifying action to the fuel being sucked up, so that raw gas is not introduced into the carb throat. The direction of the hole shouldn't matter, since it is drawing air from the passage that it is in.
                          JAT

                          CZ
                          Hey CZ,

                          I was reviewing some other photos of the carb bodies that Mack had given to me to slice up...but I was marking the air and fuel paths with color coded wires before cutting them up....red=fuel, blue=air...and also used some black thinner wires for other venting/air paths.

                          What I found/noticed is that the carb body air vents...both for the early models as well as the later ones....lead to that flat channel in the float bowl proximal to the enrichener tube...but at the other end of the channel away from the tube. That's why the gasket has a little HOLE punched into it...to allow air to bleed into that channel to provide that aeration/venting affect that you described for the enrichener circuit with that little hole in the enrichener tube right at the bowl/gasket interface zone. SO....you're probably right in it's function.....and I apologize for my "ignorance" in stating that the tube shouldn't have a hole in it! Like you and CM400 said, the little holes are in all different positions around the tube, not necessarily pointing in one particular direction, since it just needs to get air from that channel at the float bowl.

                          Now, to address his current situation directly. The shaft seals are directional and seal against vacuum pressures on the INSIDE of the carb body. I would think the SMOKE test would be putting smoke into the carb bodies and see if you can see any leaking outward....but that will be a flawed test due to the directional sealing.

                          I didn't reread the whole thread....but you're talking about 40 and lower pilot jet sizes? The lowest stock jets were 42.5, they started at 45 in '78, but got a little leaner for EPA guidelines. ARE THEY GENUINE MIKUNI Pilot jets? As the F/A mixture gets too lean, it can cause the rpms to rise. ALSO, have you tried disconnecting the Vac. Adv. hose/capping the port on the #2 carb to see if you can get the idle lower with the pilot AIR JETS UNCAPPED? When you cap the Pilot Air Jets...you are increasing the vacuum level, and are probably putting way too much of a vacuum signal into the vac. adv. port causing it to advance raising your rpm! You need to leave the Pilot Air Jets uncapped and then troubleshoot from there!

                          T.C.
                          T. C. Gresham
                          81SH "Godzilla" . . .1179cc super-rat.
                          79SF "The Teacher" . . .basket case!
                          History shows again and again,
                          How nature points out the folly of men!

                          Comment


                          • #28
                            I have a dial type carb synchronizer but the needles seem to jump around too much to be useful
                            You need regulators in the lines, something like this...


                            http://www.ebay.com/itm/like/2310586...chn=ps&lpid=82
                            2H7 (79) owned since '89
                            3H3 owned since '06

                            "If it ain't broke, modify it"

                            Comment


                            • #29
                              This carb tuning has been a train wreck since the start, and going to 32.5 pilots to compensate? For carbon build up? Are all the other things fixed now, like the stretched diaphragm springs, et al?

                              "I am aware of synchronizing screws, set the gaps all the same and haven't touched them since?". You need a sync, otherwise it is wasting a lot of time on alot of fronts.

                              If indeed the problem is in the pilot circuit, then find out what the blessed heck is going on by settng it as it should be with stock settings, and stop altering things to make up for something else that is out if sorts, and wondering why it doesn't run like it should.

                              Sorry, I am direct when I see a repetition of the same type of stuff that makes little tuning sense, and when new people join in not necesarily knowing the way this thread started.
                              Howard

                              ZRX1200

                              BTW, ZRX carbs have the same spacing as the XS11... http://www.xs11.com/forum/showthread.php?t=35462

                              Comment


                              • #30
                                Originally posted by Bonz View Post
                                This carb tuning has been a train wreck since the start, and going to 32.5 pilots to compensate? For carbon build up? Are all the other things fixed now, like the stretched diaphragm springs, et al?

                                "I am aware of synchronizing screws, set the gaps all the same and haven't touched them since?". You need a sync, otherwise it is wasting a lot of time on alot of fronts.

                                If indeed the problem is in the pilot circuit, then find out what the blessed heck is going on by settng it as it should be with stock settings, and stop altering things to make up for something else that is out if sorts, and wondering why it doesn't run like it should.

                                Sorry, I am direct when I see a repetition of the same type of stuff that makes little tuning sense, and when new people join in not necesarily knowing the way this thread started.
                                I'm just watchin' and along for the ride. I DO know ome thing at a time van save alot of tail chasing, /hope he's got lots of bunnies to turn looose down the perverbale 'rabbit hole'..............this gonna go on for a bit.
                                81H Venturer1100 "The Bentley" (on steroids) 97 Yamaha YZ250(age reducer) 92 Honda ST1100 "Twisty"(touring rocket) Age is relative to the number of seconds counted 'airing' out an 85ft. table-top.

                                Comment

                                Working...
                                X