Announcement

Collapse
No announcement yet.

Need ideas for cleaning, polishing, painting the valve covers

Collapse
X
 
  • Filter
  • Time
  • Show
Clear All
new posts

  • Need ideas for cleaning, polishing, painting the valve covers

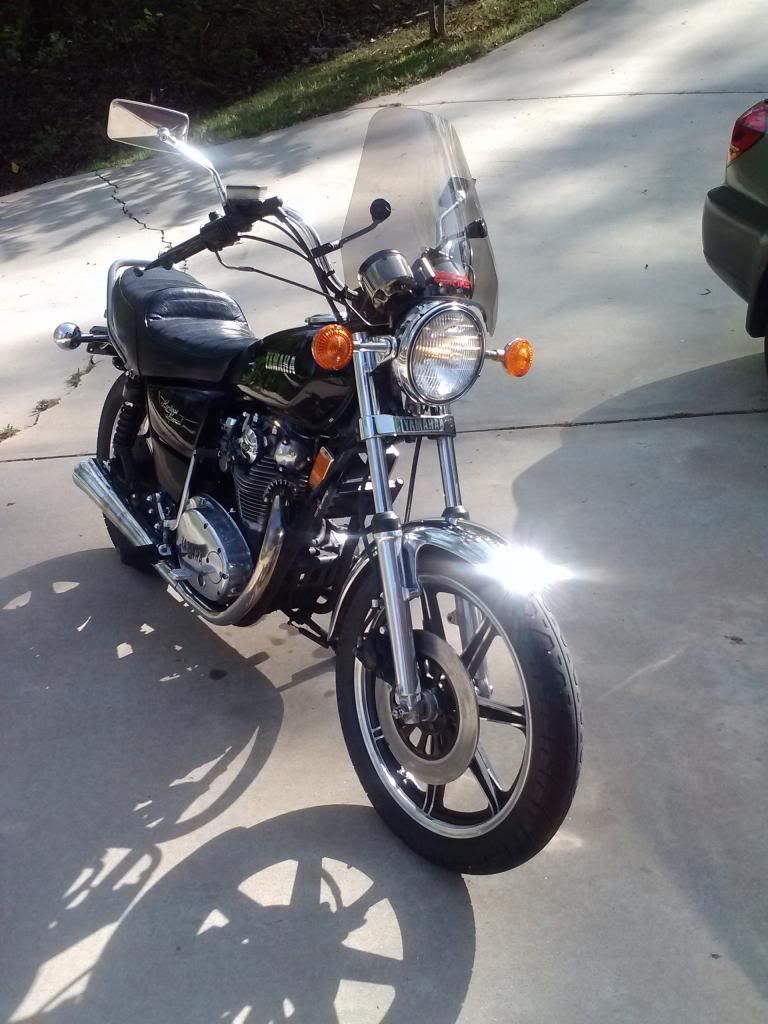
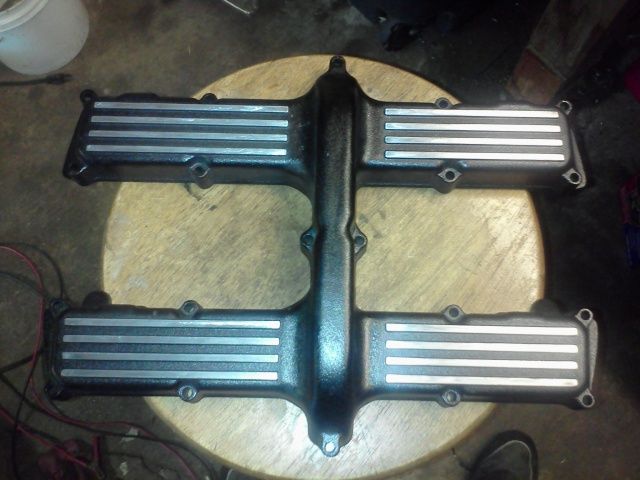
    It's time to tuck her away since it's too cold to ride here in NJ. I want to pull the valve covers (and few other parts) and pretty them up,...somehow. They are in good conditions with little to no pitting. What have you guys done to get them looking sharp? What tools and products did you use?

    (leaning towards polishing)

    Post em if you got em! Thanks!
    Rob - 79 SF

  • #2
    If all you want is polish, just remove any remaining clear-coat, wash with Dawn/Simple Green and hit it with Mothers polish. Or can get all fancy with wheels and buffing compound. I prefer the Mothers myself. Will require re-polishing every other week or so.

    Just my .02.
    1) Fire up Internet Explorer
    2) http://www.yahoo.com
    3) type "www.mapquest.com" into the Yahoo search page.
    4) go about day as VP managing multi-million dollar financial contracts.

    Comment


    • #3
      Originally posted by mrhammer2u View Post
      It's time to tuck her away since it's too cold to ride here in NJ. I want to pull the valve covers (and few other parts) and pretty them up,...somehow. They are in good conditions with little to no pitting. What have you guys done to get them looking sharp? What tools and products did you use?

      (leaning towards polishing)

      Post em if you got em! Thanks!
      Phosphoric acid works well.....
      XS1100F 1980 European model. Standard. Dyna coils. Iridium plugs. XS750 final drive (sometimes). Micron fork brace. Progressive front springs. Geezer regulator/rectifier. Stainless 4 into 2 exhaust. Auto CCT (Venturer 1300) SOLD. New project now on the go. 1980 European model.

      Comment


      • #4
        Originally posted by Diskman01 View Post
        If all you want is polish, just remove any remaining clear-coat, wash with Dawn/Simple Green and hit it with Mothers polish. Or can get all fancy with wheels and buffing compound. I prefer the Mothers myself. Will require re-polishing every other week or so.

        Just my .02.
        I def don't want to be polishing valve covers every other week. Thanks for the advice though
        Rob - 79 SF

        Comment


        • #5
          Originally posted by mrhammer2u View Post
          It's time to tuck her away since it's too cold to ride here in NJ. I want to pull the valve covers (and few other parts) and pretty them up,...somehow. They are in good conditions with little to no pitting. What have you guys done to get them looking sharp? What tools and products did you use?

          (leaning towards polishing)

          Post em if you got em! Thanks!
          I like the look of stock, not polished like chrome (I've done this chrome look, it does not last long) but like a slightly buffed finish.
          Brillo pads will give this look, just find the direction you want the brush mark to go towards, like around the forks, circular on the side covers, along the line of the cooling fins and valve cover, front to back on the carb bowls, around on the diaphragm covers.
          Or your choice ?
          Brillo will leave a slightly protective finish but cleaning this finish off and clear coating will last longer.
          76 XS650 C ROADSTER
          80 XS650 G Special II
          https://ibb.co/album/icbGgF
          80 XS 1100 SG
          81 XS 1100LH/SH DARKHORSE
          https://tinyurl.com/k6nzvtw
          AKA; Don'e, UD, Unca Don'e

          Comment


          • #6
            Not going for chrome looks

            Brillo or Scotch-Brite? Is Brillo rougher on the surface? I find the Scotch-Brite does not seem to work much without some serious elbow grease.
            Rob - 79 SF

            Comment


            • #7
              I wouldn't get near any Aluminum parts with a brillo pad which is steel wool impregnated with some detergent. Good for steel parts but will leave microscopic shards in the softer Al which will oxidize and dull the finish.

              Here's some good info:

              http://www.xs11.com/forum/forumdisplay.php?f=33
              1980 XS1100G "Dolly G" Full Dresser (with a coat of many colors )
              1979 XS1100SF (stock-euro mods planned)
              1984 XV700L Virago (to be hot-modded)
              1983 XJ750MK Midnight Maxim (semi-restored DD)
              1977 XS650D ( patiently awaiting resto)

              Sometimes it takes a whole tank of gas before you can think straight.

              Comment


              • #8
                I discovered a way to finish the aluminum, once and for all. The product is Glisten PC. You first clean and polish the aluminum. Then prime, followed by clear epoxy. Done! The primer does dull the shine just a bit, no mirror shine. This stuff is tough as nails and never yellows. The lower fork tubes in the photo were done almost 15 years ago! They still look like I did them yesterday. No more polishing....ever!

                Marty (in Mississippi)
                XS1100SG
                XS650SK
                XS650SH
                XS650G
                XS6502F
                XS650E

                Comment


                • #9
                  Originally posted by mrhammer2u View Post
                  Not going for chrome looks

                  Brillo or Scotch-Brite? Is Brillo rougher on the surface? I find the Scotch-Brite does not seem to work much without some serious elbow grease.
                  Originally posted by Schming View Post
                  I wouldn't get near any Aluminum parts with a brillo pad which is steel wool impregnated with some detergent. Good for steel parts but will leave microscopic shards in the softer Al which will oxidize and dull the finish.

                  Here's some good info:

                  http://www.xs11.com/forum/forumdisplay.php?f=33
                  Notice the shine on those parts, just beautiful that's what I used to do. Schming is right with steel wool and mag aluminum polish little bits of the steel in the steel wool embed in the softer aluminum and eventually rust leaving little rusty spots.
                  Brillo does not seem to do this, could be the protective coat left by the soap in the Brillo. Might also be that the slippery soap in the pad does not cause the type of wool Brillo uses to break apart. While using the Brillo I notice the pad does not tear/break up as regular steel wool pad does, Brillo pads last much longer.
                  Brillo is made for cleaning/polishing of cook ware, don't want little shards of steel in you cooking.
                  My dad was a top chef and when I was old enough I started cooking, I kept getting my eggs stuck to the pan. I saw dad in his kitchen at work just sliding the eggs on steel and aluminum pans, flipping and not sticking. I asked him how, he said Brillo, his pans showed a nice smooth brushed finish. Dad left cooking at home to mom he had had enough at 10-12 hrs. cooking at work.
                  I would still clean and clear over the polished part unless you don't mind doing the polish once or twice a year. On the other hand each time you do them they get even better.
                  Try some little area or try on some scrap, see if it does what you want.
                  76 XS650 C ROADSTER
                  80 XS650 G Special II
                  https://ibb.co/album/icbGgF
                  80 XS 1100 SG
                  81 XS 1100LH/SH DARKHORSE
                  https://tinyurl.com/k6nzvtw
                  AKA; Don'e, UD, Unca Don'e

                  Comment


                  • #10
                    A fully polished surface is actually a bit easier to keep clean, unless you clear-coat it. Any 'roughness' on the surface will tend to hold contaminants more so than a polish. Adding a clear coat introduces a whole new set of issues...

                    For a relatively 'maintenance-free' surface, consider having the parts shot-peened (not sandblasted!!!) after a surface smoothing. This gives an almost cast look to the parts, but without the surface porosity inherent in a casting. And this will have enough 'tooth' to the surface to minimize the issue of a clear coat sticking poorly.
                    Fast, Cheap, Reliable... Pick any two

                    '78E original owner - resto project
                    '78E ???? owner - Modder project FJ forks, 4-piston calipers F/R, 160/80-16 rear tire
                    '82 XJ rebuild project
                    '80SG restified, red SOLD
                    '79F parts...
                    '81H more parts...

                    Other current bikes:
                    '93 XL1200 Anniversary Sportster 85RWHP
                    '86 XL883/1200 Chopper
                    '82 XL1000 w/1450cc Buell, Baker 6-speed, in-progress project
                    Cage: '13 Mustang GT/CS with a few 'custom' touches
                    Yep, can't leave nuthin' alone...

                    Comment


                    • #11
                      And something to remember... The factory polish/clear coat was rather quickly done but they started with brand-new, clean castings; fresh out of the mold. We're dealing with 30-plus year old parts, and corrosion has done it's damage to some degree in all cases. Unless you get virtually all of that corrosion removed, it will quickly return. There just isn't any 'short-cut' for this; any method you use will require a labor investment, and the more of it you do by hand, the longer it will take....
                      Fast, Cheap, Reliable... Pick any two

                      '78E original owner - resto project
                      '78E ???? owner - Modder project FJ forks, 4-piston calipers F/R, 160/80-16 rear tire
                      '82 XJ rebuild project
                      '80SG restified, red SOLD
                      '79F parts...
                      '81H more parts...

                      Other current bikes:
                      '93 XL1200 Anniversary Sportster 85RWHP
                      '86 XL883/1200 Chopper
                      '82 XL1000 w/1450cc Buell, Baker 6-speed, in-progress project
                      Cage: '13 Mustang GT/CS with a few 'custom' touches
                      Yep, can't leave nuthin' alone...

                      Comment


                      • #12
                        Originally posted by crazy steve View Post
                        And something to remember... The factory polish/clear coat was rather quickly done but they started with brand-new, clean castings; fresh out of the mold. We're dealing with 30-plus year old parts, and corrosion has done it's damage to some degree in all cases. Unless you get virtually all of that corrosion removed, it will quickly return. There just isn't any 'short-cut' for this; any method you use will require a labor investment, and the more of it you do by hand, the longer it will take....
                        Originaly, the engine side covers, ignition, clutch, etc. had a plastic coat on the polished aluminum. The ignition side cover on my Venturer still has this coating on it. The outer shiney portion of the wheels also had this coating when new.
                        81H Venturer1100 "The Bentley" (on steroids) 97 Yamaha YZ250(age reducer) 92 Honda ST1100 "Twisty"(touring rocket) Age is relative to the number of seconds counted 'airing' out an 85ft. table-top.

                        Comment


                        • #13
                          Let me say this again. If you refinish the aluminum, and remove all corrosion and other foreign matter. You can cover it with Glisten PC. That stuff is forever. It stays clear and hard as nails. The only drawback is that it isn't cheap, and best results are achieved if you spray it. You won't polish those pieces again.
                          Marty (in Mississippi)
                          XS1100SG
                          XS650SK
                          XS650SH
                          XS650G
                          XS6502F
                          XS650E

                          Comment


                          • #14
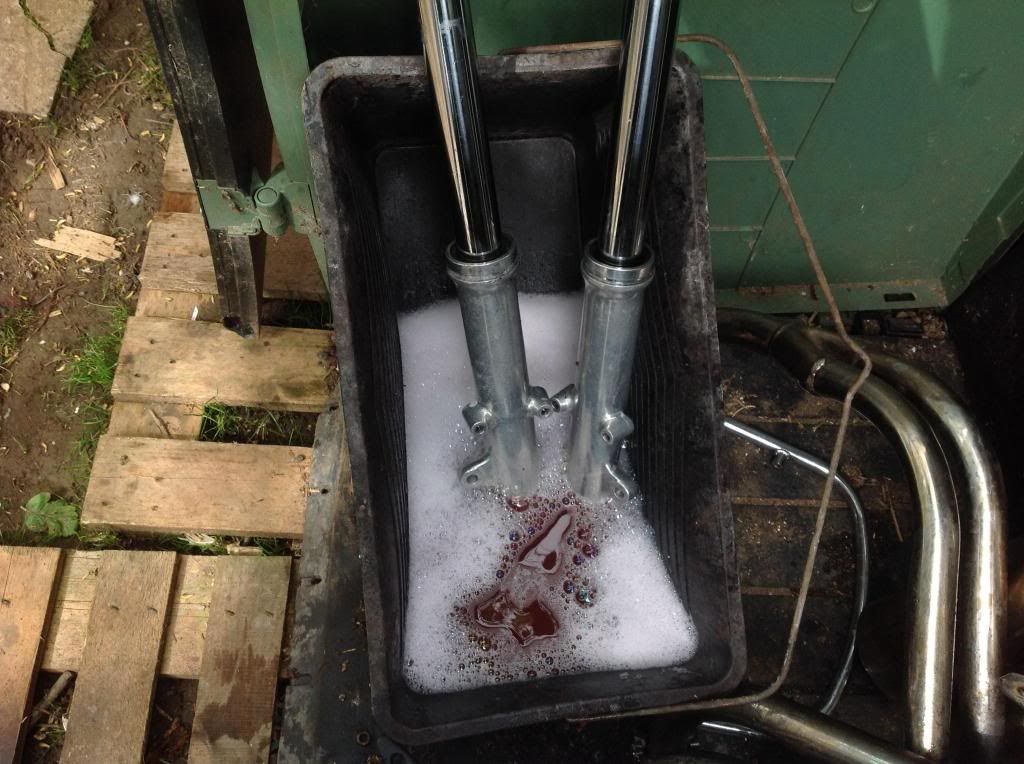
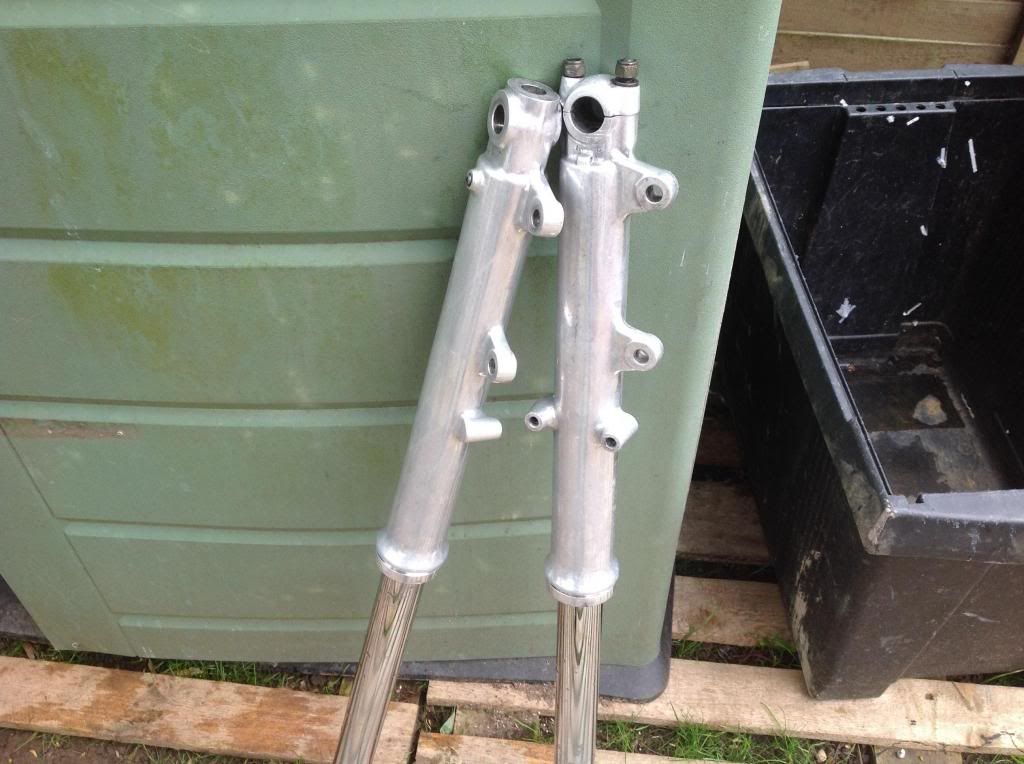
                            You'll get them totally clean with phosphoric acid. Here's a few pix of me using it for the fork sliders....


                            Result

                            XS1100F 1980 European model. Standard. Dyna coils. Iridium plugs. XS750 final drive (sometimes). Micron fork brace. Progressive front springs. Geezer regulator/rectifier. Stainless 4 into 2 exhaust. Auto CCT (Venturer 1300) SOLD. New project now on the go. 1980 European model.

                            Comment


                            • #15
                              I repainted mine with spray truck bed liner and then cleaned off the fins with a scotch brite disc and a small angle grinder.


                              Greg

                              Everybody is a genius. But if you judge a fish by its ability to climb a tree, it will live its whole life believing that it is stupid.”

                              ― Albert Einstein

                              80 SG Ol' Okie;79 engine & carbs w/pods, 45 pilots, 140 mains, Custom Mac 4 into 2 exhaust, ACCT,XS850 final drive,110/90/19 front tire,TKat fork brace, XS750 140 MPH speedometer, Vetter IV fairing, aftermarket hard bags and trunk, LG high back seat, XJ rear shocks.

                              The list changes.

                              Comment

                              Working...
                              X