Announcement

Collapse
No announcement yet.

80/81 turn signal switch repair

Collapse
X
 
  • Filter
  • Time
  • Show
Clear All
new posts

  • 80/81 turn signal switch repair

    Okay, my left blinkers are not even coming on and when I turn the hazards on, I get no blink at all anywhere and the tach drops about 1k per non-'flash' cycle. (the right signals work great, including the self cancel)
    I think one of those wires came loose and is grounding out somewhere.
    So, obviously I've got to go BACK into the left switch and repair those solder joints again.
    I've search the forum and I found one fuzzy pic that Bug put up about 4 years ago that showed the internals of the hazard switch.
    This seems to be another one of those items that needs more repairing than most.
    So, to help all here, I'm planning on documenting the full tear down and repair of my switch assembly. (ie. lots of pics)
    Someone here just recently did a 78/79 switch, but to me that seemed easy because there's no hazard switch in there. http://www.xs11.com/forum/showpost.p...79&postcount=7

    While those are some great pics, it doesn't help those of us that have the 80/81 switch with the hazard switch in the bottom.

    Stay tuned, the fun begins this afternoon, so maybe by Sunday evening I'll have some updates. (i'm gonna go buy one of those soldering aligator clip holder thingies to help hold everything together because I don't have enough hands)

    Maybe when I'm all done, Steve (or one of the other mods) can smooth the thread out and make it a tech tip.
    Hi, my name is George & I'm a twisty addict!

    80G (Green paint(PO idea))
    The Green Monster
    K&N A/F, TC's fuse block, '81 oil cooler, TC's homemade 4-2 w/Mac Mufflers, Raptor 660 ACCT
    Got him in '04.
    bald tire & borrowing parts

    80SG (Black w/red emblems & calipers)
    Scarlet
    K&N A/F, TC's fuse block, WJ5, Shoei bags, Raptor 660 ACCT.
    Got her in '11
    Ready for the twisties!

    81H (previously CPMaynard's)
    Hugo
    Full Venturer, Indigo Blue with B/W painted tank.
    Cold weather ride

  • #2
    Go for it!

    There's actually very little difference between the 'non-hazard' and 'hazard' XS11 turn switches; there's one more wire to the switch with the hazard version, and where they attach is slightly different. But the turn switch guts are identical, so some detailed pics with the switch out of the housing and fully disassembled would be great....
    Fast, Cheap, Reliable... Pick any two

    '78E original owner - resto project
    '78E ???? owner - Modder project FJ forks, 4-piston calipers F/R, 160/80-16 rear tire
    '82 XJ rebuild project
    '80SG restified, red SOLD
    '79F parts...
    '81H more parts...

    Other current bikes:
    '93 XL1200 Anniversary Sportster 85RWHP
    '86 XL883/1200 Chopper
    '82 XL1000 w/1450cc Buell, Baker 6-speed, in-progress project
    Cage: '13 Mustang GT/CS with a few 'custom' touches
    Yep, can't leave nuthin' alone...

    Comment


    • #3
      Found out what was wrong

      So, I took my switch off the handle bar and did a quick check with the mulitmeter before I decide to tear it apart.
      Guess what, It checked out fine!
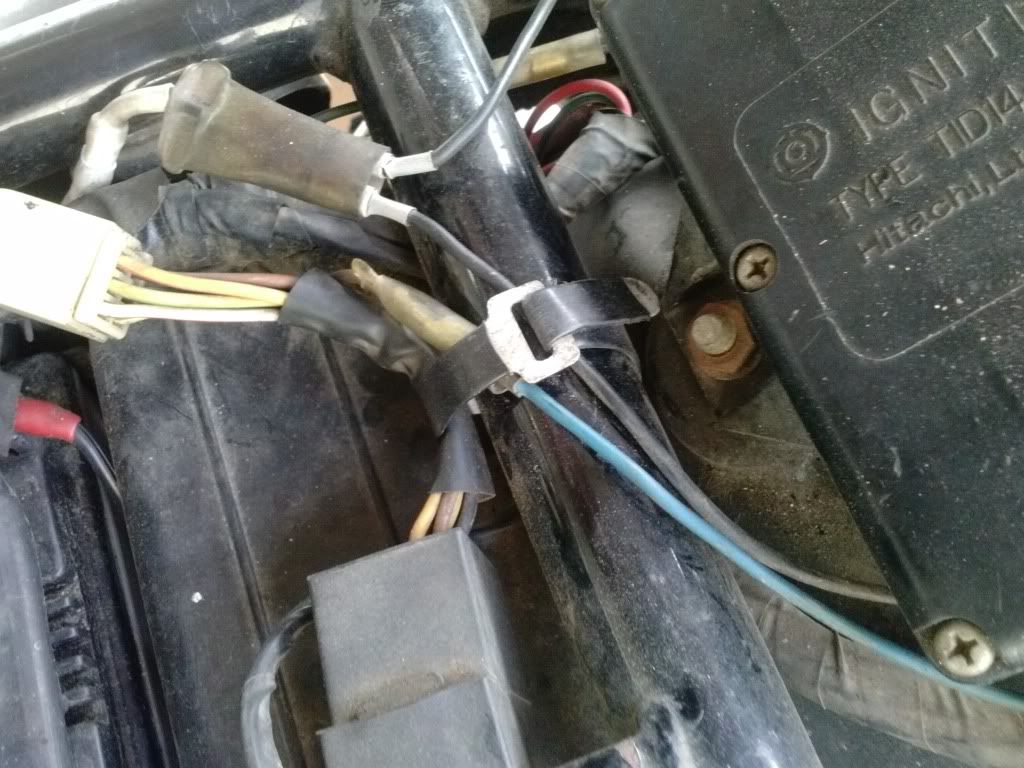
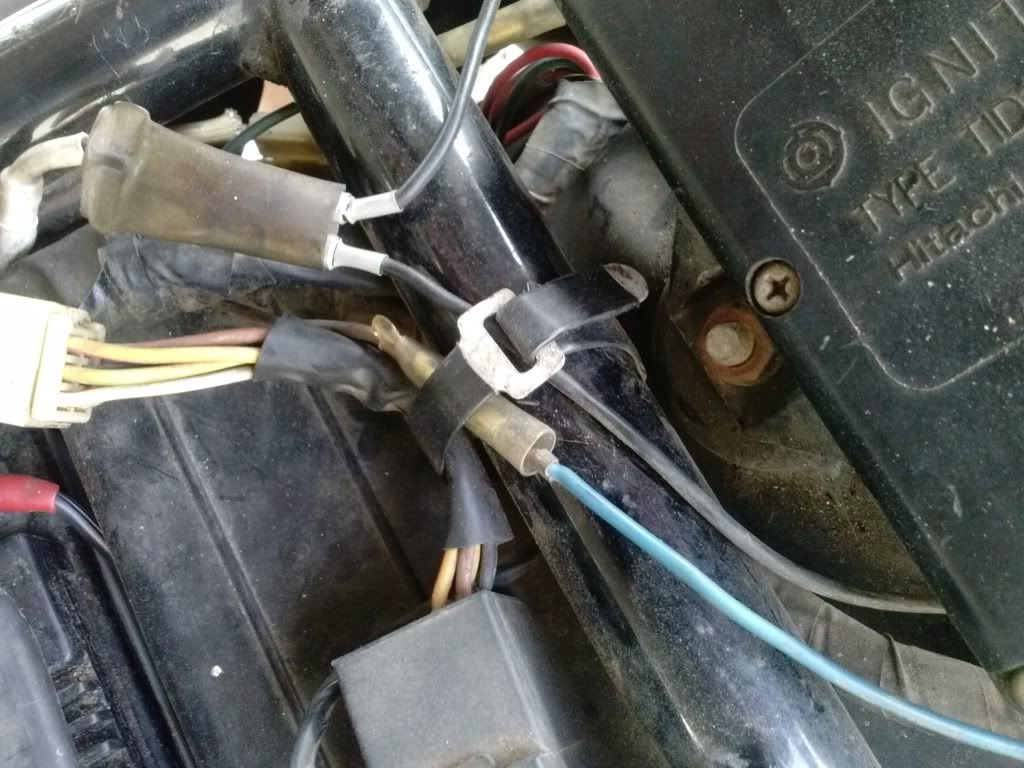
      I was looking at the bike for something that could cause the left signals to 'ground' out, and I shortly found this:


      Part of the lug was touching the metal tie down strap.
      Luck I didn't blow a fuse, so I moved it:


      I put the good switch back on and tested it and it all worked great!

      So, to the point of this thread, I did promise to tear into one, so the G's switch needs some TLC/fixing, so......
      Hi, my name is George & I'm a twisty addict!

      80G (Green paint(PO idea))
      The Green Monster
      K&N A/F, TC's fuse block, '81 oil cooler, TC's homemade 4-2 w/Mac Mufflers, Raptor 660 ACCT
      Got him in '04.
      bald tire & borrowing parts

      80SG (Black w/red emblems & calipers)
      Scarlet
      K&N A/F, TC's fuse block, WJ5, Shoei bags, Raptor 660 ACCT.
      Got her in '11
      Ready for the twisties!

      81H (previously CPMaynard's)
      Hugo
      Full Venturer, Indigo Blue with B/W painted tank.
      Cold weather ride

      Comment


      • #4
        Part 1 disassembly

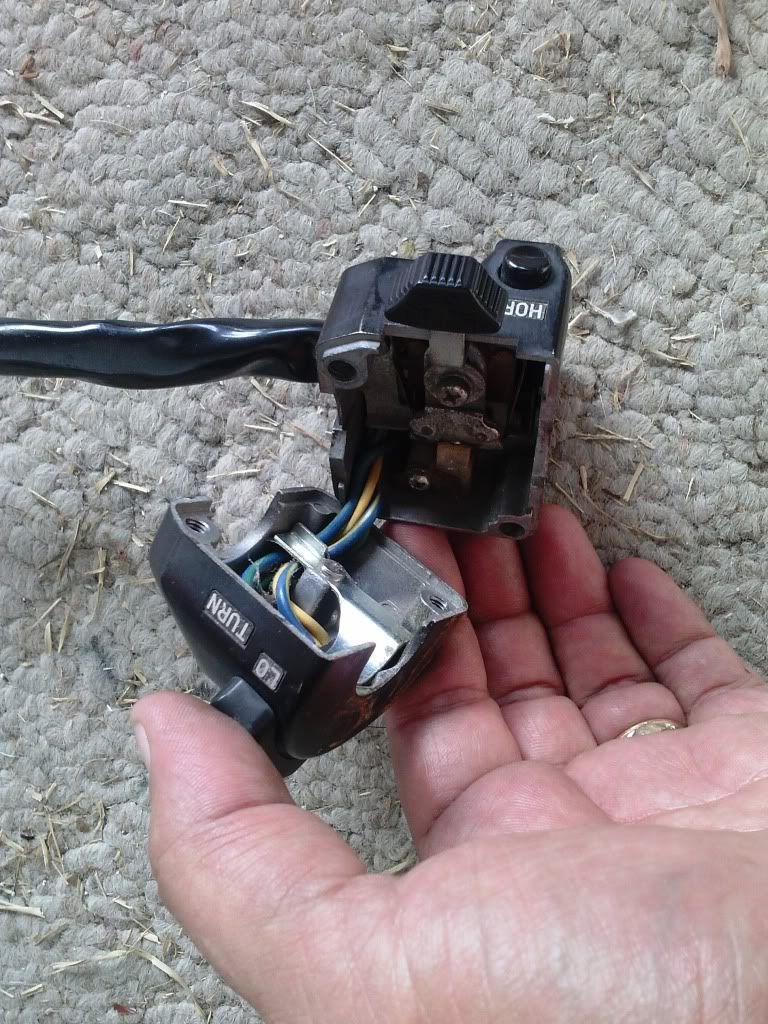
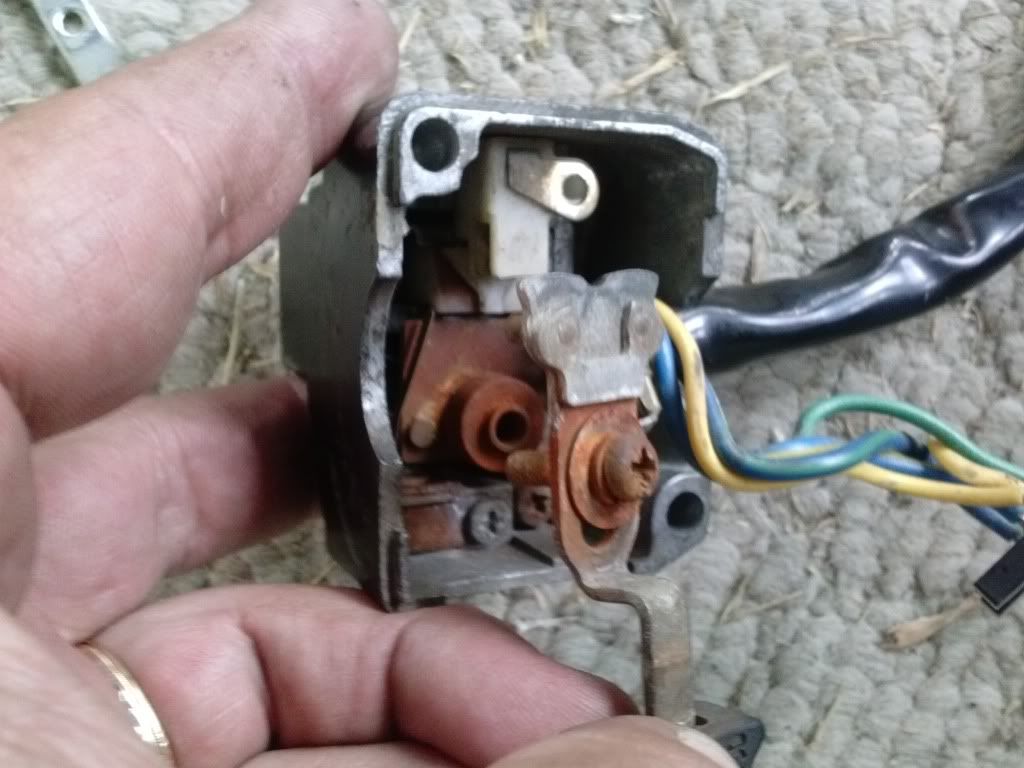
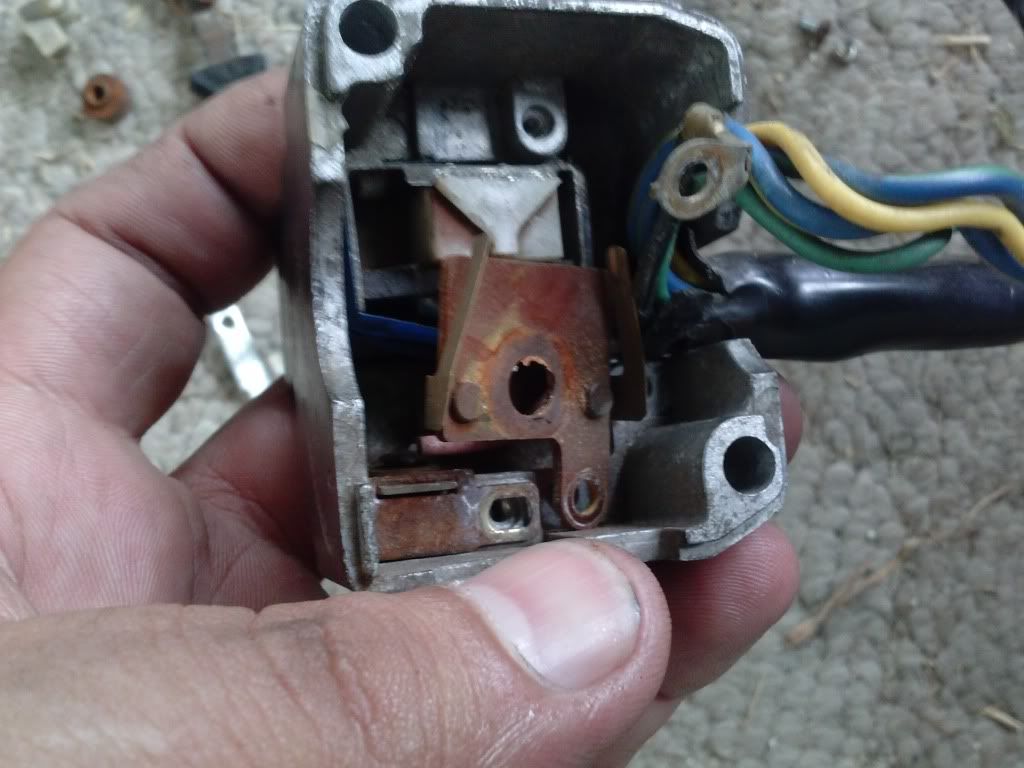
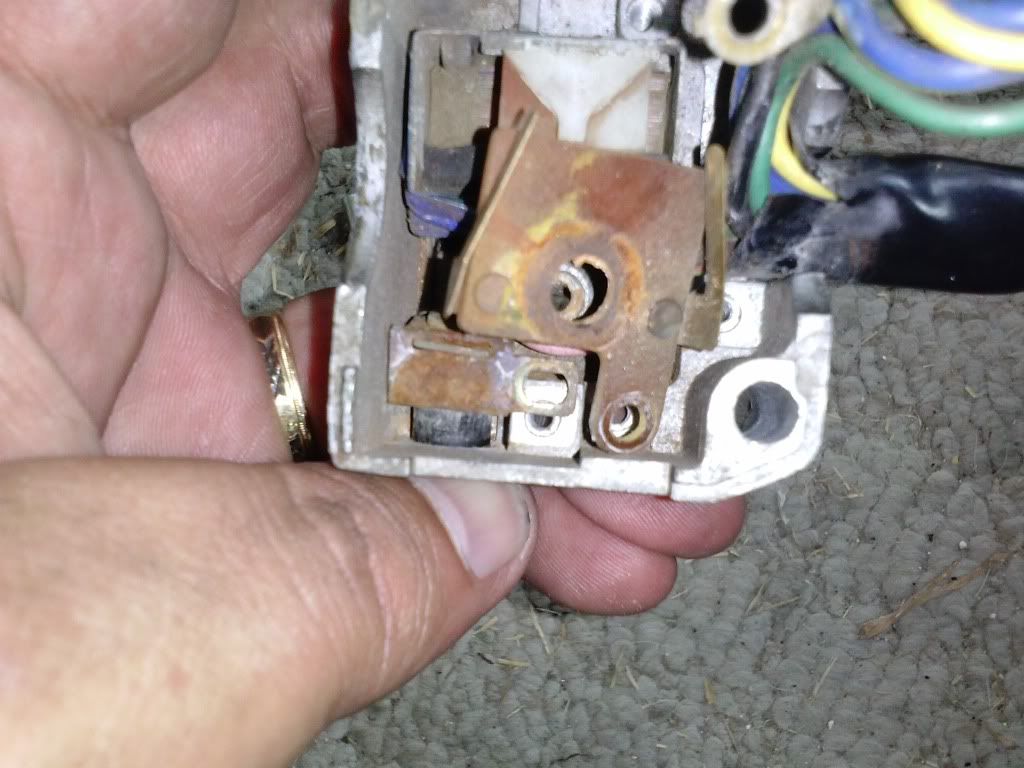
        So, here’s the insides:


        Take the high/low switch off/out:


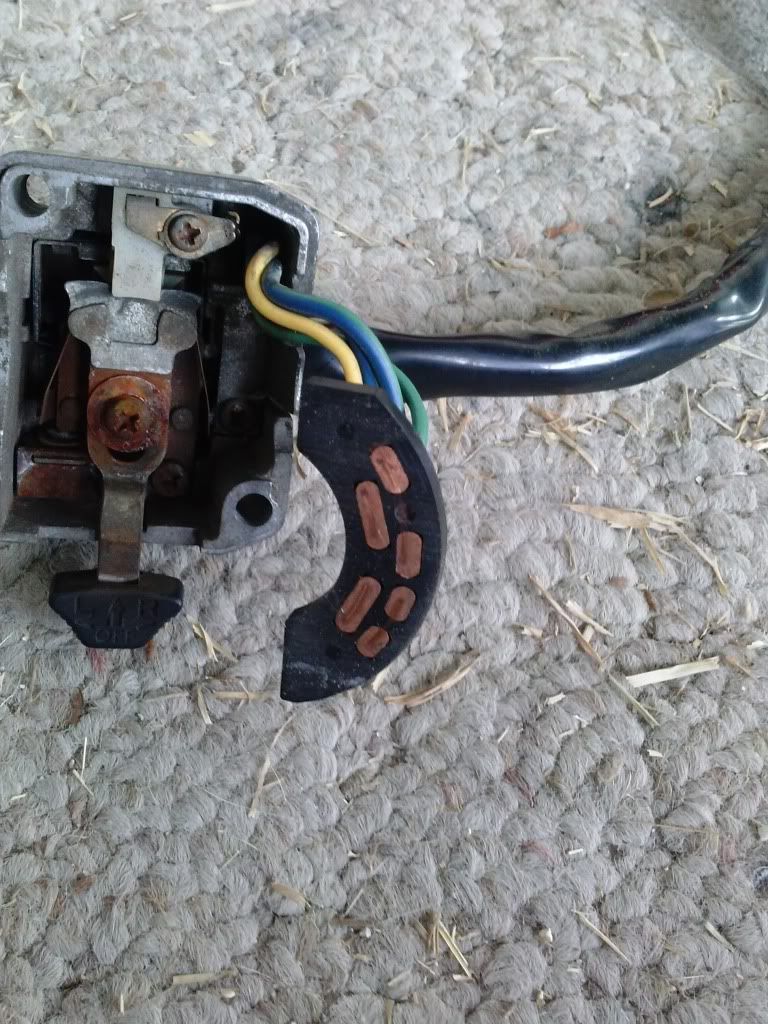
        Here you can see the copper swiper contacts for the high beam switch.


        Here’s the wires for it, Yellow, Blue, Green and a Blue w/Yellow:


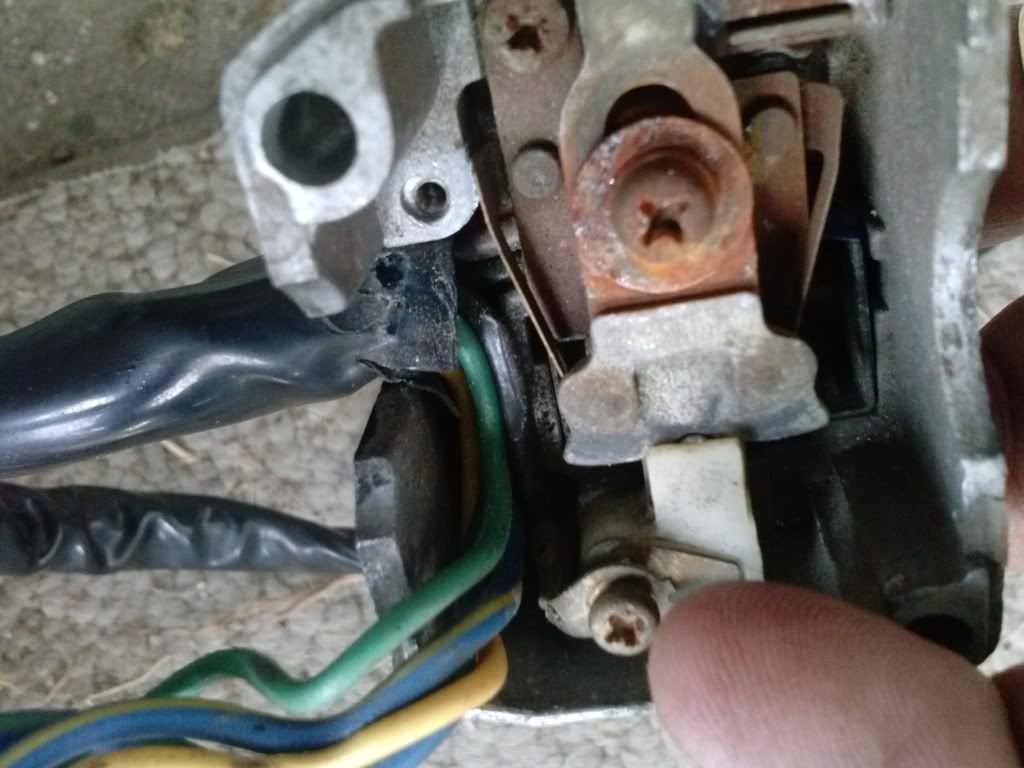
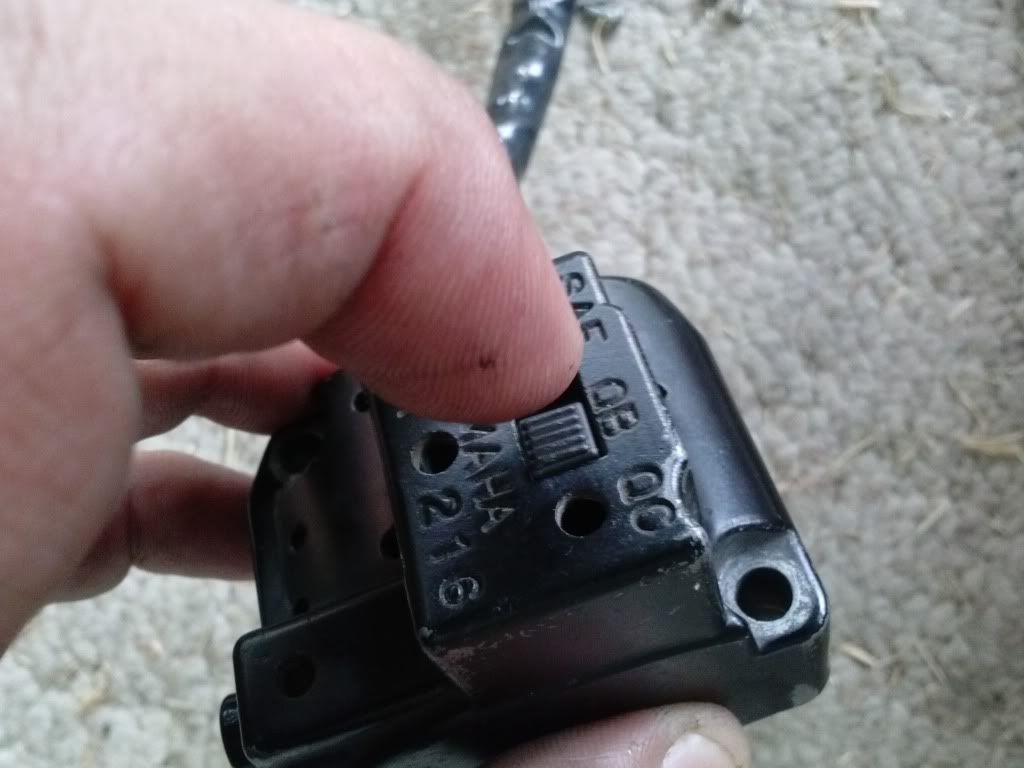
        Next to come out is the cable keeper where the cables come in and the ground lead(at the tip of my finger)


        Next is the center bolt, here I lifted it our a bit to see what it looks like:


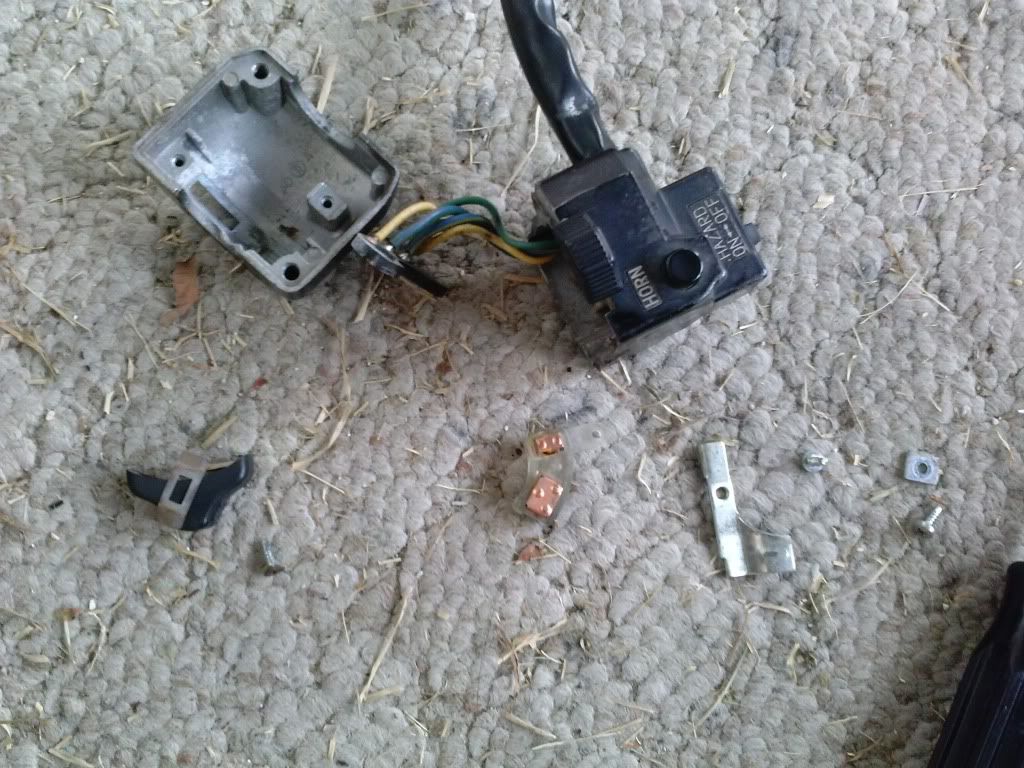
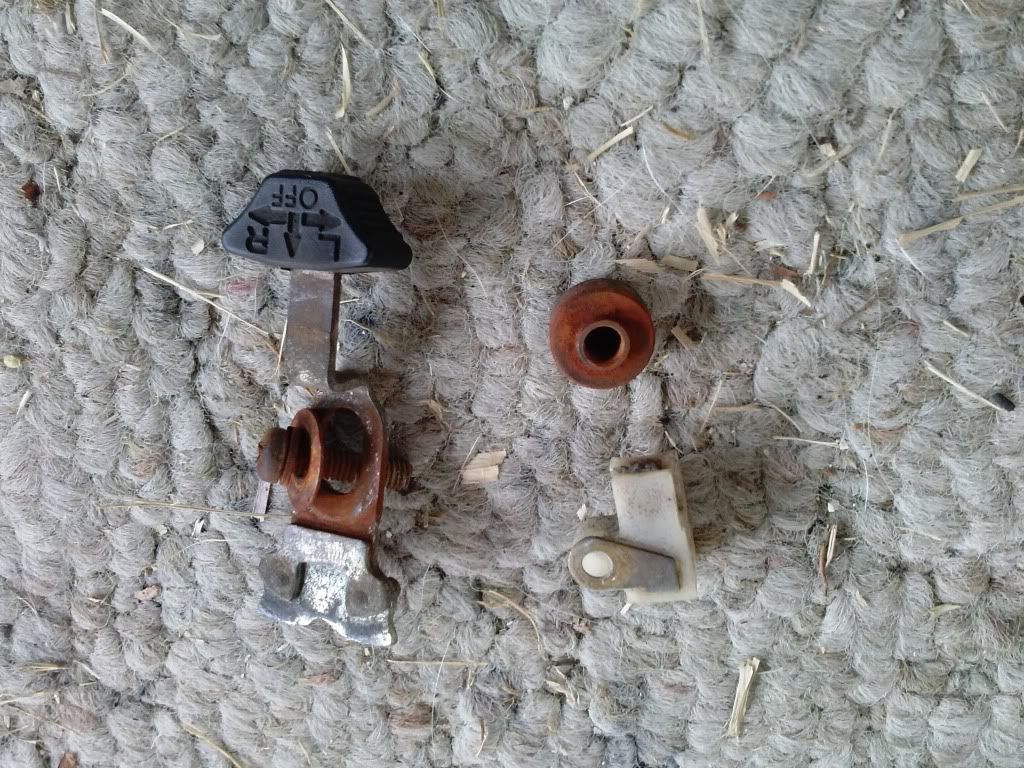
        Here are the pieces:


        The plate there with the tangs is the self canceling. When the arm gets pushed left(or right), the arm just touches the tang and grounds the self cancel circuit to reset it so it starts counting. I also took out the screw for the horn button.


        Now you can push the hazard switch up thru the bottom to help ease the switch parts up out of the housing:


        Push the horn button in as the switch parts are coming out.


        Here’s the guts out:
        Hi, my name is George & I'm a twisty addict!

        80G (Green paint(PO idea))
        The Green Monster
        K&N A/F, TC's fuse block, '81 oil cooler, TC's homemade 4-2 w/Mac Mufflers, Raptor 660 ACCT
        Got him in '04.
        bald tire & borrowing parts

        80SG (Black w/red emblems & calipers)
        Scarlet
        K&N A/F, TC's fuse block, WJ5, Shoei bags, Raptor 660 ACCT.
        Got her in '11
        Ready for the twisties!

        81H (previously CPMaynard's)
        Hugo
        Full Venturer, Indigo Blue with B/W painted tank.
        Cold weather ride

        Comment


        • #5
          Part 2 repair

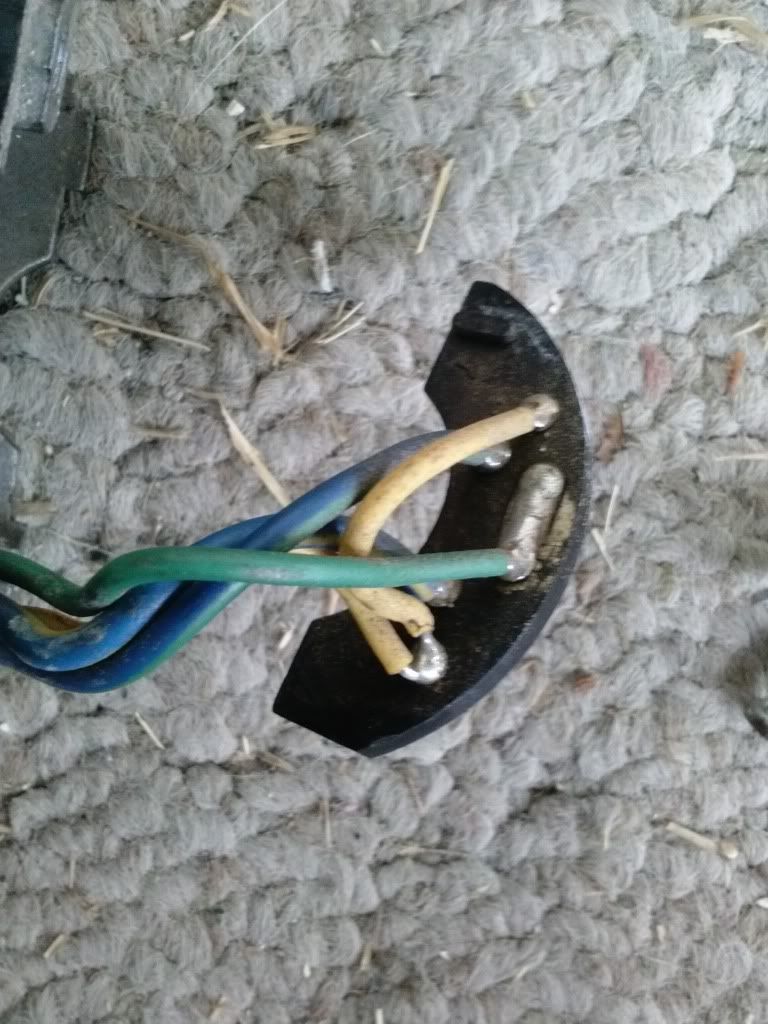
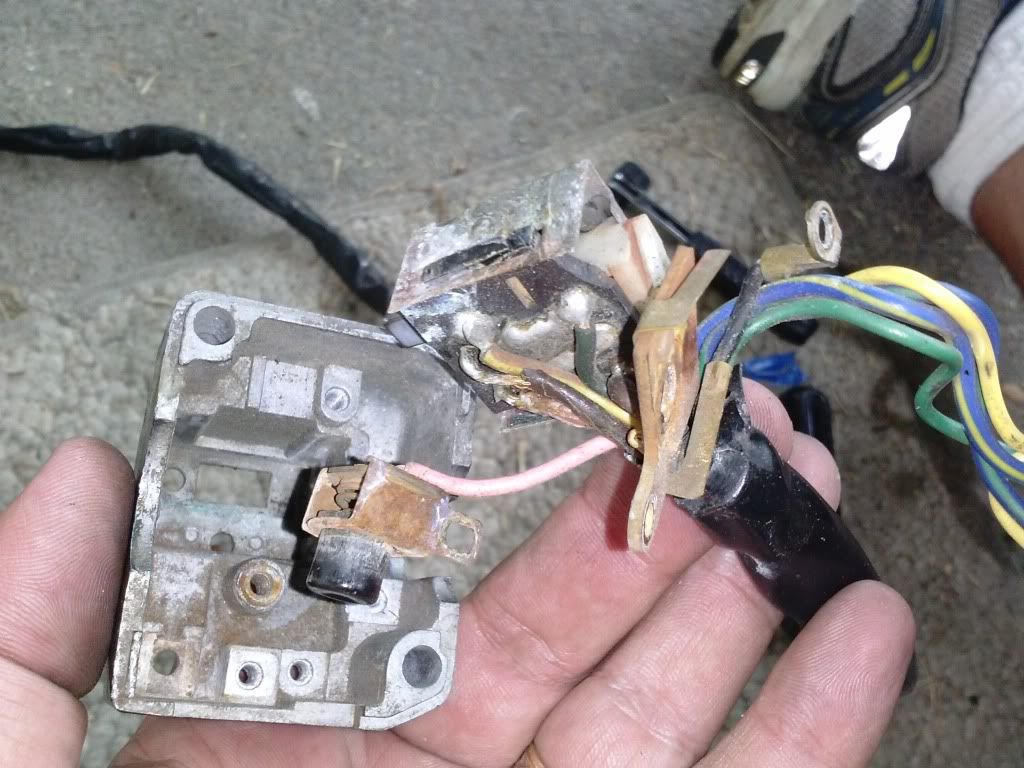
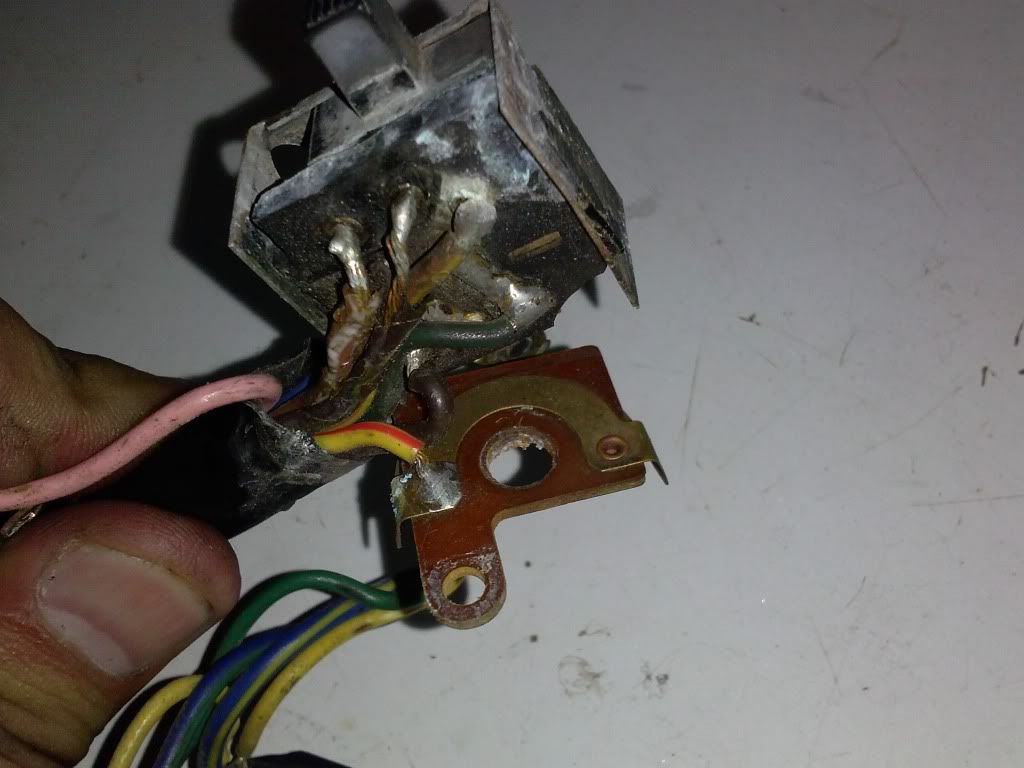
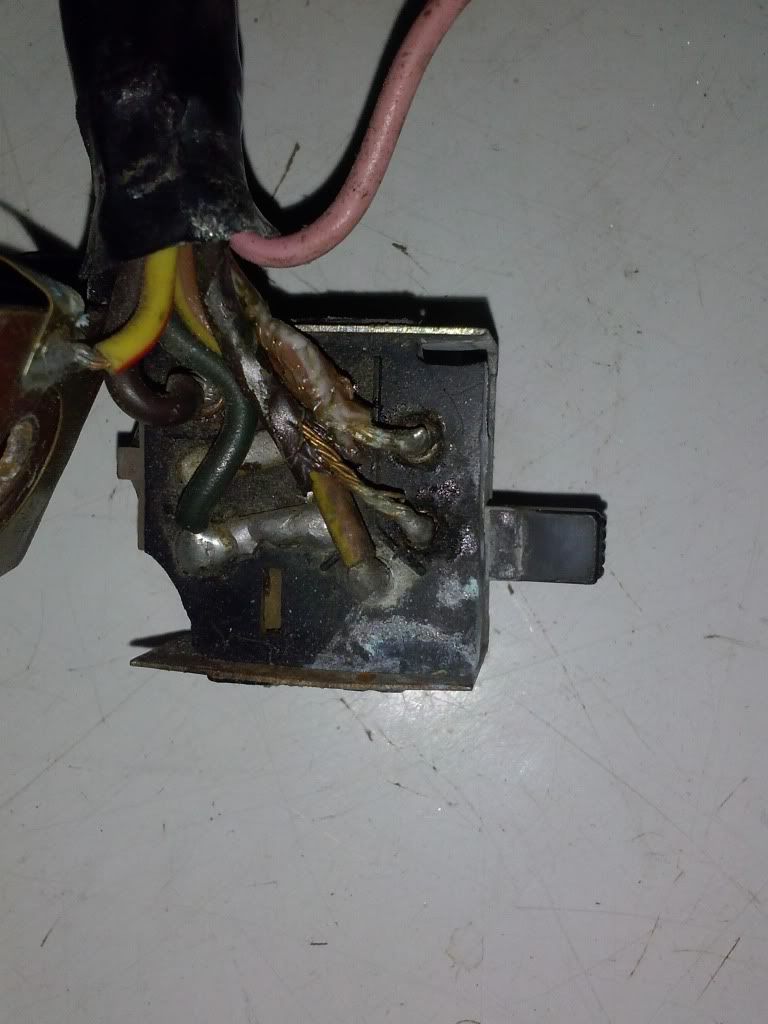
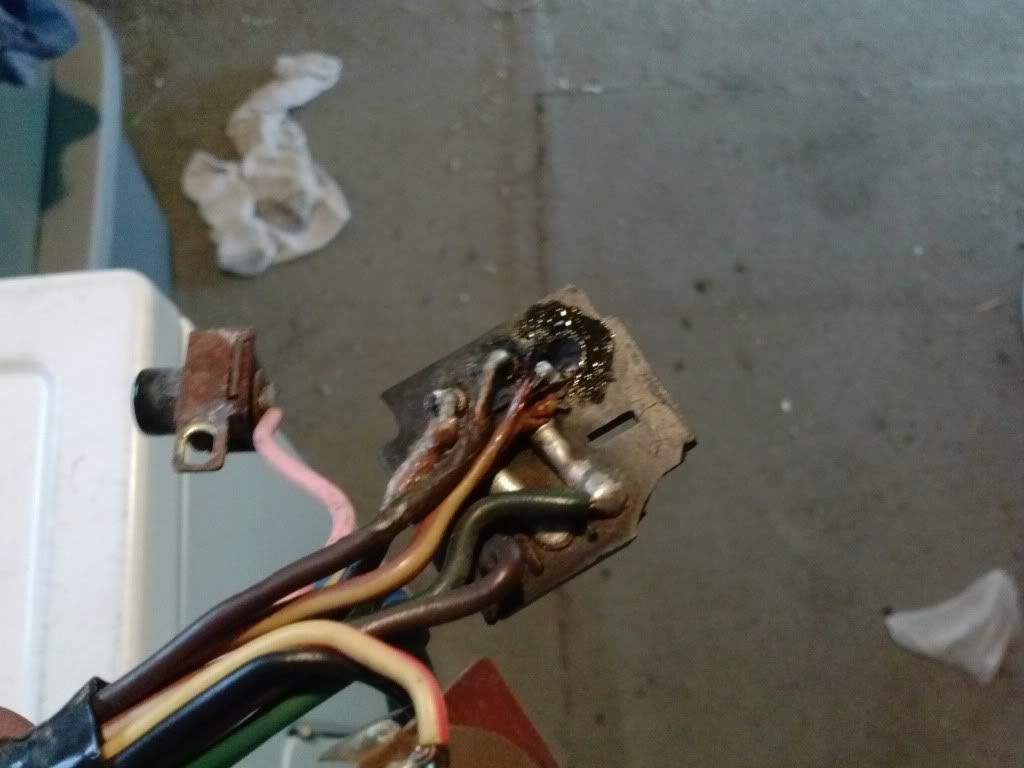
          Okay, I’ve repaired this switch before. The left two wires (brown/white and brown) however, the brown/yellow is now bad.
          I know it’s a crappy solder job, I did this while the switch was still on the bike and I was standing there with soldering iron in one hand and the switch in the other.


          I used a soldering gun and it got the wires a little hot so some of the insulation melted off.


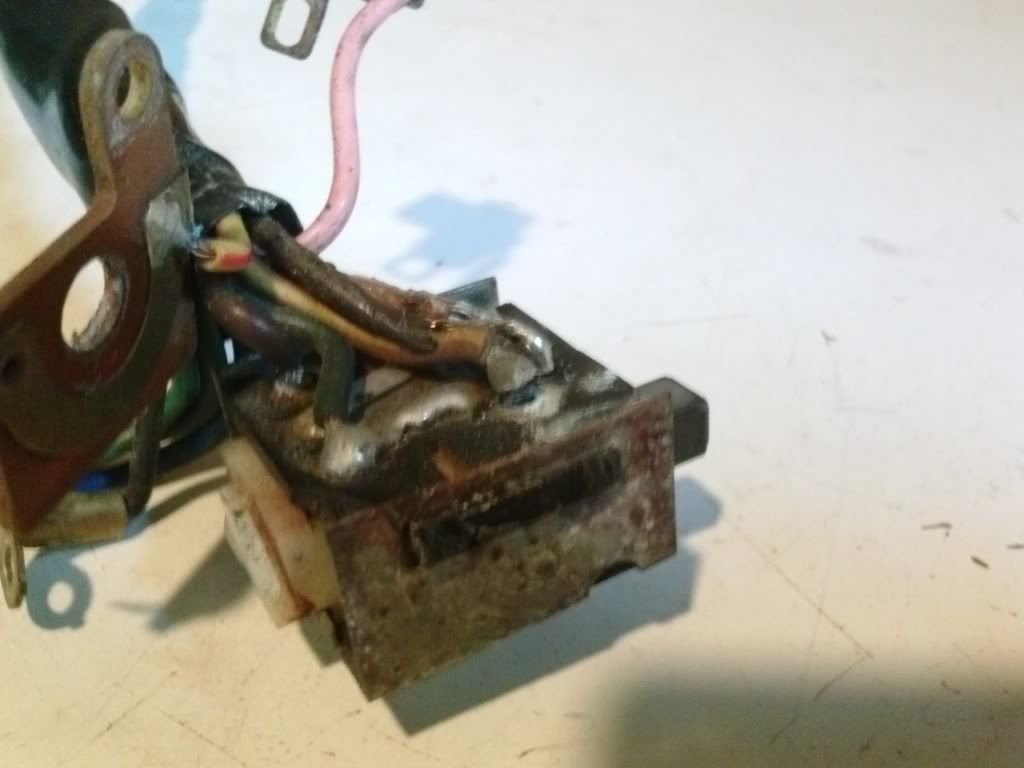
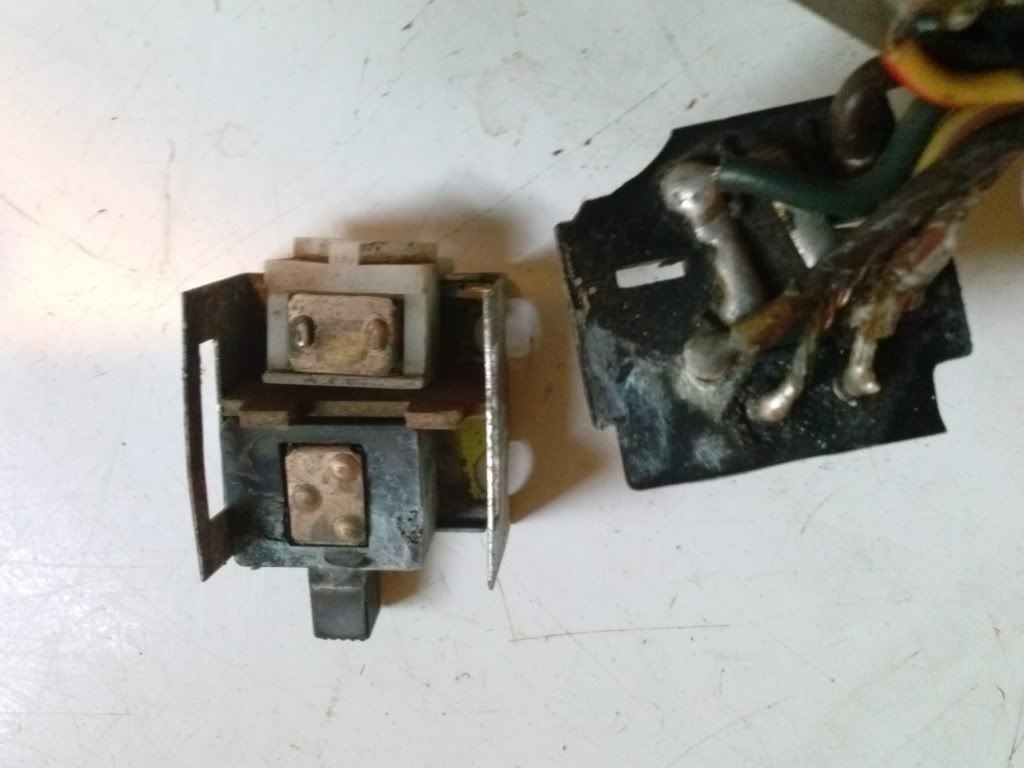
          From the side you can see the solder joint has come loose from the little copper tab.

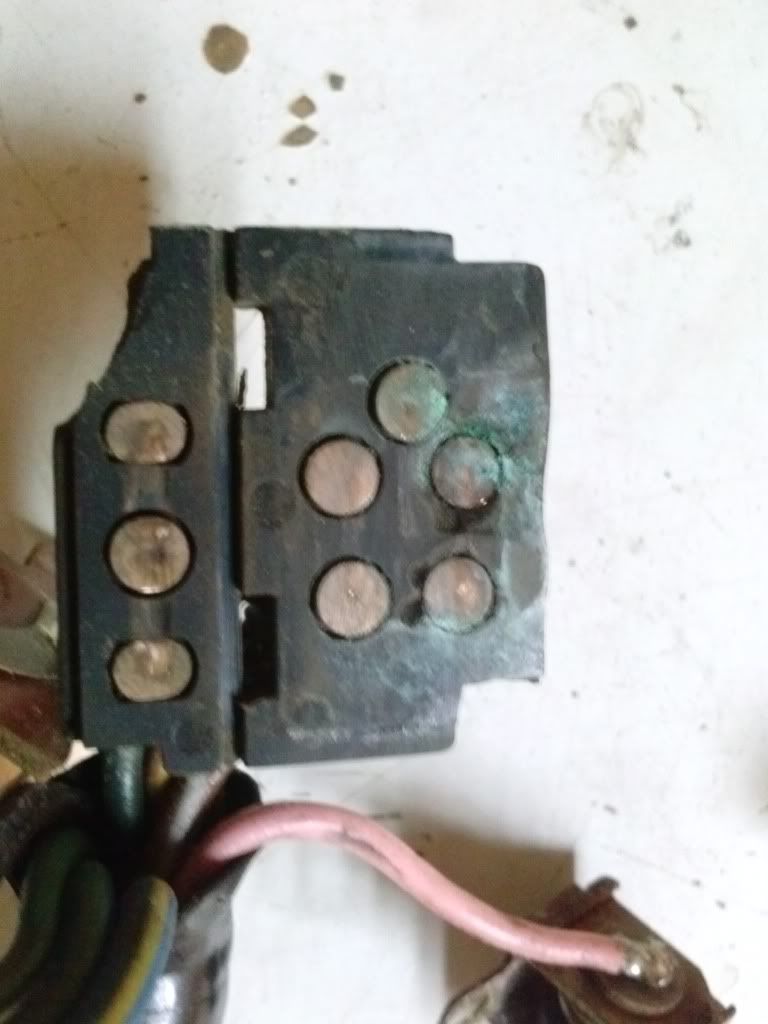
          You can gently pry the 2 sides off and pull the plastic back plate off. The corner of my mine got broke the last time I repaired this 2 years ago.


          Here’s the underside of the back plate, you can see some of the corrosion.


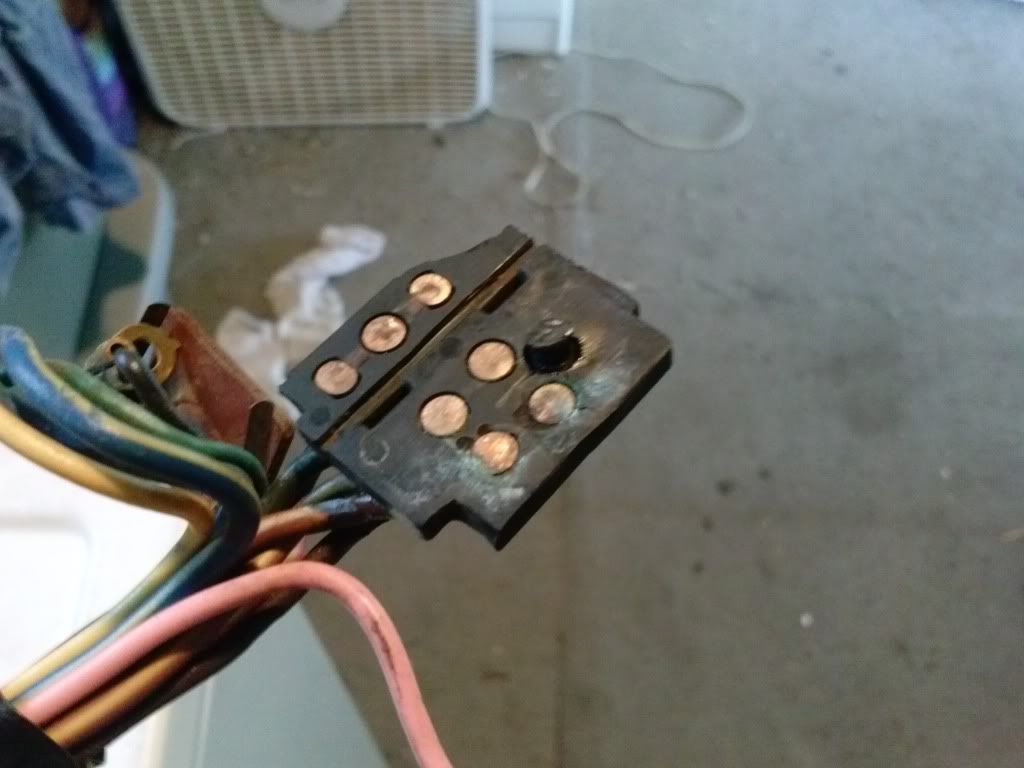
          So I tried to solder that back together and it’s a PITA.


          Too much heat and the plastic melted and the copper button tab pushed thru a little.


          Since this is for the G and it's kinda not going anywhere right now, I'm giving up for now. I think I'm gonna try to find one on ebay. It'll probably be in better shape than this one is now.
          Hi, my name is George & I'm a twisty addict!

          80G (Green paint(PO idea))
          The Green Monster
          K&N A/F, TC's fuse block, '81 oil cooler, TC's homemade 4-2 w/Mac Mufflers, Raptor 660 ACCT
          Got him in '04.
          bald tire & borrowing parts

          80SG (Black w/red emblems & calipers)
          Scarlet
          K&N A/F, TC's fuse block, WJ5, Shoei bags, Raptor 660 ACCT.
          Got her in '11
          Ready for the twisties!

          81H (previously CPMaynard's)
          Hugo
          Full Venturer, Indigo Blue with B/W painted tank.
          Cold weather ride

          Comment


          • #6
            You need to go to Radio Shack and get a 15W solder iron. It will NOT heat things up as fast, and make it easier to repair.
            The other thing you will need to do is CLEAN BEFORE YOU TRY TO REPAIR!! This is important, as the solder will NOT work well if one part is dirty/corroded. Try to find the OLD SOLDER, WITH LEAD!! The "new" stuff is JUNK, and will not work well.
            Ray Matteis
            KE6NHG
            XS1100 E '78 (winter project)
            XS1100 SF Bob Jones worked on it!

            Comment


            • #7
              Originally posted by DiverRay View Post
              You need to go to Radio Shack and get a 15W solder iron. It will NOT heat things up as fast, and make it easier to repair.
              The other thing you will need to do is CLEAN BEFORE YOU TRY TO REPAIR!! This is important, as the solder will NOT work well if one part is dirty/corroded. Try to find the OLD SOLDER, WITH LEAD!! The "new" stuff is JUNK, and will not work well.
              I agree Ray, a lower wattage is what I should have used the first time.
              2 years ago for the first repair, I started with a low 10W pencil iron and it just wasn't getting it done. I went to HF and got the gun I got the joints to stick, but as you can see those 2 wires got cooked a little in the process. If you look closely in a few pics you can see some blue electrical tape I had in there to help keep things isolated.
              This time I used a 20W iron instead of my gun and it still got too hot.
              My soldering skills have long since gone. (I used to do this kinda thing alot a decade or two ago.)
              I may try again one day when I get bored and try my 'cold solder pen' (the one as seen on tv that's battery operated)

              Right now I'm watching one or 2 'replacement' switches on ebay.

              Anyway, this thread was more for the pics of the inside and to show what is involved in taking one of these apart so that the repair can be done, not so much the repair itself.
              Hi, my name is George & I'm a twisty addict!

              80G (Green paint(PO idea))
              The Green Monster
              K&N A/F, TC's fuse block, '81 oil cooler, TC's homemade 4-2 w/Mac Mufflers, Raptor 660 ACCT
              Got him in '04.
              bald tire & borrowing parts

              80SG (Black w/red emblems & calipers)
              Scarlet
              K&N A/F, TC's fuse block, WJ5, Shoei bags, Raptor 660 ACCT.
              Got her in '11
              Ready for the twisties!

              81H (previously CPMaynard's)
              Hugo
              Full Venturer, Indigo Blue with B/W painted tank.
              Cold weather ride

              Comment


              • #8
                Hey George,

                Great job with the photodocumentation. When I was rebuilding my bike in 2000, my oem switch assembly with the ER switch had gotten all corroded and such, so I went to a local wrecker and got a replacement switch assembly, but it was from a 79 which didn't have the 4way Er switch. But because my bike originally had the 4 way function, and fearing problems with state inspection, I rigged up my own switch assembly.

                I used a double throw double pole switch and mounted it to the frame under the left side cover. That location was proximal to the ER flasher which is separate than the turn signal flasher. I tapped into the turn signal wires there as well...green and brown. I ran the POWER line from the ER flasher to the center poles of the switch dividing it into a "Y". I then ran one end of the switch poles to each of the turn signal lines. I left the other switch end poles OPEN. I can then throw the switch which provides power to both sides of the turn signals for ER flasher, when I throw it the other way it fully separates the Spliced in wires from the circuit so the regular signals will work separately. Just wanted to mention this as an alternative to the OEM swtich.

                T.C.
                T. C. Gresham
                81SH "Godzilla" . . .1179cc super-rat.
                79SF "The Teacher" . . .basket case!
                History shows again and again,
                How nature points out the folly of men!

                Comment

                Working...
                X