
 Tweet
Tweet
I bought a rear master cylinder off a '79 on Ebay to use in delinking the brakes on my XJ and bought a K&L rebuild kit too. In comparing the kit with what was in the used mc I realized the mc had some parts missing so now I'm not sure how the kit goes together inside the mc. I searched for a photo of a rebuilt plunger for a mc rebuild but didn't see one. The kit is on the left and on the right is what came out of the used mc:
[IMG] [/IMG]
Here are my questions: 1). The C-shaped clip goes on the plunger in the 5/8" space towards the left end (bottom)of the plunger and is held in place with the circle clip and this limits the plunger travel in the mc bore to approx 1/2" up and down? 2). The thicker seal goes in the middle of the plunger and the thin one at the top...with the cupped side facing up on each? 3). Please explain how the upper seal, washer, small cap, and spring go together on the upper end of the plunger (what order and right side up)?
The other thing I'm wondering is more cosmetic than functional but here goes. The reservoir is pretty rough looking on 2 of the 3 sides...
[IMG] [/IMG]
The third side looks good...
[IMG]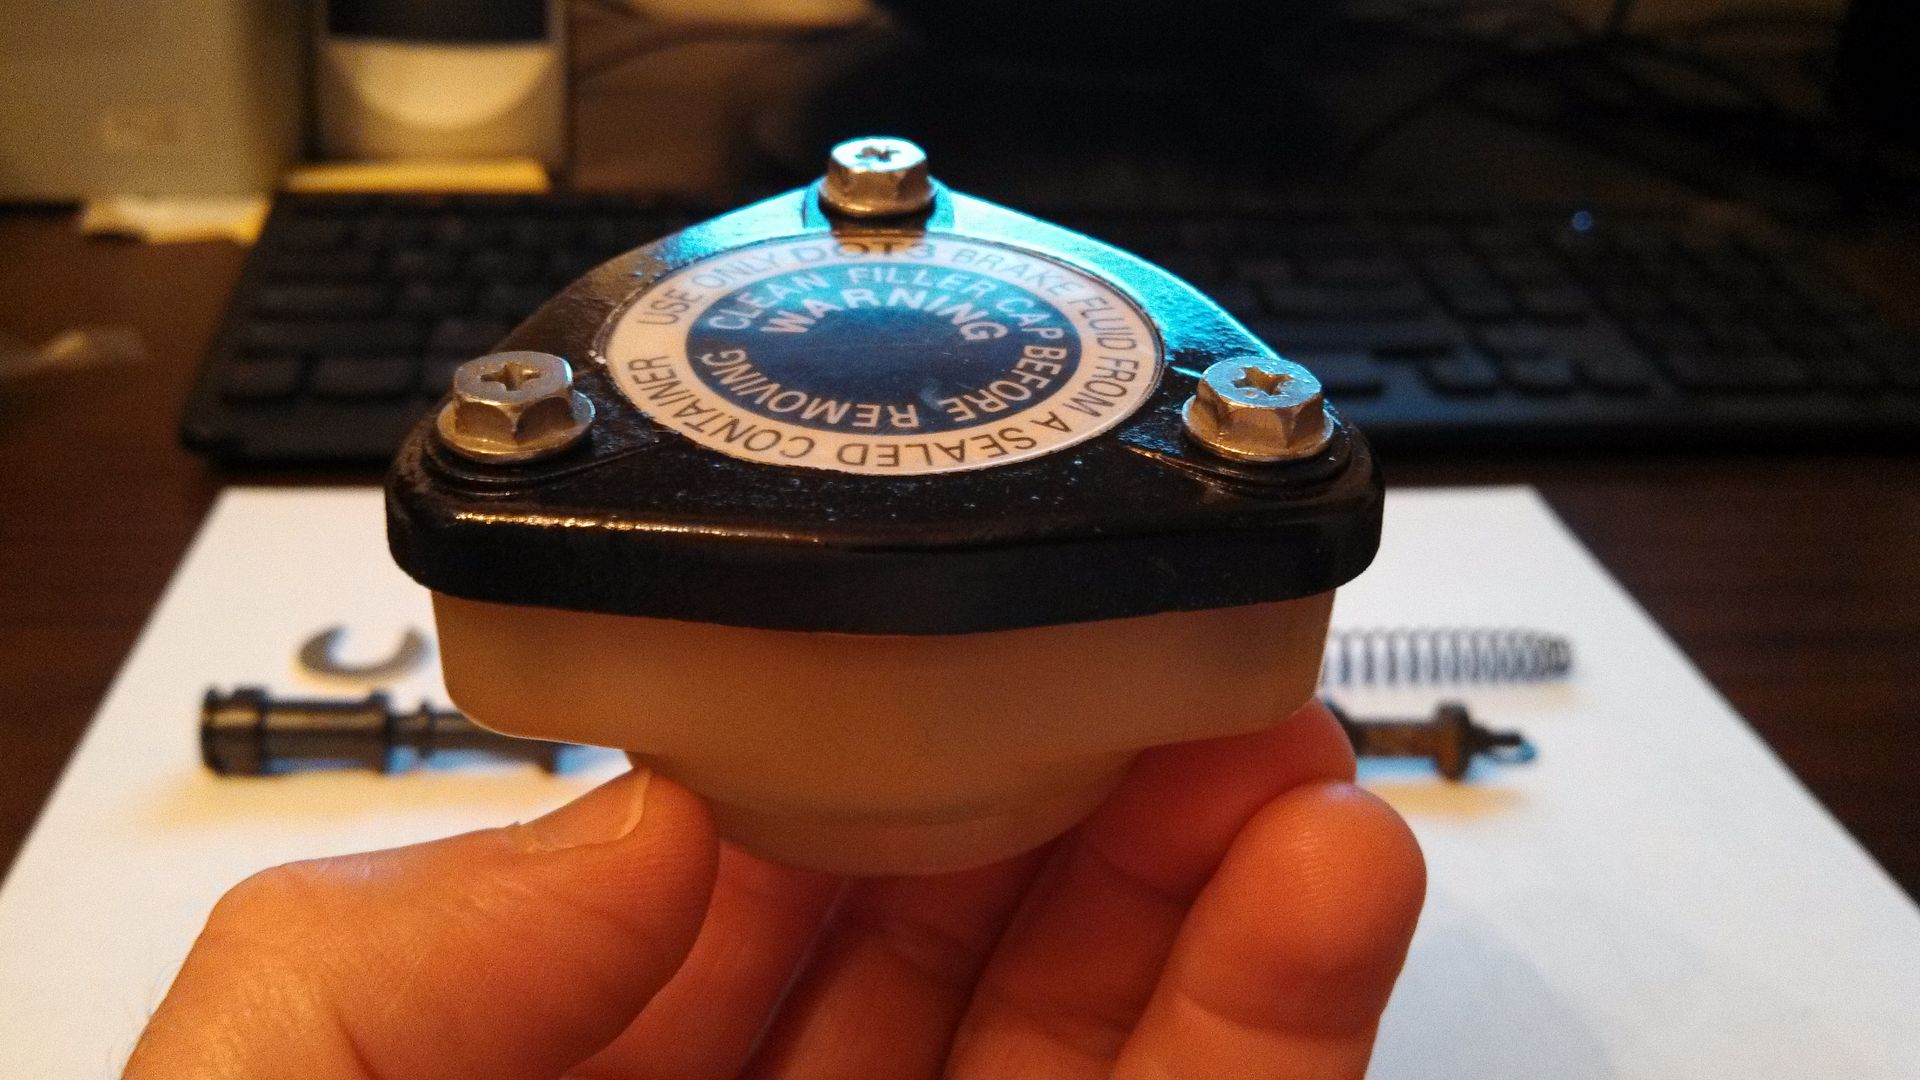 [/IMG]
The holes in the bottom of the reservoir line up with the threaded holes in the master cylinder so that either of the 2 ratty sides will face out but not for the clean side to face out. Can I drill a third set of holes in the bottom of the reservoir to orient it so the good side faces out?
Thanks for the feedback.
[IMG]
 [/IMG]
Here are my questions: 1). The C-shaped clip goes on the plunger in the 5/8" space towards the left end (bottom)of the plunger and is held in place with the circle clip and this limits the plunger travel in the mc bore to approx 1/2" up and down? 2). The thicker seal goes in the middle of the plunger and the thin one at the top...with the cupped side facing up on each? 3). Please explain how the upper seal, washer, small cap, and spring go together on the upper end of the plunger (what order and right side up)?
The other thing I'm wondering is more cosmetic than functional but here goes. The reservoir is pretty rough looking on 2 of the 3 sides...
[IMG]
 [/IMG]
The third side looks good...
[IMG]
 [/IMG]
The holes in the bottom of the reservoir line up with the threaded holes in the master cylinder so that either of the 2 ratty sides will face out but not for the clean side to face out. Can I drill a third set of holes in the bottom of the reservoir to orient it so the good side faces out?
Thanks for the feedback.

Comment