Announcement

Collapse
No announcement yet.

petcock rebuild question

Collapse
X
 
  • Filter
  • Time
  • Show
Clear All
new posts

  • petcock rebuild question

    I have a petcock rebuild kit on the way from Georgefix (and also carb kits). I have removed and disassembled my petcocks to clean them out and be ready for the rebuild. Should there be a gasket between the outer plate and the lower petcock body? Or is the o-ring around the selector the only thing needed. [IMG][/IMG]

    And does the plastic tower come off of the petcock for cleaning?

    Check out these inner gaskets, no wonder the petcock didn't work!
    79 SF

  • #2
    No gasket under the face plate, the rubber ring on the selector handle piece is the gasket to keep fuel from leaking outward.
    2H7 (79) owned since '89
    3H3 owned since '06

    "If it ain't broke, modify it"

    Comment


    • #3
      I've seen some of the plastic towers that can be pulled out, and some that seem to be well fastened. There isn't any reason to take them out, if they are still in one piece.

      CZ

      Comment


      • #4
        Thank you for the replies
        79 SF

        Comment


        • #5
          When its apart you can shoot some carb cleaner up through the petcock into the screen to rinse it out if you feel the need.
          Nate

          78 XS11 "Matilda" 2H7 000364

          2001 Raptor ACCT, T.C. Fuse Box, TC Bros Forward Controls
          Kuryakyn Iso Grips/Throttleboss/Bar End Mirror, Custom Covered Seat
          Shinko 712s, HID Headlight, RC Performance Exhaust
          Bikemaster Daytona Handlebars, Galfer SS Brake Lines
          Barnett HD Clutch Springs, T.C. Spin On Filter Adapter
          K+N Air Filter

          88 Voyager XII
          81 XJ650 Maxim

          Comment


          • #6
            Hi PBJ,
            one last thing, the handle face that seals against the 4-hole rubber seal should be polished to shine like an outhouse door on a frosty morning so it don't abrade the seal lips.
            Also give the seal face a light smear of grease before assembly. Yes, the grease will wash away when the fuel starts to flow but you don't want the seal running dry before it's wetted with fuel.
            Fred Hill, S'toon
            XS11SG with Spirit of America sidecar
            "The Flying Pumpkin"

            Comment


            • #7
              Originally posted by fredintoon View Post
              Hi PBJ,
              one last thing, the handle face that seals against the 4-hole rubber seal should be polished to shine like an outhouse door on a frosty morning so it don't abrade the seal lips.
              Also give the seal face a light smear of grease before assembly. Yes, the grease will wash away when the fuel starts to flow but you don't want the seal running dry before it's wetted with fuel.
              I cant find the thread with the petcock rebuild tutorial but as Fred said, get the inside of the selector nice and smooth. The thread suggests using 1000 grit wet sandpaper on a flat surface. Hold the selector face down and move it in a circular motion. Should clear the face right up.

              Also, if you have a dremmel, use the polishing tips and get the valve seat nice and shiny.
              Last edited by Tat2demon; 07-04-2013, 01:09 PM.
              Nate

              78 XS11 "Matilda" 2H7 000364

              2001 Raptor ACCT, T.C. Fuse Box, TC Bros Forward Controls
              Kuryakyn Iso Grips/Throttleboss/Bar End Mirror, Custom Covered Seat
              Shinko 712s, HID Headlight, RC Performance Exhaust
              Bikemaster Daytona Handlebars, Galfer SS Brake Lines
              Barnett HD Clutch Springs, T.C. Spin On Filter Adapter
              K+N Air Filter

              88 Voyager XII
              81 XJ650 Maxim

              Comment


              • #8
                Slipped a zero

                Originally posted by Tat2demon View Post
                The thread suggests using 100 grit wet sandpaper on a flat surface.
                Hi demon,
                did your typing finger miss a zero? Use a THOUSAND grit wet&dry paper and soapy water to make the final polish.
                Fred Hill, S'toon
                XS11SG with Spirit of America sidecar
                "The Flying Pumpkin"

                Comment


                • #9
                  lol yeah I just noticed that. Most certainly DO NOT USE 100 grit! lol
                  Nate

                  78 XS11 "Matilda" 2H7 000364

                  2001 Raptor ACCT, T.C. Fuse Box, TC Bros Forward Controls
                  Kuryakyn Iso Grips/Throttleboss/Bar End Mirror, Custom Covered Seat
                  Shinko 712s, HID Headlight, RC Performance Exhaust
                  Bikemaster Daytona Handlebars, Galfer SS Brake Lines
                  Barnett HD Clutch Springs, T.C. Spin On Filter Adapter
                  K+N Air Filter

                  88 Voyager XII
                  81 XJ650 Maxim

                  Comment


                  • #10
                    There is a little round wavy spring washer that goes between the outside cover and handle that holds tension in on the gasket. Do not break the wavy washer they are not easy to find. To clean the insde holes out I use the multistranded wire from a picture hang kit bent over and put in a drill. It cleans very well and moves smoothly threw the holes.
                    To fix the problem one should not make more assumptions than the minimum needed.

                    Rodan
                    https://www.youtube.com/watch?v=khm6...liHntN91DHjHiS
                    1980 G Silverbird
                    Original Yamaha Fairfing and Bags
                    1198 Overbore kit
                    Grizzly 660 ACCT
                    Barnett Clutch Springs
                    R1 Clutch Fiber Plates
                    122.5 Main Jets
                    ACCT Mod
                    Mac 4-2 Flare Tips
                    Antivibe Bar ends
                    Rear trunk add-on
                    http://s1184.photobucket.com/albums/z329/viperron1/

                    Comment


                    • #11
                      I just finished sanding mine down with 1200 grit sandpaper and some WD-40 after using a dremel grinding stone to lightly buff out any imperfections. Getting ready to do the same thing, but make sure that those surfaces are nice and shiny. I did every surface that has a gasket.

                      Here is that post:

                      http://xjbikes.com/Forums/viewtopic/t=25058.html
                      79 SF 3H3 Engine, 145/45 Mikuni Jets, El Cheapo Pod Filter Mod w/ EMGO Pods, Coil Repower w/ Dyna Coils, Accell Wires and Side Gapped Plugs, 78 Mech Advance, 4-2 Turnouts

                      Comment


                      • #12

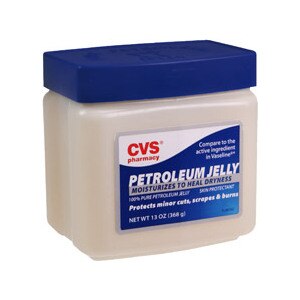
                        I use this as a lubricant for the rubber bits during assembly. Like Fred pointed out, you don't want to tear those seals the first time you move the handle. It will have everything gliding smoothly.

                        Maybe someone knows better, but not having that stuff, I think I would use Vaseline (petrolatum).

                        Marty (in Mississippi)
                        XS1100SG
                        XS650SK
                        XS650SH
                        XS650G
                        XS6502F
                        XS650E

                        Comment

                        Working...
                        X