 Tweet
Tweet
... or at least I think so....
Every time I've posted pics of some of my polished bike parts or even the SG I re-did last year, I always get questions about 'how did you get those parts so shiny?' Well, I just finished polishing most of the stuff for my current XJ project, so this time I documented how I do this. Now, even with my method you'll still have to put some time in and there's a definite money investment needed, but if you're willing to trade some money for time, this can reduce the amount of time needed a bunch. I've been polishing my own parts now for 4-5 years, and have settled on this way as taking the least amount of time while still getting good results. You have to make a tool investment, but this can save literally hours and hours of hand work...
If, like many here, you've got a bike that's 'cosmetically challenged', the paint and chrome are fairly easily dealt with. New paint if needed, and chrome polish on the chrome if it isn't rusted beyond hope. But that aluminum isn't so easy sometimes. Factory clearcoat that's bad or missing, oxidized surfaces, discoloration, or the worst, pitting. Any clearcoat will need to be removed, and just straight buffing won't always clean up bad surfaces, or takes forever. You can laboriously hand-sand the pieces, but deep surface problems are extremely hard to sand out.... there's gotta be a better way...
There is...
First, the tools needed.
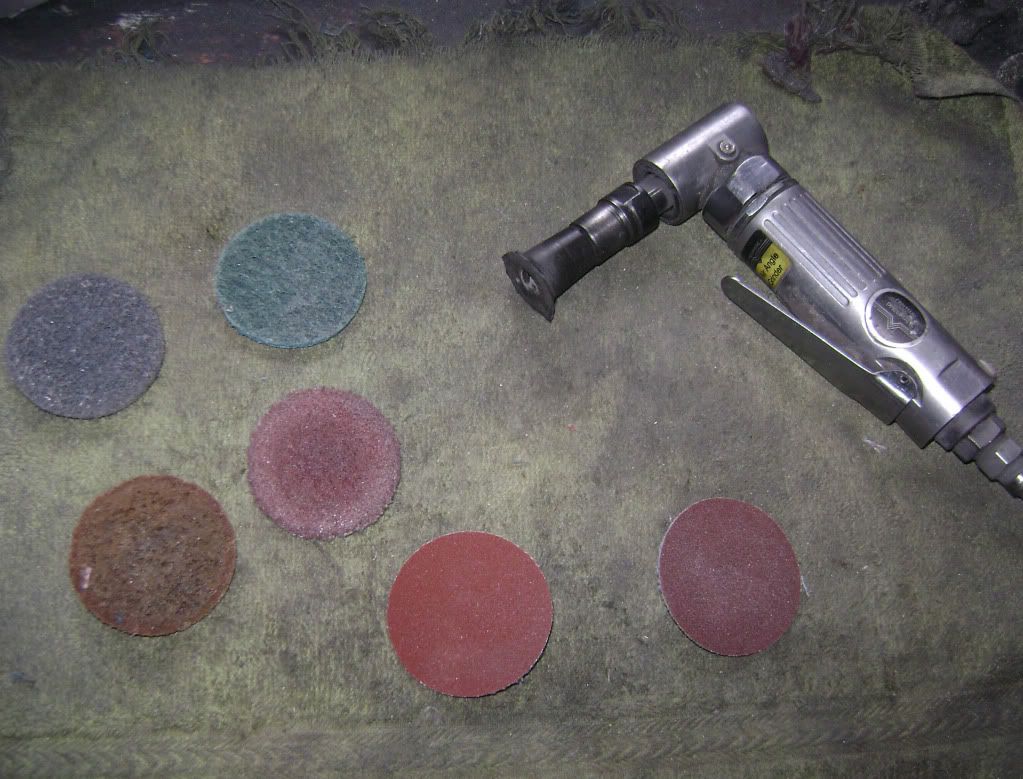
Here's the real secret; surface conditioning discs AKA Scotchbrite, as seen to the left. These are made by a number of companies in 'standard' grits, I buy mine here: http://keenabrasives.com/Surface%20C...20Type%20R.htm. I'm sure you can find these locally also, but Keen has by far the best prices I've found. You need a bunch of 'em, you won't get by with just a few...
Shown are the four main 'grits'; brown (coarse), maroon (medium), blue (fine), and grey (very fine). The ones I use most are the blue and grey, but the other two are handy to have too; I'll get to specific uses further along. I also use the 2" size, as I've found that to be the best size for getting into places. I also use 2" sanding discs, usually in 240 and 320 grits for more aggressive material removal. Note that the disc holder is broken; that's on purpose. By not having the whole disc supported, this allows the edges to 'curl' when sanding into curved areas, giving you a nice 'blend' rather than gouging the metal, although the discs need to be used a while before they'll do this. To run these, I use a $15 HF angle-head die grinder.
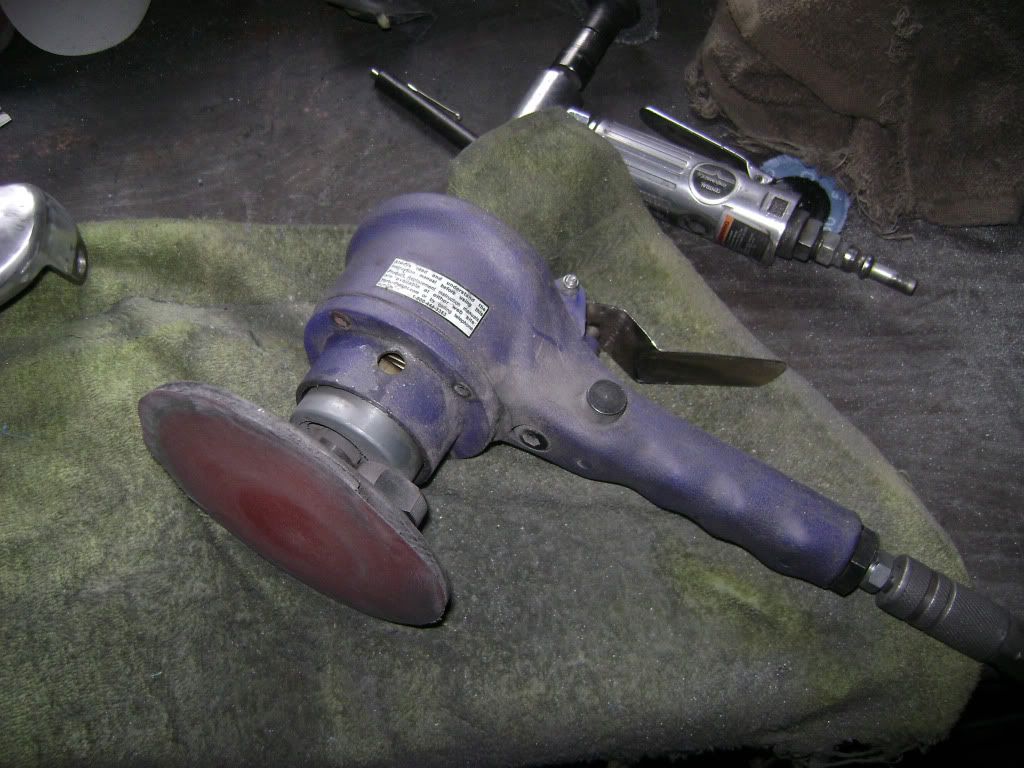
You'll also want a larger 5" disc sander. Again, an inexpensive HF unit is used with a foam-backed pad and adhesive-backed sanding discs. This unit will both 'orbit' and spin; I lock it on spin. 400 grit discs are as coarse as you want these to be. I'd get some 400 grit, and maybe some 600. I use this for smoothing/blending larger areas. Great for removing deep scratches. Keen also carries these, so you can do one-stop shopping. Got all this stuff? Let's do a piece....
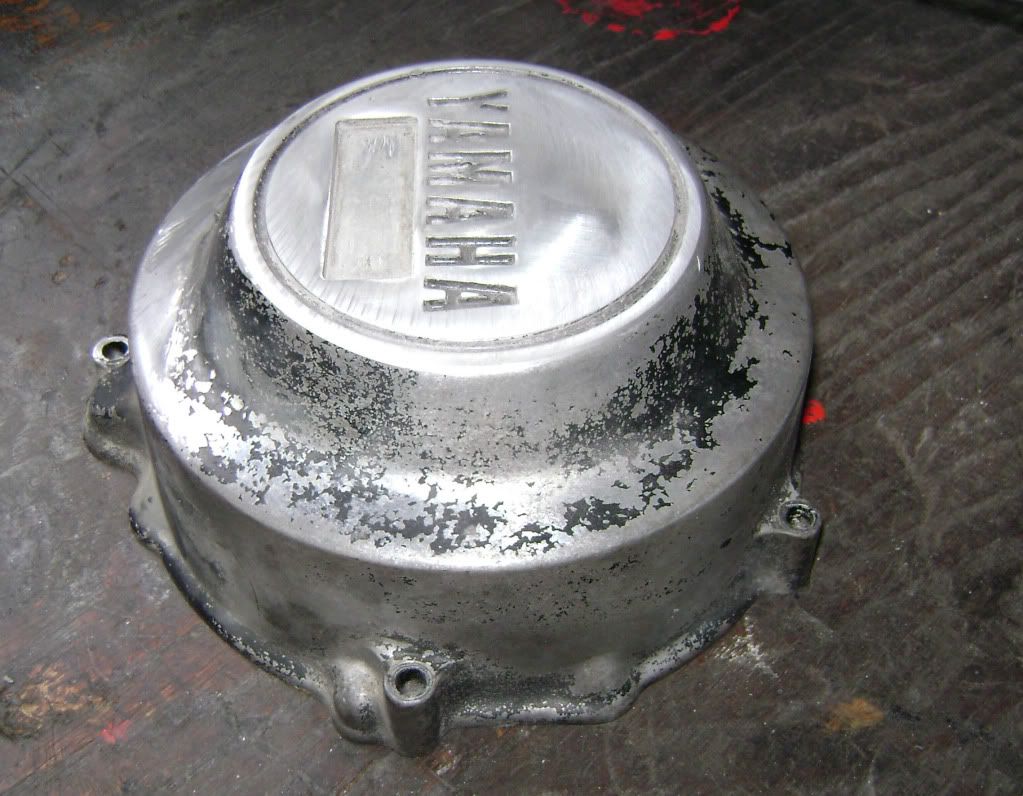
A XJ alternator cover. Here's most of the problems you'll run into in one place. Clearcoat is mostly gone but it's been painted, dull oxidized metal, and some deep scratches on the face. I've already hit the face with the disc sander to level that (a matter of a few minutes), so let's move on to the conditioning discs...
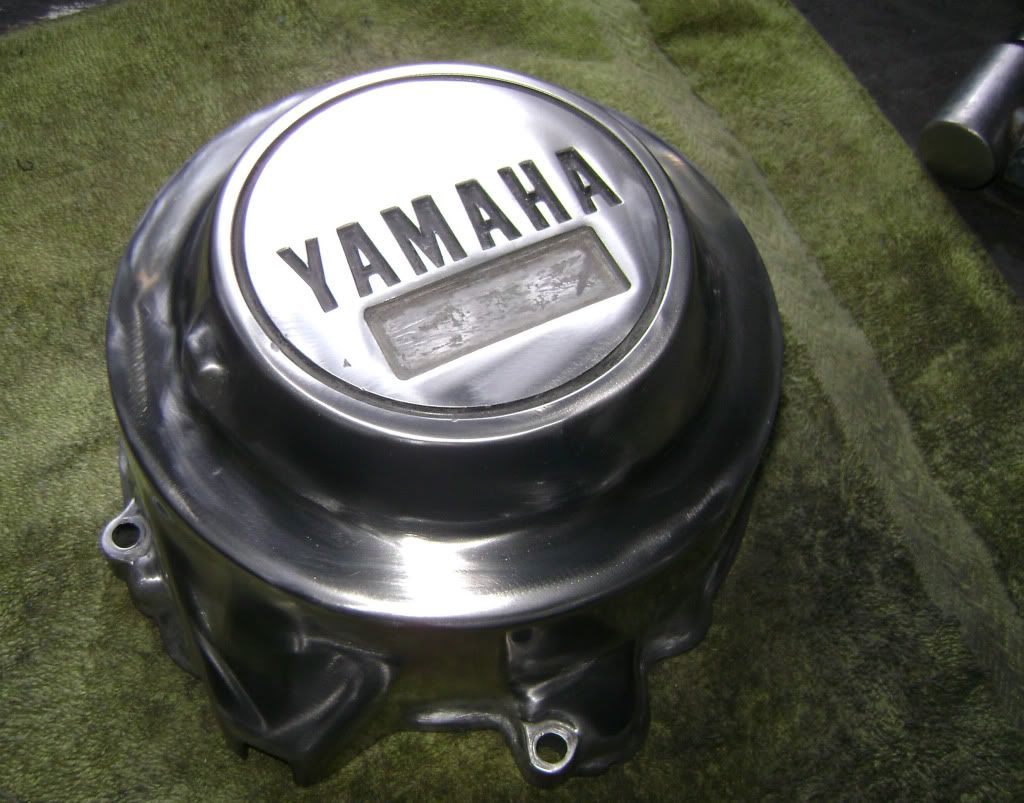
After about 20 minutes with the conditioning discs (blue, then grey), it looks like this. This is ready to buff, no more work needed; total time about 1/2 hour!
After only 15 minutes at the buffer, the restored part.
Sometimes you'll have a part that you're sure is beyond repair... or is it?
Not a great pic, but this XJ ignition cover has been laid over and has some nasty deep scratches in it. If you were hand-sanding this, you'd throw it away.
After some serious use of the 5" discs, this cover has been smoothed out and is ready to polish. There's still a bit of damage visible and the OEM contours have been changed, but I'll call this acceptable. A bit more work, a bit more time; about 40 minutes.
After buffing; not bad eh?
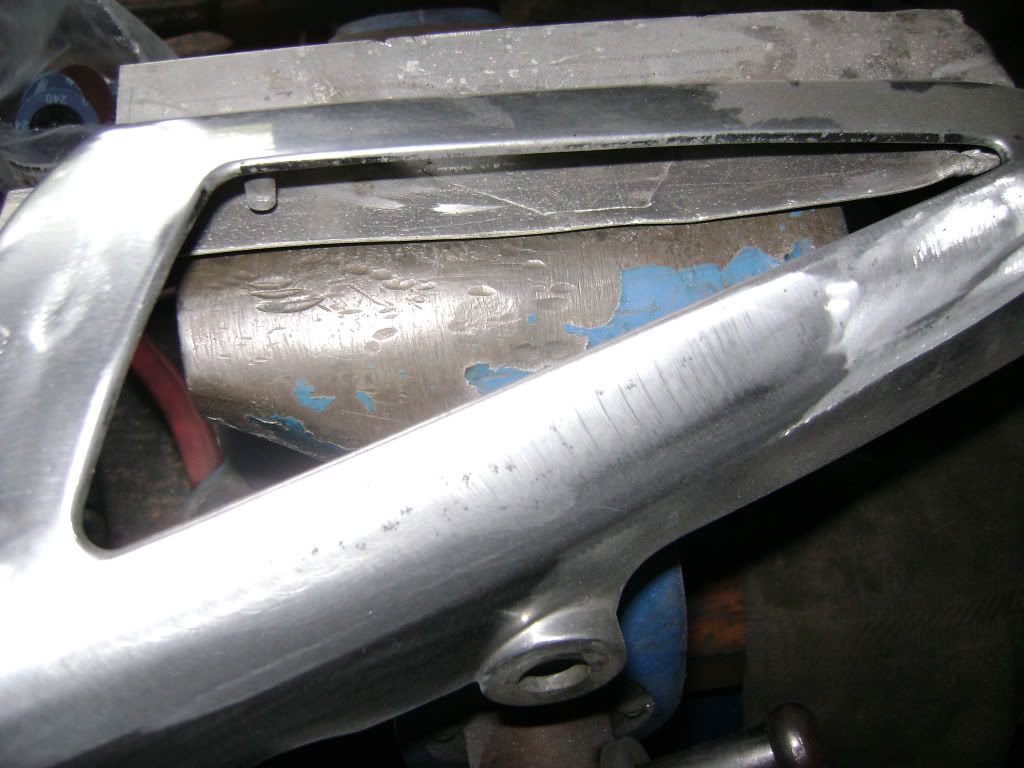
For fork sliders or other 'long' or flat pieces, I'll use the 5" discs to initially smooth the main areas, then follow up with the conditioning discs.
I've 'blended' some pretty deep scratches out of the cast aluminum grab rails on both this XJ and the SG I did with these.
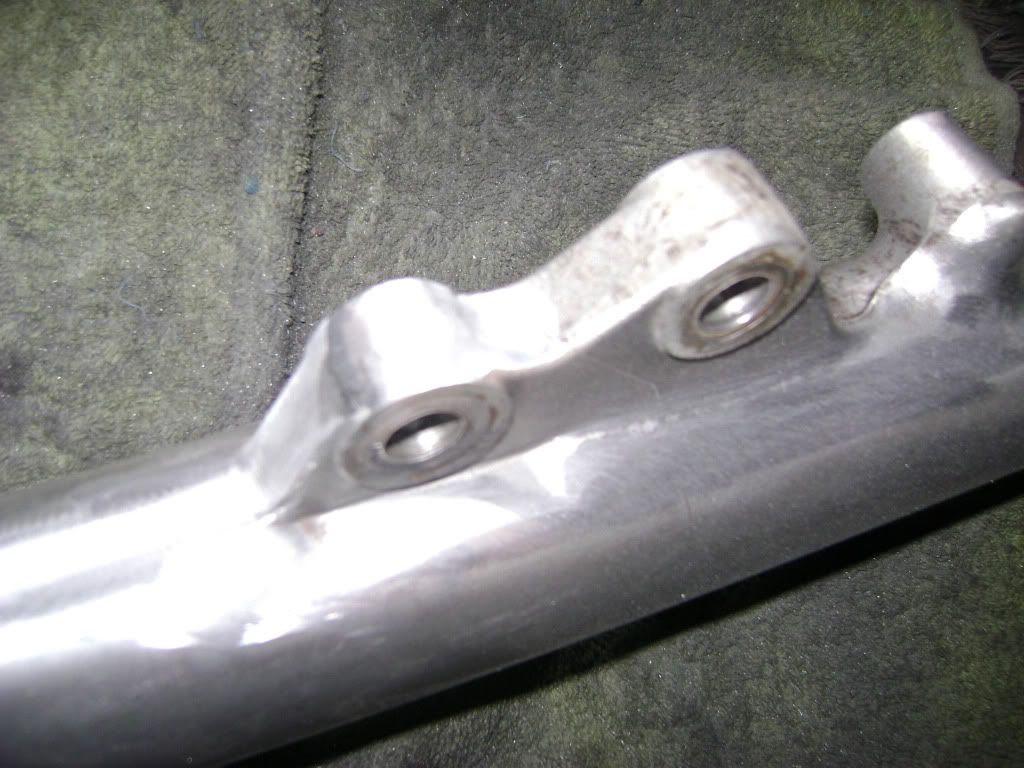
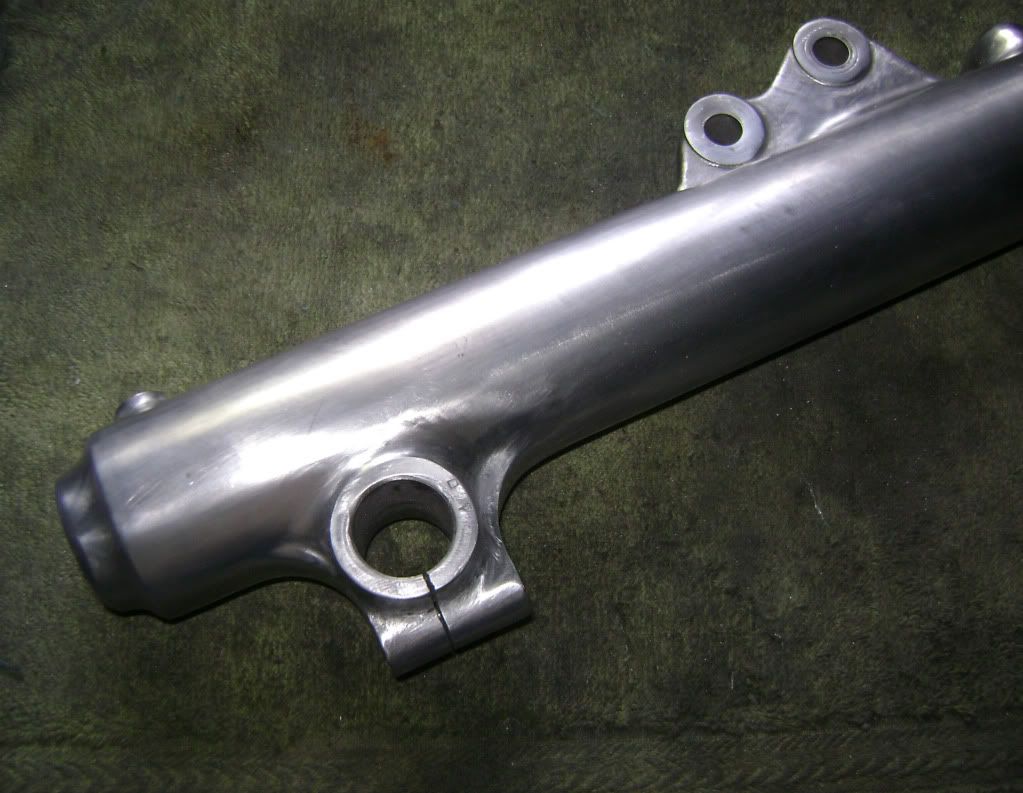
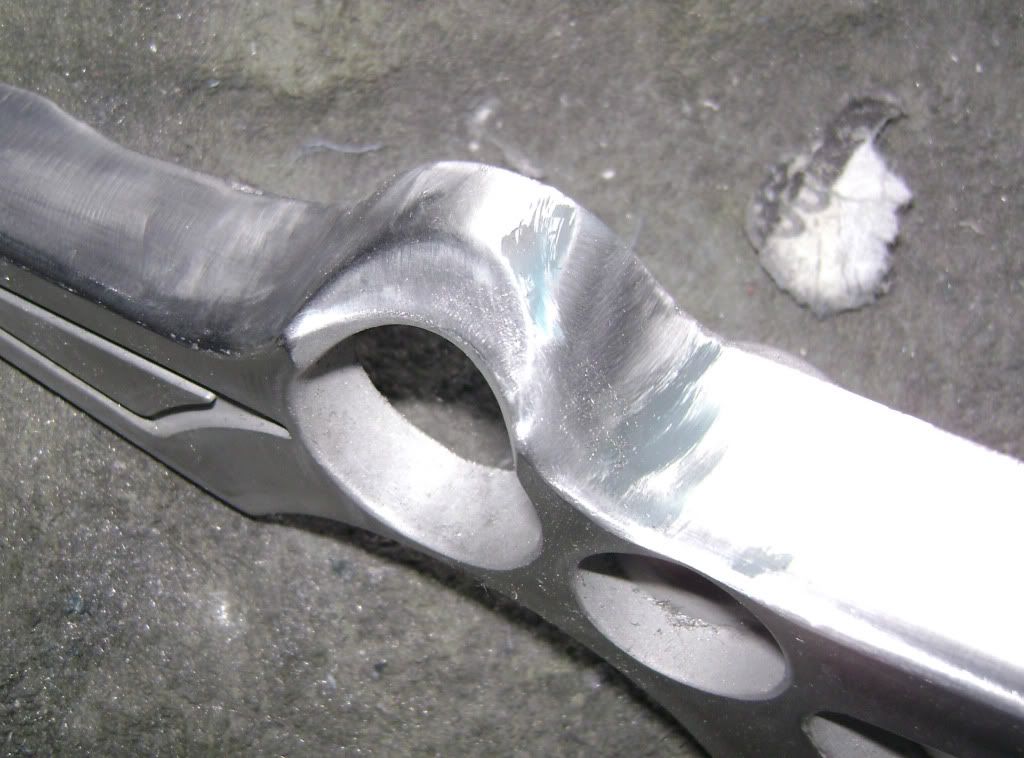
For really rough areas, I'll use the 2" sanding discs to level, then follow with the conditioning discs. You can sometimes use the brown or maroon discs instead of the sanding discs, but they work better at 'blending' rough areas rather than removing material. The area around the axle mounts on these XJ forks took some time; about an hour for each fork lower in prep. Yamaha only 'polished' about half of these at the factory...
The quality of the metal used isn't always that good; you may find pieces that have 'stuff' embedded in the metal or 'soft' spots. No fix for it; the best you can do is try to blend it out; sometimes these things won't show up until you do your buffing. This XJ sidecover casting had 'pits' in the metal that I managed to reduce but not eliminate. Again, the 5" disc was used. This wasn't caused by corrosion...
This will give you an idea of the difference in finish between 'blue' and 'grey' discs, blue on the left. Remember, any scratching you can still see after using the grey discs will be harder to buff out. Do the whole piece with blue, then follow up with grey.
A few tricks...
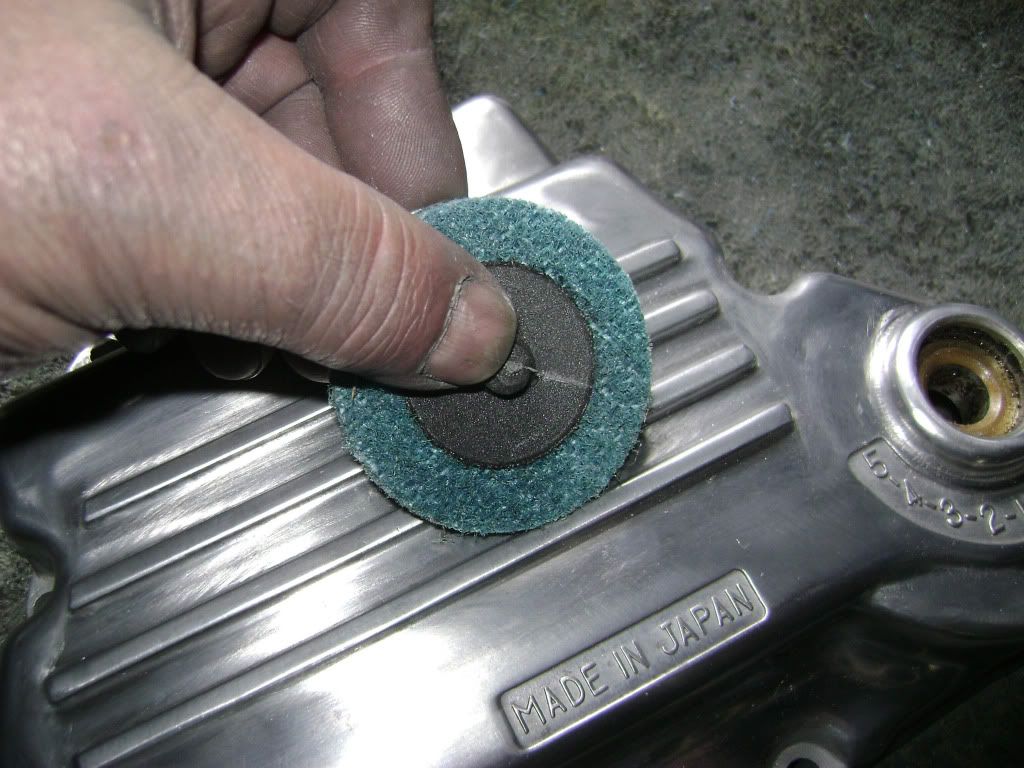
One area on these that's always hard to get is next to the 'fins' on the shifter cover and cam cover. Using a new disc, hit these areas first before the disc starts to break down.

Same thing for some of the edges...
Ok, these discs do have a few drawbacks; they can overheat and 'smear' onto the work surface as seen here, particularly after they start to wear. Keeping the disc moving over the surface will help with this. Not a big deal when it happens, I use some 0000 steel wool to remove it. How many discs will you run through? Well, that depends; figure about one disc of each type per piece, maybe two for larger pieces, less for small parts as a general rule. The number will depend on how bad the part is and how 'perfect' you want it. The 5" sanding discs don't last long either, I went through six on the ignition cover shown above. You can save the 'worn' blue discs and use them to clean gasket surfaces after scraping most of the gasket off though..
I'll talk about the factory clearcoat here; if yours is still on the parts, the conditioning discs should take it right off, no paint stripper needed. You might run into some that they'll have a hard time with, generally if it's extra-thick. I had a bit on the XJ shifter cover like that, I sandblasted it off. The blue discs will quickly restore the surface, but you might check before starting to see if it's going to be a problem. In places where the discs wouldn't go, I simply scraped it off with a sharp knife; the buffing process will smooth this well enough.
So, how long did all this take me? I did 14 pieces; all the lower engine covers (4), the fork sliders (2), muffler/footpeg brackets (2), handlebars (2; remember this is a XJ), sidecovers (2), and grab rail (2). There was three days of prep, but this includes repairing and I smoothed more places than was done originally. And the buffing? I buffed all of it in 8 hours, start to finish. Probably somewhere around 30 hours, not bad for at home.
What do I buff with?
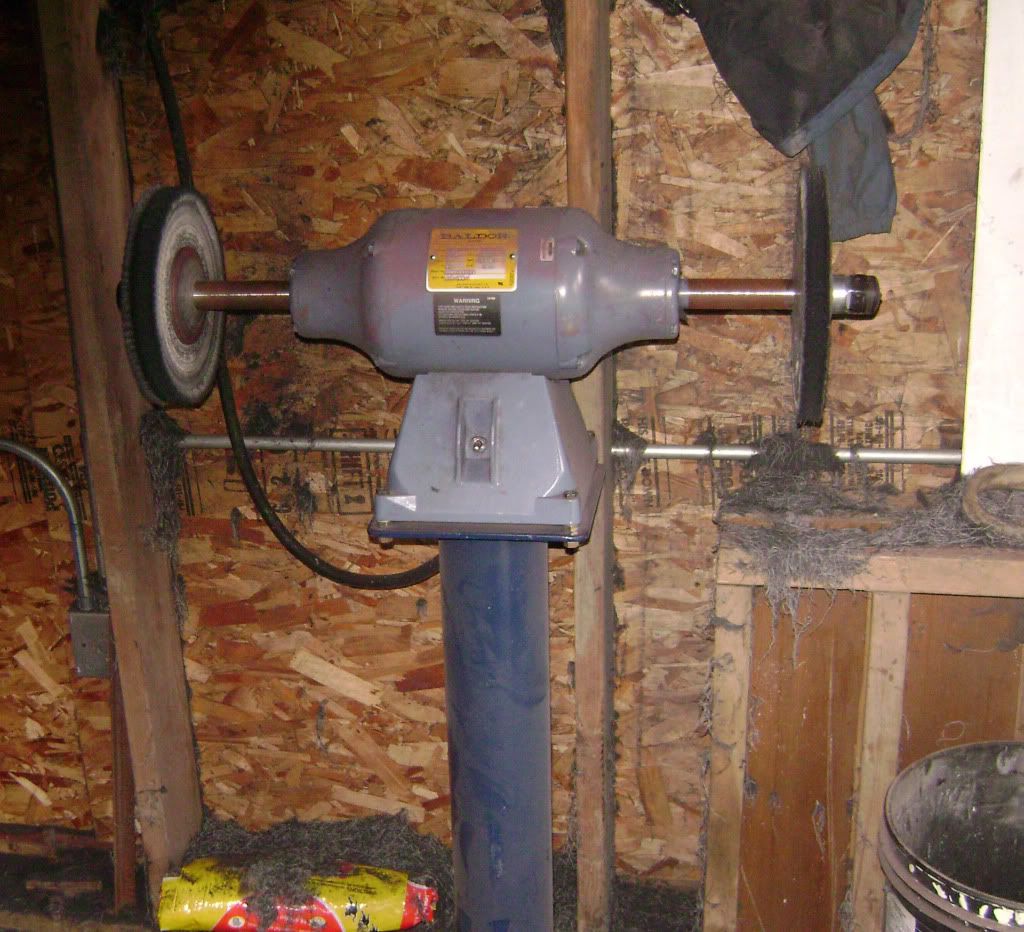
Ok, this is probably more than most will have; it's 1.5 HP Baldor buffer spinning 10" wheels. But even if you have a smaller buffer, that still won't increase your buffing time that much if the parts are well-prepped. Buffers can be put together pretty cheaply, and buffing wheels and compounds aren't expensive either. You'll need a sewn cotton spiral with tripoli to remove the scratches, and a loose cotton flannel with white for the 'color' buff. If you really want to 'detail' your parts, the wheels won't quite get into some recessed areas, you can use one of these...
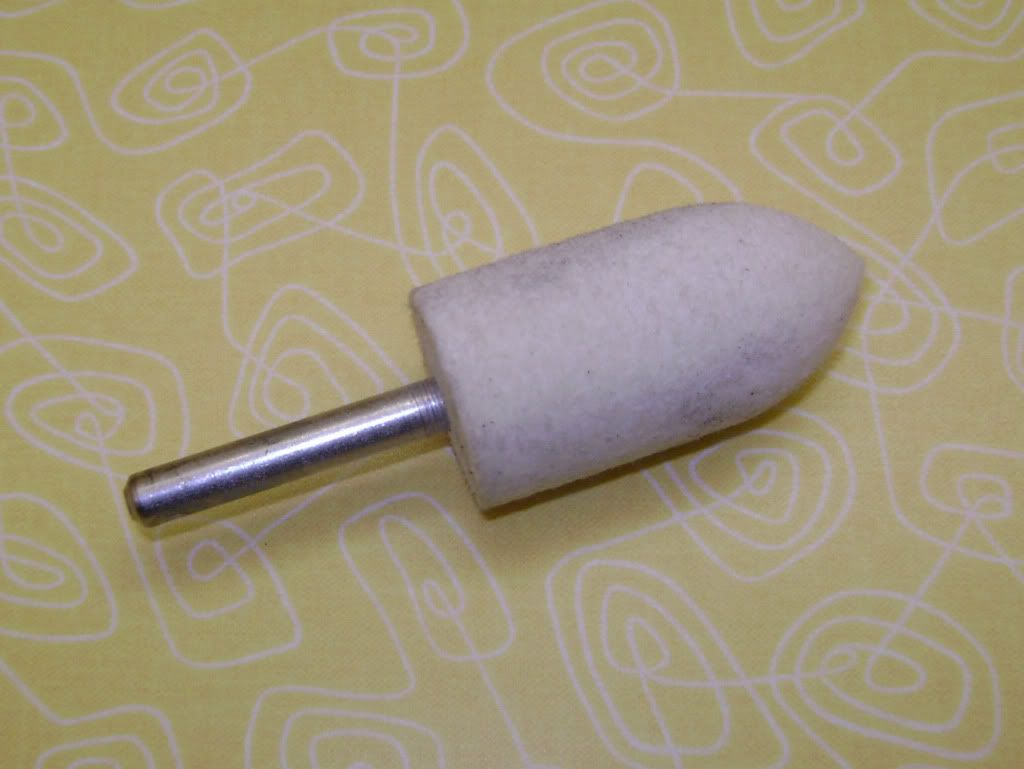
... felt buffs for those spots.
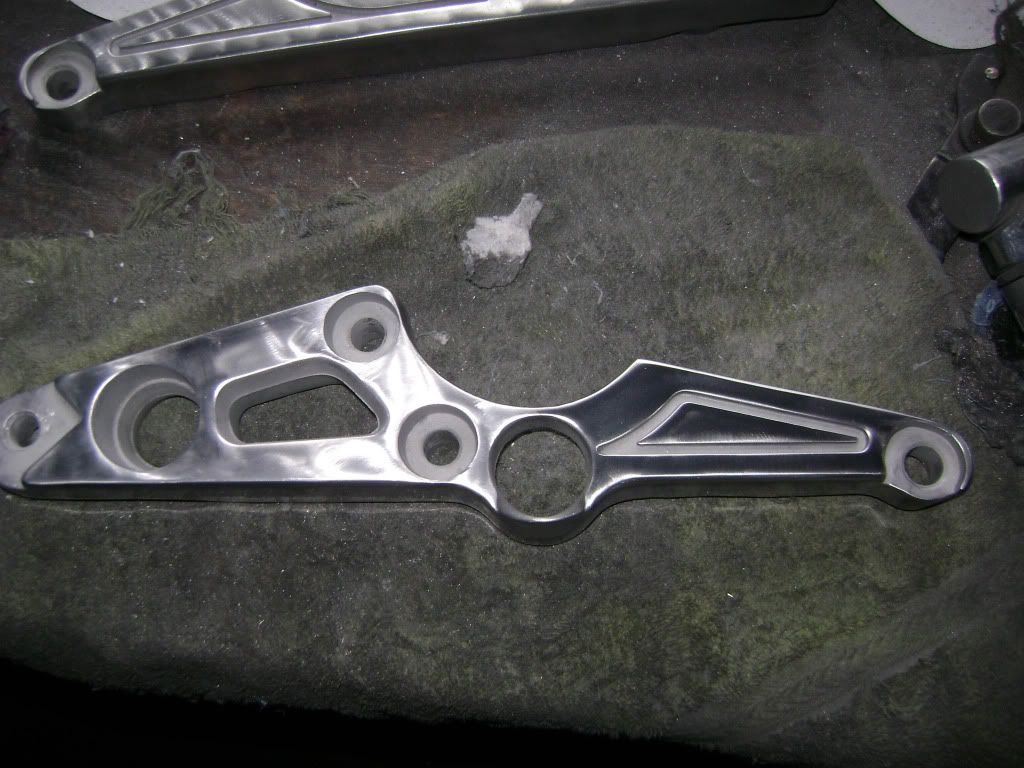
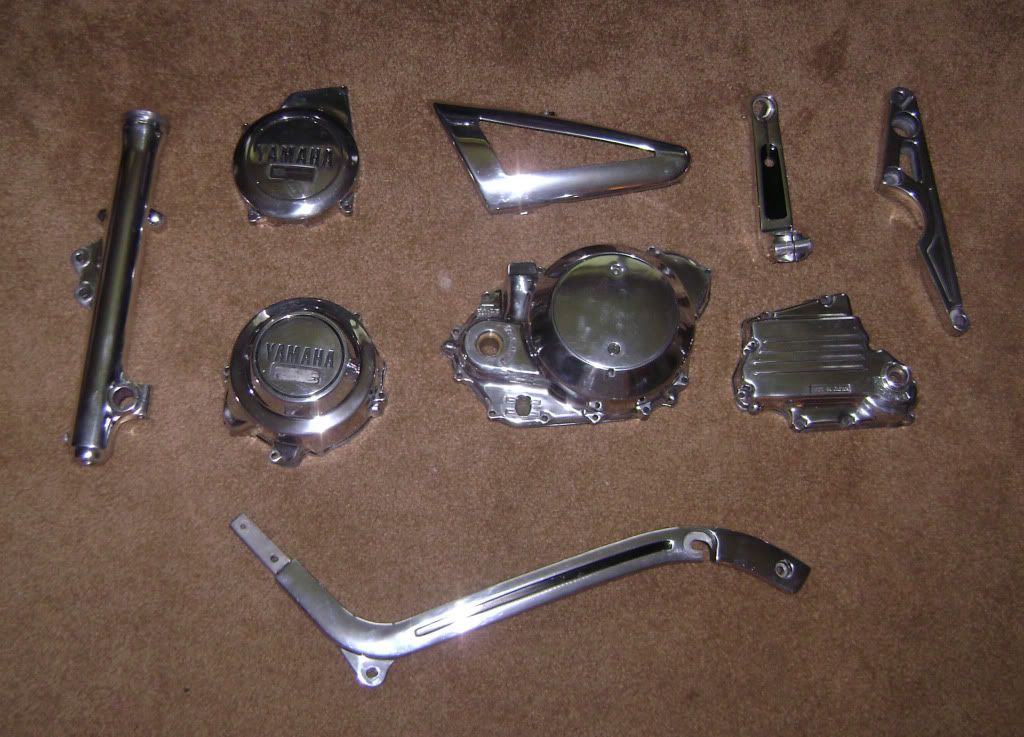
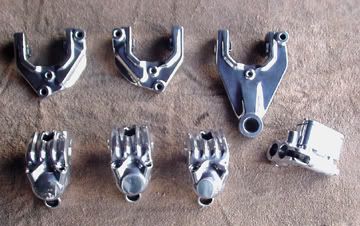
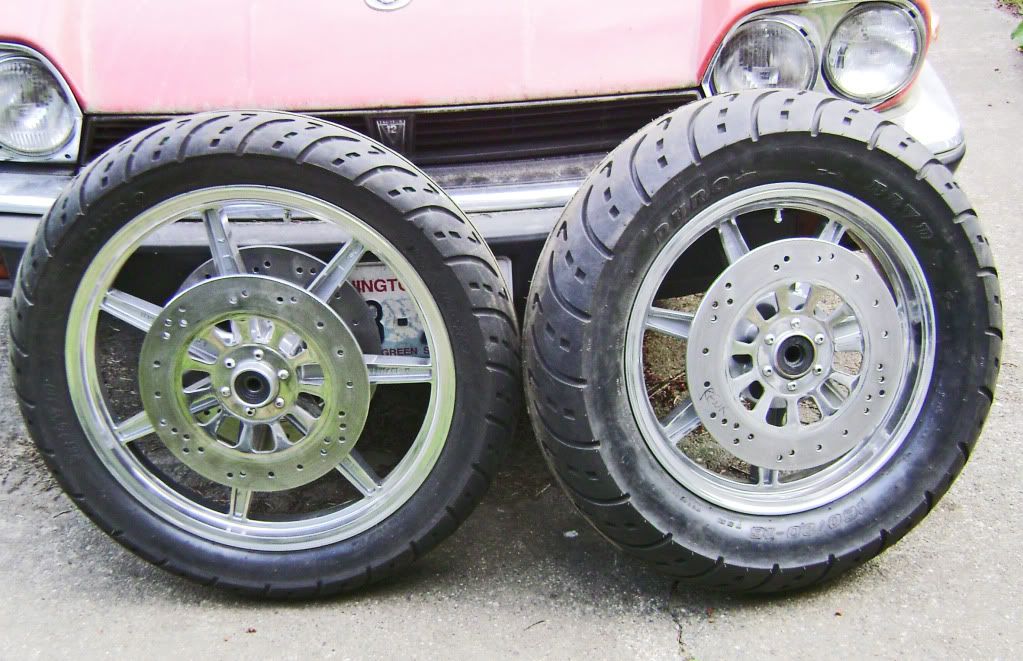
And the parts? Here they are...
Questions and comments welcome!
Every time I've posted pics of some of my polished bike parts or even the SG I re-did last year, I always get questions about 'how did you get those parts so shiny?' Well, I just finished polishing most of the stuff for my current XJ project, so this time I documented how I do this. Now, even with my method you'll still have to put some time in and there's a definite money investment needed, but if you're willing to trade some money for time, this can reduce the amount of time needed a bunch. I've been polishing my own parts now for 4-5 years, and have settled on this way as taking the least amount of time while still getting good results. You have to make a tool investment, but this can save literally hours and hours of hand work...
If, like many here, you've got a bike that's 'cosmetically challenged', the paint and chrome are fairly easily dealt with. New paint if needed, and chrome polish on the chrome if it isn't rusted beyond hope. But that aluminum isn't so easy sometimes. Factory clearcoat that's bad or missing, oxidized surfaces, discoloration, or the worst, pitting. Any clearcoat will need to be removed, and just straight buffing won't always clean up bad surfaces, or takes forever. You can laboriously hand-sand the pieces, but deep surface problems are extremely hard to sand out.... there's gotta be a better way...
There is...
First, the tools needed.
Here's the real secret; surface conditioning discs AKA Scotchbrite, as seen to the left. These are made by a number of companies in 'standard' grits, I buy mine here: http://keenabrasives.com/Surface%20C...20Type%20R.htm. I'm sure you can find these locally also, but Keen has by far the best prices I've found. You need a bunch of 'em, you won't get by with just a few...
Shown are the four main 'grits'; brown (coarse), maroon (medium), blue (fine), and grey (very fine). The ones I use most are the blue and grey, but the other two are handy to have too; I'll get to specific uses further along. I also use the 2" size, as I've found that to be the best size for getting into places. I also use 2" sanding discs, usually in 240 and 320 grits for more aggressive material removal. Note that the disc holder is broken; that's on purpose. By not having the whole disc supported, this allows the edges to 'curl' when sanding into curved areas, giving you a nice 'blend' rather than gouging the metal, although the discs need to be used a while before they'll do this. To run these, I use a $15 HF angle-head die grinder.
You'll also want a larger 5" disc sander. Again, an inexpensive HF unit is used with a foam-backed pad and adhesive-backed sanding discs. This unit will both 'orbit' and spin; I lock it on spin. 400 grit discs are as coarse as you want these to be. I'd get some 400 grit, and maybe some 600. I use this for smoothing/blending larger areas. Great for removing deep scratches. Keen also carries these, so you can do one-stop shopping. Got all this stuff? Let's do a piece....
A XJ alternator cover. Here's most of the problems you'll run into in one place. Clearcoat is mostly gone but it's been painted, dull oxidized metal, and some deep scratches on the face. I've already hit the face with the disc sander to level that (a matter of a few minutes), so let's move on to the conditioning discs...
After about 20 minutes with the conditioning discs (blue, then grey), it looks like this. This is ready to buff, no more work needed; total time about 1/2 hour!
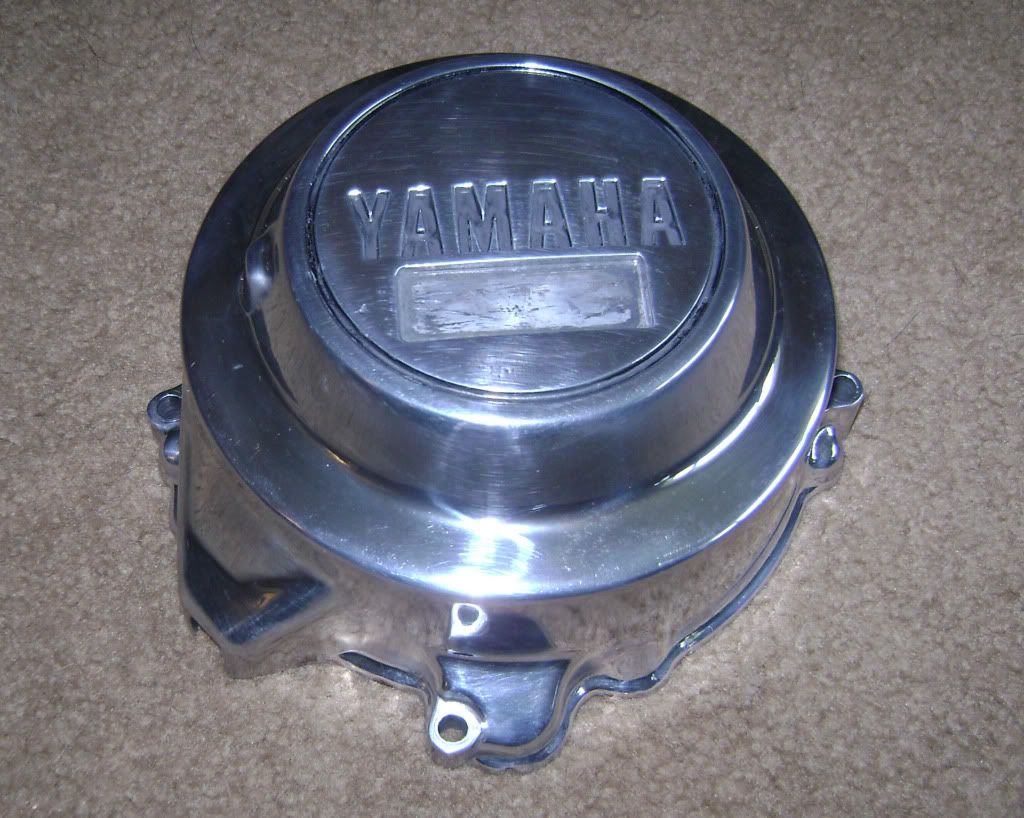
After only 15 minutes at the buffer, the restored part.
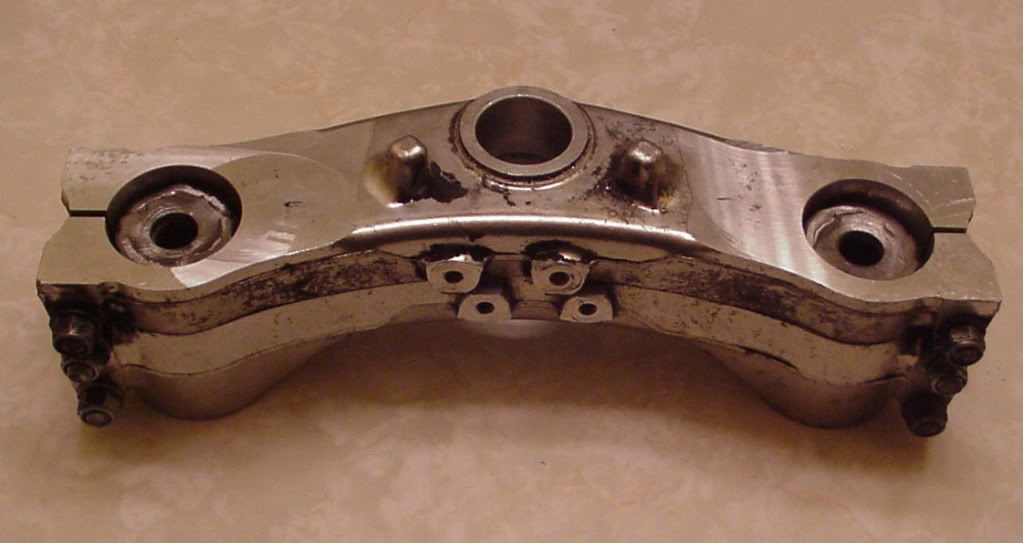
Sometimes you'll have a part that you're sure is beyond repair... or is it?
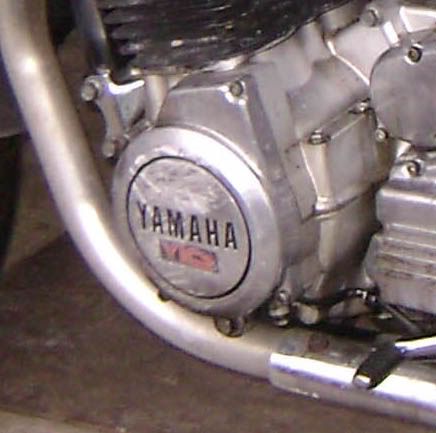
Not a great pic, but this XJ ignition cover has been laid over and has some nasty deep scratches in it. If you were hand-sanding this, you'd throw it away.
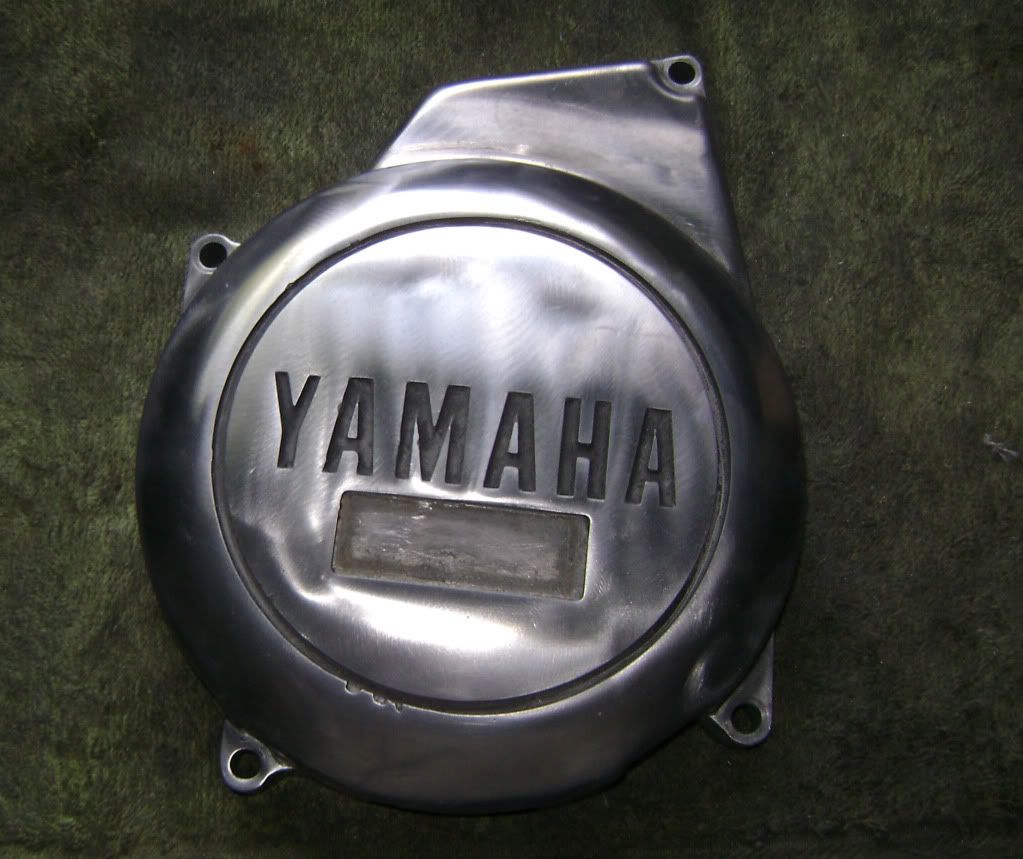
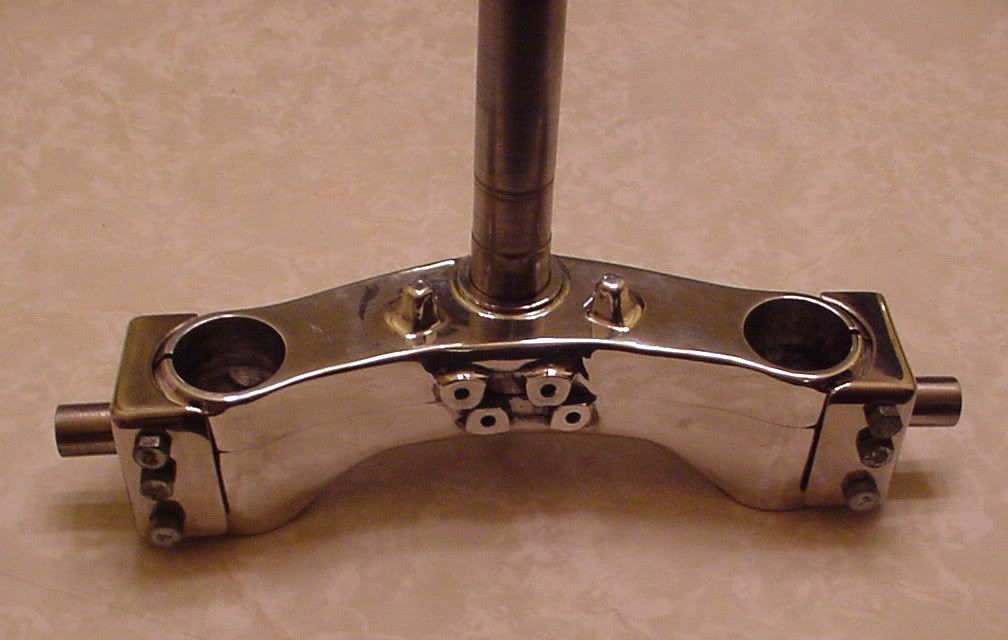
After some serious use of the 5" discs, this cover has been smoothed out and is ready to polish. There's still a bit of damage visible and the OEM contours have been changed, but I'll call this acceptable. A bit more work, a bit more time; about 40 minutes.
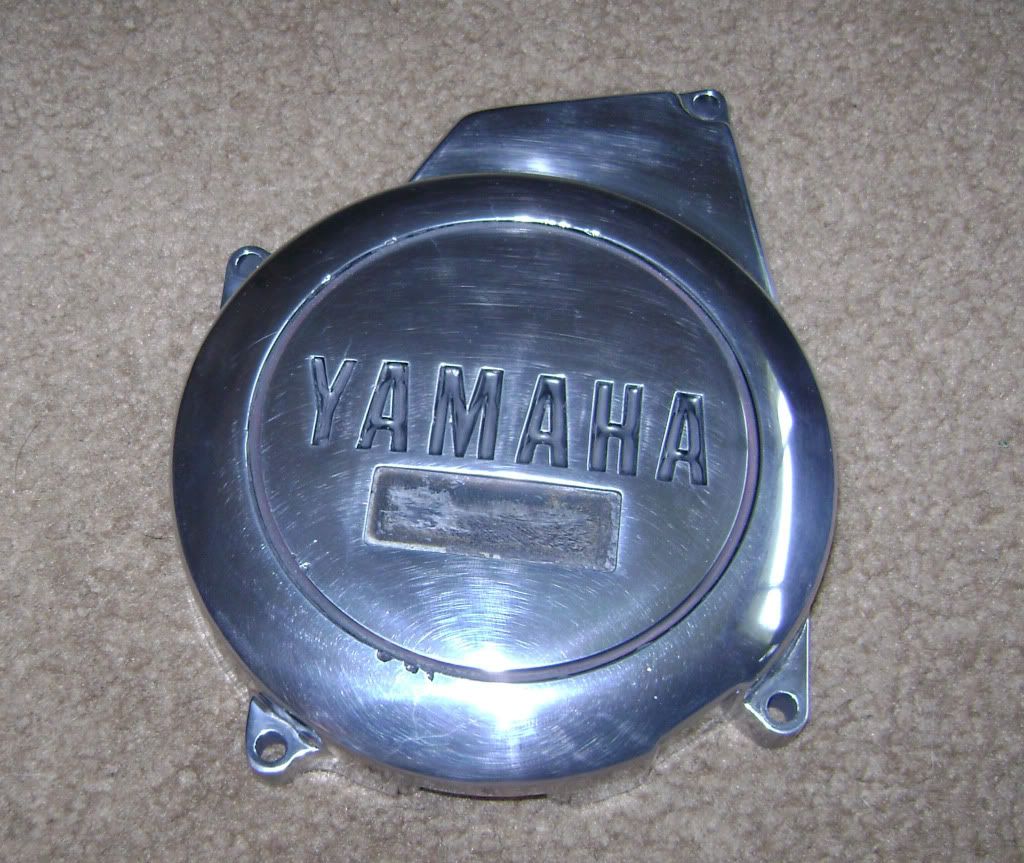
After buffing; not bad eh?
For fork sliders or other 'long' or flat pieces, I'll use the 5" discs to initially smooth the main areas, then follow up with the conditioning discs.
I've 'blended' some pretty deep scratches out of the cast aluminum grab rails on both this XJ and the SG I did with these.
For really rough areas, I'll use the 2" sanding discs to level, then follow with the conditioning discs. You can sometimes use the brown or maroon discs instead of the sanding discs, but they work better at 'blending' rough areas rather than removing material. The area around the axle mounts on these XJ forks took some time; about an hour for each fork lower in prep. Yamaha only 'polished' about half of these at the factory...
The quality of the metal used isn't always that good; you may find pieces that have 'stuff' embedded in the metal or 'soft' spots. No fix for it; the best you can do is try to blend it out; sometimes these things won't show up until you do your buffing. This XJ sidecover casting had 'pits' in the metal that I managed to reduce but not eliminate. Again, the 5" disc was used. This wasn't caused by corrosion...
This will give you an idea of the difference in finish between 'blue' and 'grey' discs, blue on the left. Remember, any scratching you can still see after using the grey discs will be harder to buff out. Do the whole piece with blue, then follow up with grey.
A few tricks...
One area on these that's always hard to get is next to the 'fins' on the shifter cover and cam cover. Using a new disc, hit these areas first before the disc starts to break down.
Same thing for some of the edges...
Ok, these discs do have a few drawbacks; they can overheat and 'smear' onto the work surface as seen here, particularly after they start to wear. Keeping the disc moving over the surface will help with this. Not a big deal when it happens, I use some 0000 steel wool to remove it. How many discs will you run through? Well, that depends; figure about one disc of each type per piece, maybe two for larger pieces, less for small parts as a general rule. The number will depend on how bad the part is and how 'perfect' you want it. The 5" sanding discs don't last long either, I went through six on the ignition cover shown above. You can save the 'worn' blue discs and use them to clean gasket surfaces after scraping most of the gasket off though..
I'll talk about the factory clearcoat here; if yours is still on the parts, the conditioning discs should take it right off, no paint stripper needed. You might run into some that they'll have a hard time with, generally if it's extra-thick. I had a bit on the XJ shifter cover like that, I sandblasted it off. The blue discs will quickly restore the surface, but you might check before starting to see if it's going to be a problem. In places where the discs wouldn't go, I simply scraped it off with a sharp knife; the buffing process will smooth this well enough.
So, how long did all this take me? I did 14 pieces; all the lower engine covers (4), the fork sliders (2), muffler/footpeg brackets (2), handlebars (2; remember this is a XJ), sidecovers (2), and grab rail (2). There was three days of prep, but this includes repairing and I smoothed more places than was done originally. And the buffing? I buffed all of it in 8 hours, start to finish. Probably somewhere around 30 hours, not bad for at home.
What do I buff with?
Ok, this is probably more than most will have; it's 1.5 HP Baldor buffer spinning 10" wheels. But even if you have a smaller buffer, that still won't increase your buffing time that much if the parts are well-prepped. Buffers can be put together pretty cheaply, and buffing wheels and compounds aren't expensive either. You'll need a sewn cotton spiral with tripoli to remove the scratches, and a loose cotton flannel with white for the 'color' buff. If you really want to 'detail' your parts, the wheels won't quite get into some recessed areas, you can use one of these...
... felt buffs for those spots.
And the parts? Here they are...
Questions and comments welcome!


 CZ
CZ
 CZ
CZ

Comment