Announcement

Collapse
No announcement yet.

No electrical power

Collapse
X
 
  • Filter
  • Time
  • Show
Clear All
new posts

  • #16
    Thank you, guys!

    I removed the switch. When I test it with the ohm meter it seems to work(?):

    OFF position:
    There is no conductivity between the brown cable and the blue cable and no connection between the brown and the red one. No conductivity between red and blue either.

    ON position:
    Conductivity between the brown and the blue one and between the brown and the red one. Also between red and blue.

    This means the switch works, correct? I will still clean it but if it works that means the issue is elsewhere.

    Some of the cables in the headlight bucket looked questionable (insulation slightly damaged) and there is light corrosion in some of the connectors.

    I looked for New Old Stock main switches on eBay but only saw used ones.

    A failing main switch in the wrong moment is what I want to avoid. Is there a source for NOS main switches?

    Thanks again!

    Armin
    2018 Suzuki DR650, no XS1100 right now.

    Comment


    • #17
      Originally posted by QTreiber View Post
      When I test it with the ohm meter it seems to work(?):

      OFF position:
      There is no conductivity between the brown cable and the blue cable and no connection between the brown and the red one. No conductivity between red and blue either.

      ON position:
      Conductivity between the brown and the blue one and between the brown and the red one. Also between red and blue.

      This means the switch works, correct?
      Not neccesarily; an ohm meter only applies a very small current to check for continuity, so even a poor connection will read. But put a larger load on it, and it can fail. You need to check this 'hot' with a load on it; look here:
      http://www.xs11.com/forum/showthread.php?t=35339
      If you drop more than one or two tenths of a volt across the switch or plug contacts, that's enough to cause problems.
      Fast, Cheap, Reliable... Pick any two

      '78E original owner - resto project
      '78E ???? owner - Modder project FJ forks, 4-piston calipers F/R, 160/80-16 rear tire
      '82 XJ rebuild project
      '80SG restified, red SOLD
      '79F parts...
      '81H more parts...

      Other current bikes:
      '93 XL1200 Anniversary Sportster 85RWHP
      '86 XL883/1200 Chopper
      '82 XL1000 w/1450cc Buell, Baker 6-speed, in-progress project
      Cage: '13 Mustang GT/CS with a few 'custom' touches
      Yep, can't leave nuthin' alone...

      Comment


      • #18
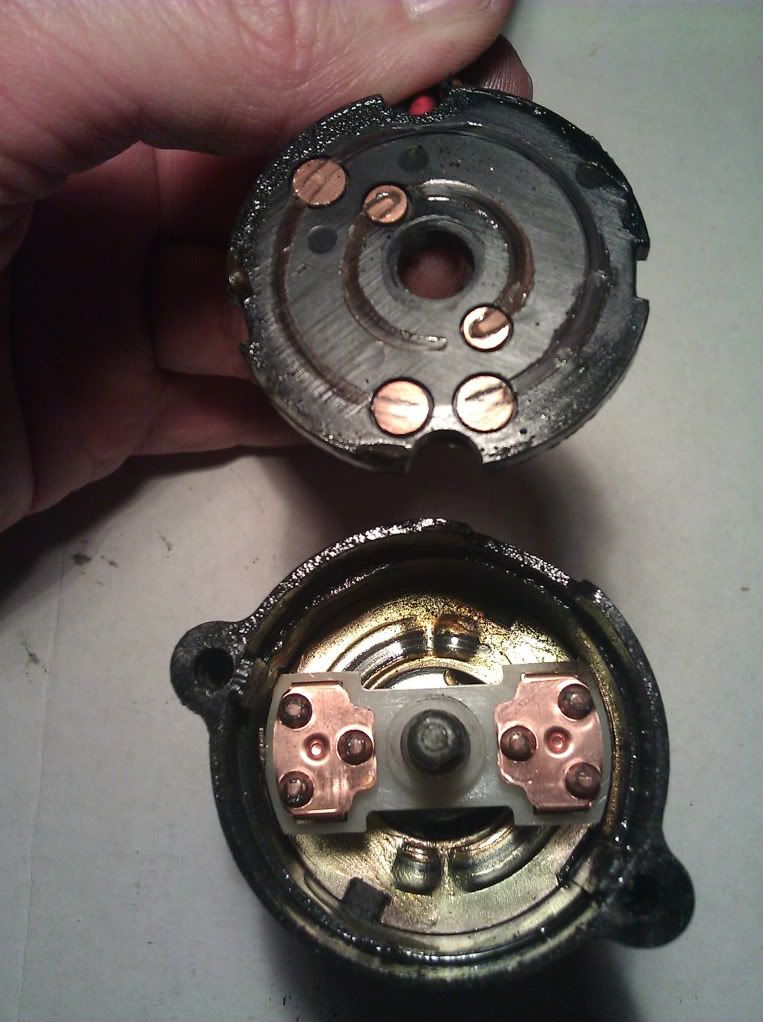
        Doesn't look too bad. Should I clean the contacts with solvent?

        2018 Suzuki DR650, no XS1100 right now.

        Comment


        • #19
          After cleaning the contacts, should I use some dielectric grease?

          What I don't understand about using dielectric grease for electric connections is this: it is non-conductive, so wouldn't it insulate if it is applied directly onto contact surfaces?

          I understand that it is used to protect contacts against corrosion and - in some cases - also to provide lubrication.

          So should I apply the grease only to the non-contact surfaces?

          Thanks again for all your help!

          Armin
          2018 Suzuki DR650, no XS1100 right now.

          Comment


          • #20
            What is the best way to clean these contacts? Contact cleaner and Q-Tips?

            Could the light corrosion that is visible on these contacts be responsible for the total power loss?


            2018 Suzuki DR650, no XS1100 right now.

            Comment


            • #21
              Originally posted by QTreiber View Post
              OK, I have full voltage (same as on battery terminals) on the red wire in the headlight bucket on both sides of the plug.

              When I turn the switch to ON the voltage interestingly goes from 0.00 to 0.05 at both the blue and the brown wires and that's it....
              Ok, I should have told you to re-check the voltage on the red wire with the switch 'on'.

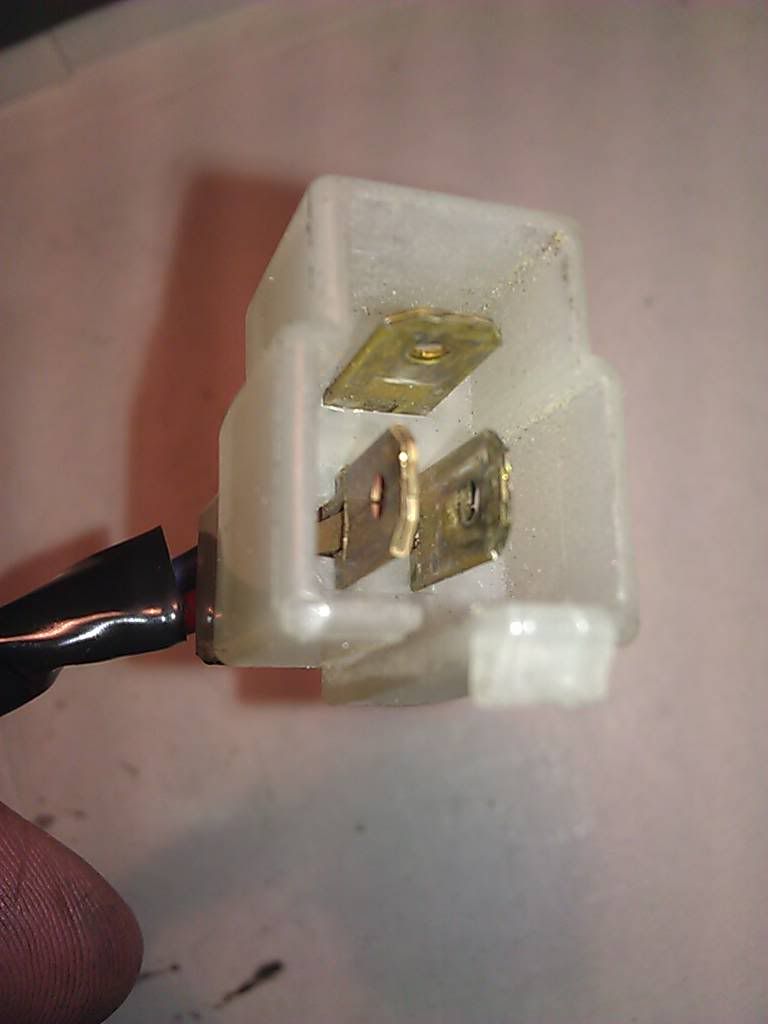
              If you still had full battery voltage on the red wire with the switch 'on' and little or no voltage on the brown and blue, then the problem is in the switch, plug, or it's wires. From your pics, the switch plug and internal contacts look good, so make sure the wires aren't damaged. Make sure the other half of the plug is good and making tight contact on the blades.

              BUT, if the battery voltage on the red wire goes down (or away) when the switch is 'on', THEN the problem is in the red wire between the battery and the switch plug. You've got a bad connection at the battery terminal, or at the plug between the positive battery cable and the harness, or at the fuse panel. First thing I'd do is thoroughly clean the battery connections. If that doesn't do it, with the key 'on' start checking for voltage working your way back from the switch. Check for battery voltage at both sides of your fuse (with the fuse installed), if it's not there or low, then at the harness plug, etc. You'll find either a dirty/loose/corroded connection or you may actually have a damaged wire, but that's fairly rare.

              More stuff to check....
              Fast, Cheap, Reliable... Pick any two

              '78E original owner - resto project
              '78E ???? owner - Modder project FJ forks, 4-piston calipers F/R, 160/80-16 rear tire
              '82 XJ rebuild project
              '80SG restified, red SOLD
              '79F parts...
              '81H more parts...

              Other current bikes:
              '93 XL1200 Anniversary Sportster 85RWHP
              '86 XL883/1200 Chopper
              '82 XL1000 w/1450cc Buell, Baker 6-speed, in-progress project
              Cage: '13 Mustang GT/CS with a few 'custom' touches
              Yep, can't leave nuthin' alone...

              Comment


              • #22
                Originally posted by crazy steve View Post
                Ok, I should have told you to re-check the voltage on the red wire with the switch 'on'.

                If you still had full battery voltage on the red wire with the switch 'on' and little or no voltage on the brown and blue, then the problem is in the switch, plug, or it's wires. From your pics, the switch plug and internal contacts look good, so make sure the wires aren't damaged. Make sure the other half of the plug is good and making tight contact on the blades.

                BUT, if the battery voltage on the red wire goes down (or away) when the switch is 'on', THEN the problem is in the red wire between the battery and the switch plug. You've got a bad connection at the battery terminal, or at the plug between the positive battery cable and the harness, or at the fuse panel. First thing I'd do is thoroughly clean the battery connections. If that doesn't do it, with the key 'on' start checking for voltage working your way back from the switch. Check for battery voltage at both sides of your fuse (with the fuse installed), if it's not there or low, then at the harness plug, etc. You'll find either a dirty/loose/corroded connection or you may actually have a damaged wire, but that's fairly rare.

                More stuff to check....
                Thank you very much, Steve!

                A few questions:

                - What is the best way to clean the contacts in the connectors? Contact cleaner and Q-Tips?

                - How to clean the "female" connectors? The contacts are not easily accessible.

                - To which parts of the main switch should I apply dielectric grease? I don't want to create a "grease film insulation".

                Can't wait to figure out what the cause for the blackout was!
                Armin
                2018 Suzuki DR650, no XS1100 right now.

                Comment


                • #23
                  Originally posted by QTreiber View Post
                  Thank you very much, Steve!

                  A few questions:

                  - What is the best way to clean the contacts in the connectors? Contact cleaner and Q-Tips?

                  - How to clean the "female" connectors? The contacts are not easily accessible.

                  - To which parts of the main switch should I apply dielectric grease? I don't want to create a "grease film insulation".

                  Can't wait to figure out what the cause for the blackout was!
                  Armin
                  Any good quality contact cleaner will do the job. As for the dielectric grease, the contacts will press through and make contact with the other side of the switch through the grease just fine. The area you DO want to be careful on is in the push together connectors, as those you can make so they won't connect if you put too much grease in there. It's really the back and edges of the connectors that you want to coat, as the actual connections should be mostly dry, but you want to keep air out of the connector by putting grease in the back of the connector and around the edges so that it's pretty much sealed once you put it together.
                  Cy

                  1980 XS1100G (Brutus) w/81H Engine
                  Duplicolor Mirage Paint Job (Purple/Green)
                  Vetter Windjammer IV
                  Vetter hard bags & Trunk
                  OEM Luggage Rack
                  Jardine Spaghetti 4-2 exhaust system
                  Spade Fuse Box
                  Turn Signal Auto Cancel Mod
                  750 FD Mod
                  TC Spin on Oil Filter Adapter (temp removed)
                  XJ1100 Front Footpegs
                  XJ1100 Shocks

                  I was always taught to respect my elders, but it keeps getting harder to find one.

                  Comment


                  • #24
                    (Main?) culprit found

                    After actually getting a new main switch, cleaning electrical connectors, checking conductivity I did what I should have done sooner.... I got a battery load tester (on sale at Harbor Freight for $19.99; item 90636) and tested the battery after charging (or trying to charge) it for 72 hours on a Battery Tender.

                    The battery load tester clearly indicated that the battery was bad. I double-checked with a 5 Watt bulb and it barely glowed.

                    Lesson learned: start with the basics! I could have done the bulb test even before I got the battery load tester.

                    BTW, the (sealed) battery (Power Sonic brand) was 3.5 years old, always made a very powerful impression. Even after it failed it had 12.8 V, which gave me a false sense of security.

                    The good side-effect of doing things in the wrong order is that I was forced to take a close look at the wiring; opening the headlight bucket felt like opening a can of worms.

                    I discovered slight corrosion and damaged insulation on some wires and I am in the process of fixing things.

                    Will install a new battery next week and hope the bike fires right up!

                    Thanks again for your help!

                    Armin
                    2018 Suzuki DR650, no XS1100 right now.

                    Comment

                    Working...
                    X