Well first, the reason for doing this. Looking at a stock airbox it's obvious that intake air is restricted as there's only a bit over 2 sq-in area in the stock 'snorkel'. Drilling the lower box doesn't seem to have much effect in terms of performance either. Installing pods doesn't offer a meaningful gain from what I can gather from those who have done that (other than making getting the carbs off easier); I think the loss of the OEM velocity stacks with pods may offset any gain because of 'turbulent' air (IMHO).
Looking inside a stock air box, there's sure a lot of 'stuff'. You've got the velocity stacks, but with all the internal brackets/filter/hardware, the air has to dodge around all that to get to the inlets. So I decided to gut the air box, converting it to a open plenum, and use a flat panel filter in the bottom; I picked up a spare air box with this in mind. This is a bit ambitious in terms of time to build, but is still something that can be done with hand tools. So, here it is...
[IMG]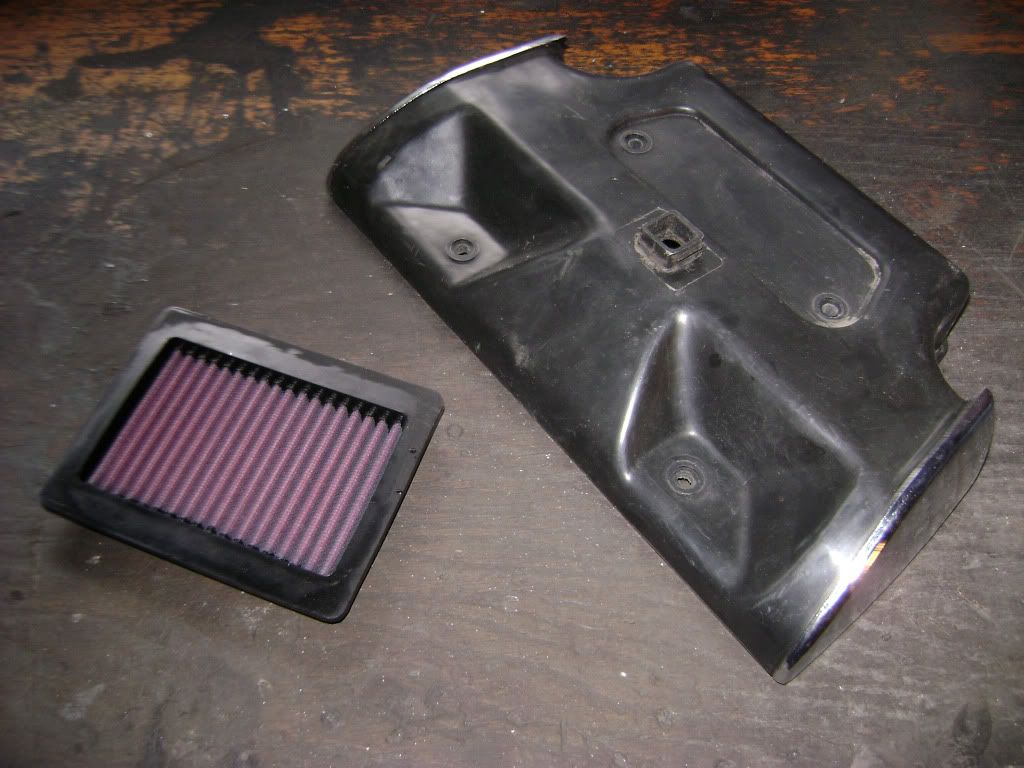 [/IMG]
This is the filter I choose. Selected on size, it's a YA-1602 K&N that just so happens to fit a '02-09 Yamaha XV1700 Road Star. Actual filter area is 4.375 x 2.75, for a total of 12 sq in. One reason I picked this one is it's not as 'thick' as some of the other choices. And before anybody points out that this is smaller than the factory filter, remember: you're currently sucking air through an opening only slightly larger than 2 sq in. This is nearly a 600% increase...
[IMG]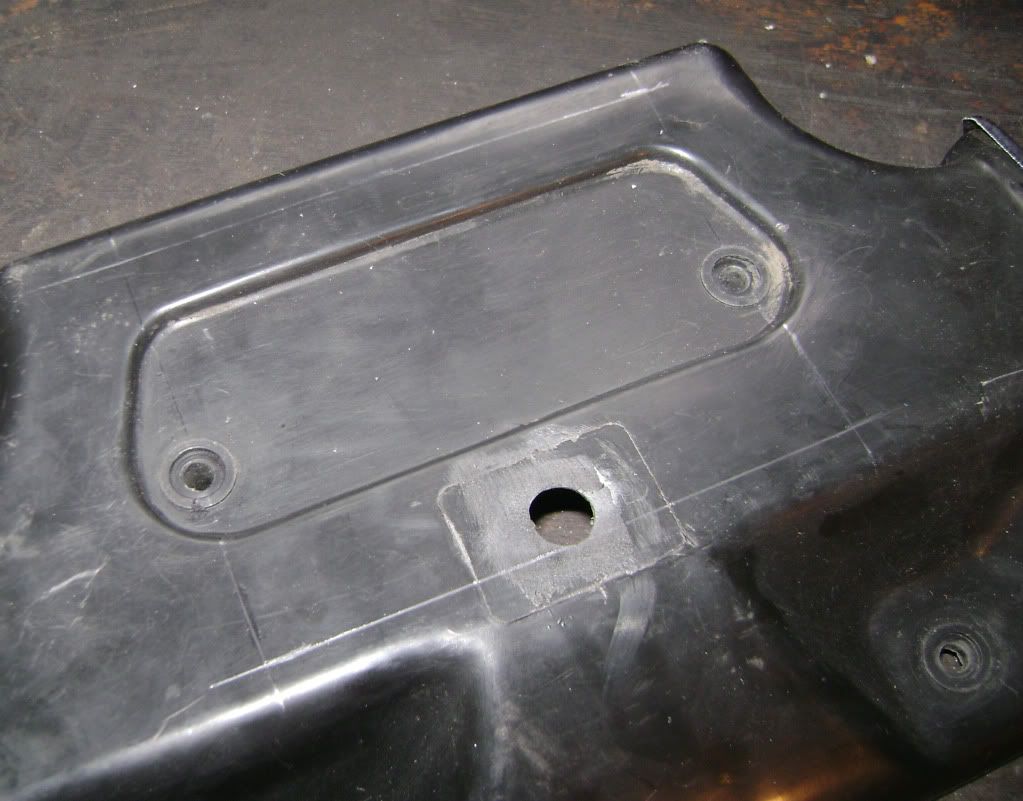 [/IMG]
Here's the hole laid out; size is 4.875" x 3.875". Can't go much bigger...
[IMG]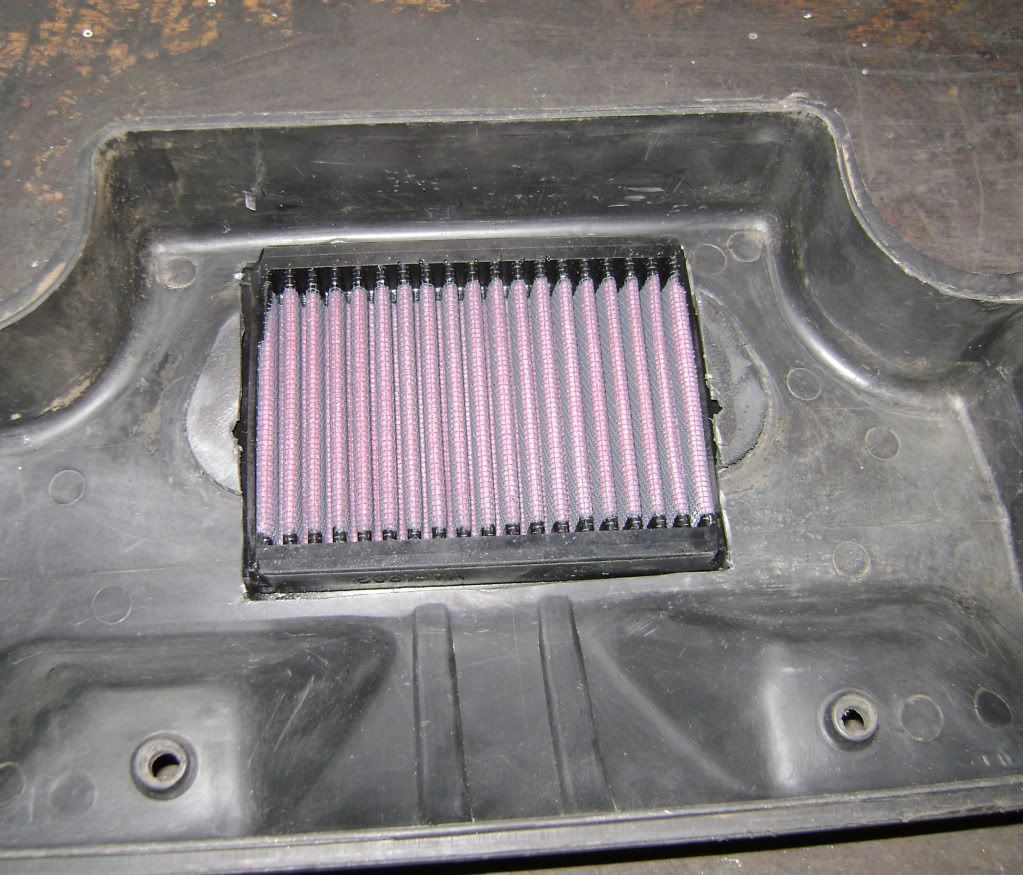 [/IMG]
Ok, it fits... now to make the attaching hardware. The bottom of the stock box isn't all that flat (plus having part of the original filter recess under the filter), so I need to make a flange for the new filter.
[IMG]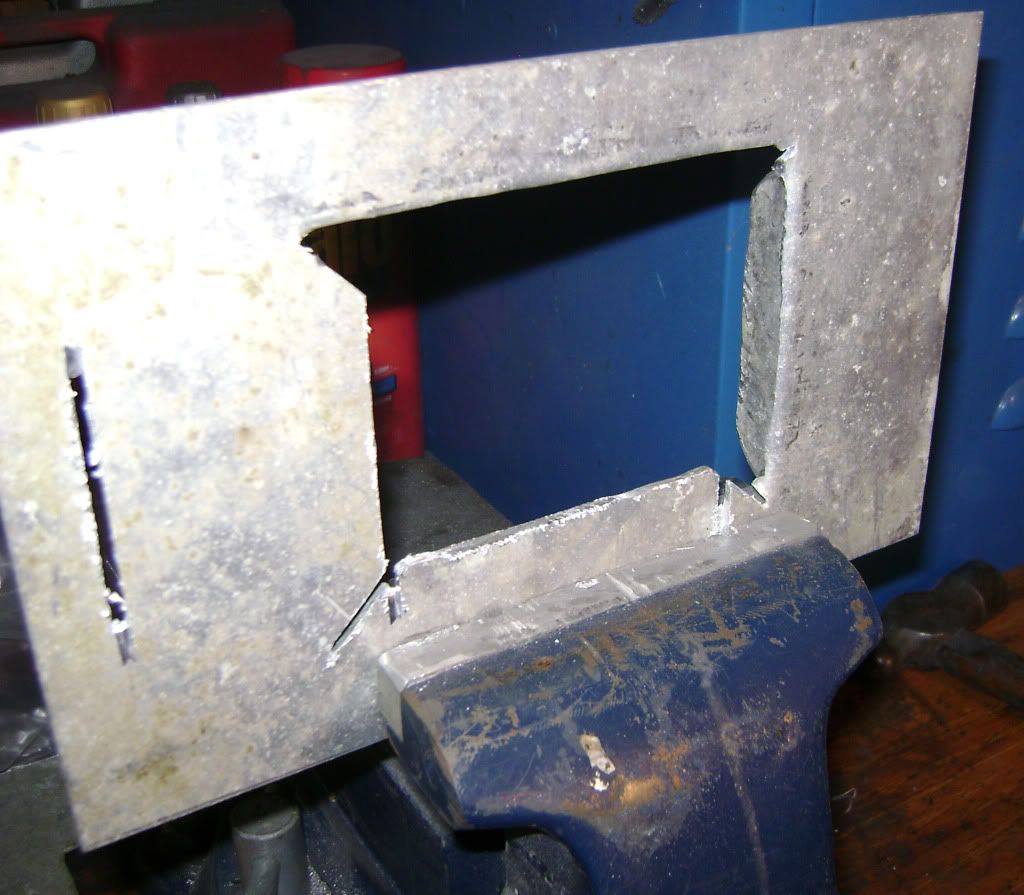 [/IMG]
I'm making the filter mount out of .100" aluminum. I'm bending flanges on this to prevent flex. Clamp it in the vice and beat it over, the piece is oversize so I can get the bends on all sides....
[IMG]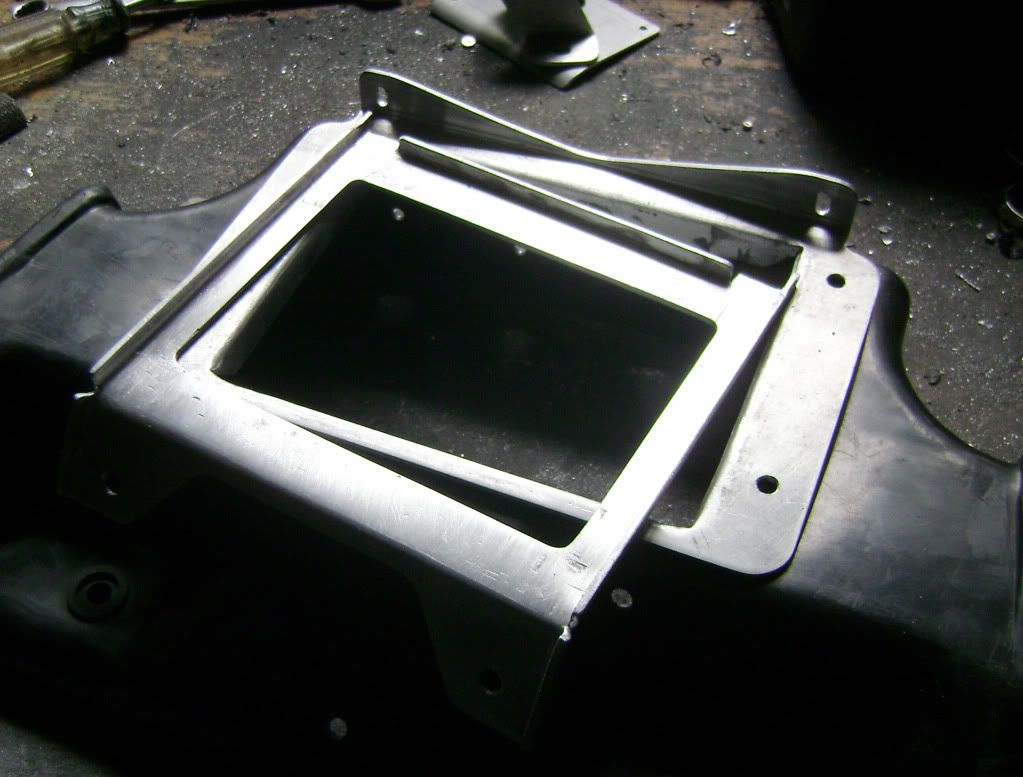 [/IMG]
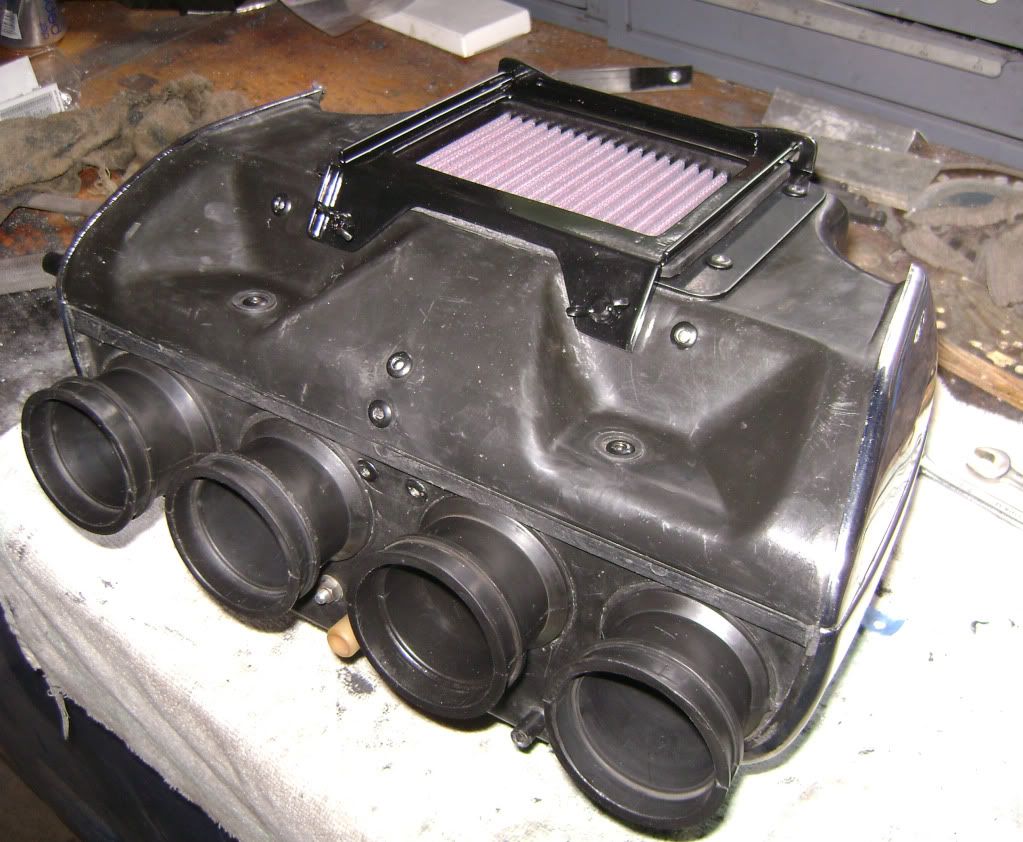
Finished flange and retainer. I designed this so it can be serviced with the airbox in place. The two small holes at the back accept 'pins' I left on the retainer; slip the filter in, engage the pins, then 'lever' the retainer up to seal the filter. I'll use a couple of wingbolts to hold it in place.
[IMG]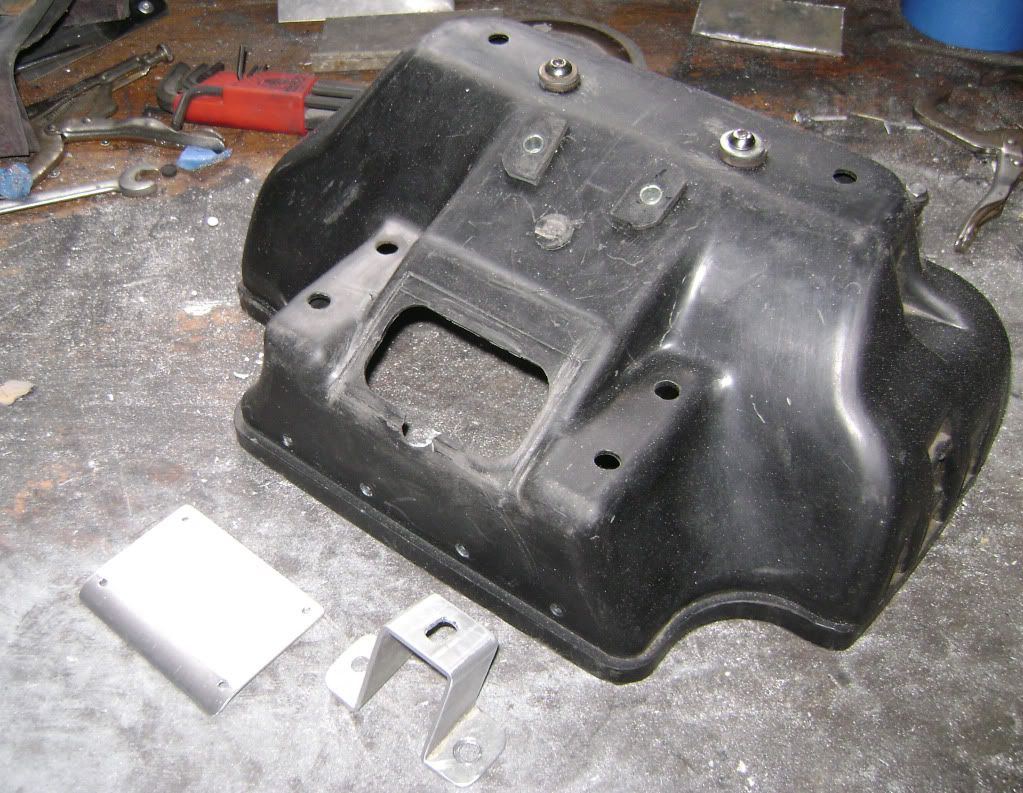 [/IMG]
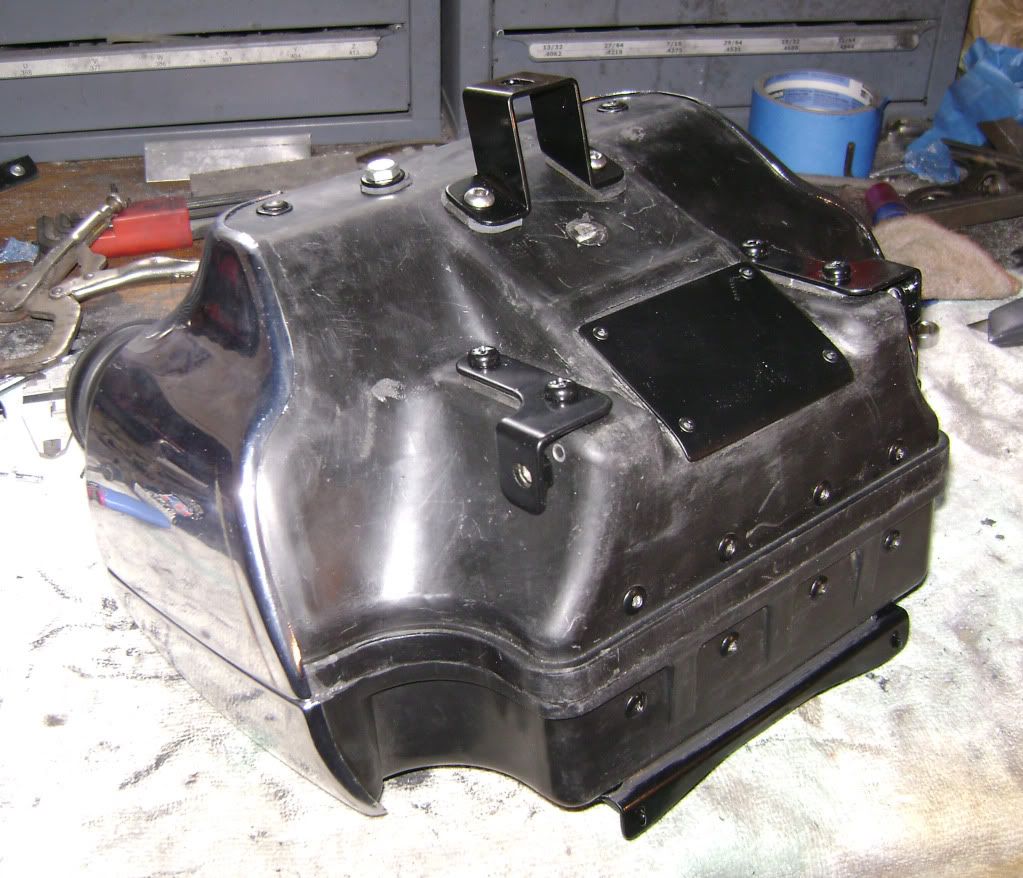
The filler piece for the snorkel hole and the new top mount (I was missing the stock one). I designed this so it could be removed/installed from outside the box, and moved it back for a more direct support.
.... continued in part 2
Looking inside a stock air box, there's sure a lot of 'stuff'. You've got the velocity stacks, but with all the internal brackets/filter/hardware, the air has to dodge around all that to get to the inlets. So I decided to gut the air box, converting it to a open plenum, and use a flat panel filter in the bottom; I picked up a spare air box with this in mind. This is a bit ambitious in terms of time to build, but is still something that can be done with hand tools. So, here it is...
[IMG]
 [/IMG]
This is the filter I choose. Selected on size, it's a YA-1602 K&N that just so happens to fit a '02-09 Yamaha XV1700 Road Star. Actual filter area is 4.375 x 2.75, for a total of 12 sq in. One reason I picked this one is it's not as 'thick' as some of the other choices. And before anybody points out that this is smaller than the factory filter, remember: you're currently sucking air through an opening only slightly larger than 2 sq in. This is nearly a 600% increase...
[IMG]
 [/IMG]
Here's the hole laid out; size is 4.875" x 3.875". Can't go much bigger...
[IMG]
 [/IMG]
Ok, it fits... now to make the attaching hardware. The bottom of the stock box isn't all that flat (plus having part of the original filter recess under the filter), so I need to make a flange for the new filter.
[IMG]
 [/IMG]
I'm making the filter mount out of .100" aluminum. I'm bending flanges on this to prevent flex. Clamp it in the vice and beat it over, the piece is oversize so I can get the bends on all sides....
[IMG]
 [/IMG]
Finished flange and retainer. I designed this so it can be serviced with the airbox in place. The two small holes at the back accept 'pins' I left on the retainer; slip the filter in, engage the pins, then 'lever' the retainer up to seal the filter. I'll use a couple of wingbolts to hold it in place.
[IMG]
 [/IMG]
The filler piece for the snorkel hole and the new top mount (I was missing the stock one). I designed this so it could be removed/installed from outside the box, and moved it back for a more direct support.
.... continued in part 2
 [/IMG]
 [/IMG]
 [/IMG]
 [/IMG]
 [/IMG]
Comment