 Tweet
Tweet
Several people on this forum have claimed to have successfully rebuilt their starter solenoid. Mine was locked up so I had nothing to lose if I tried and failed. Actually it worked. Took me about two hours and saved me $45 plus shipping plus about a week to get the part.
Here is how I did it.
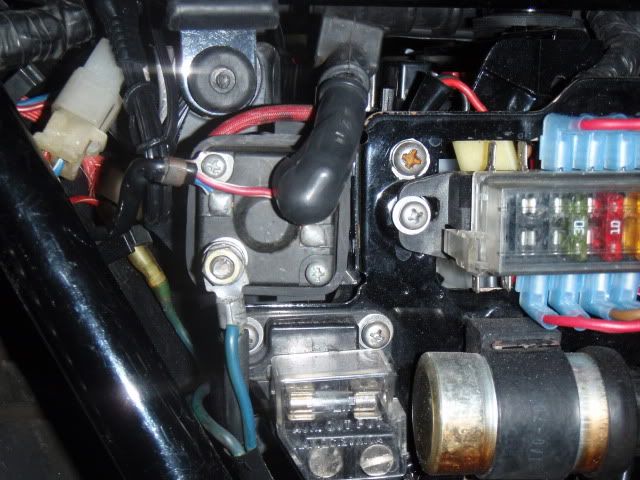
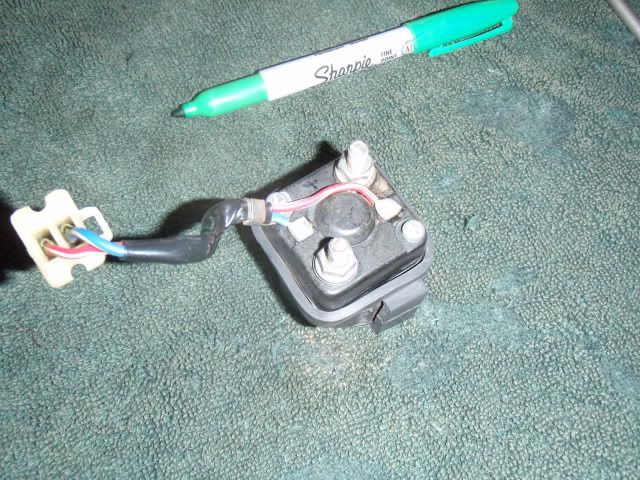
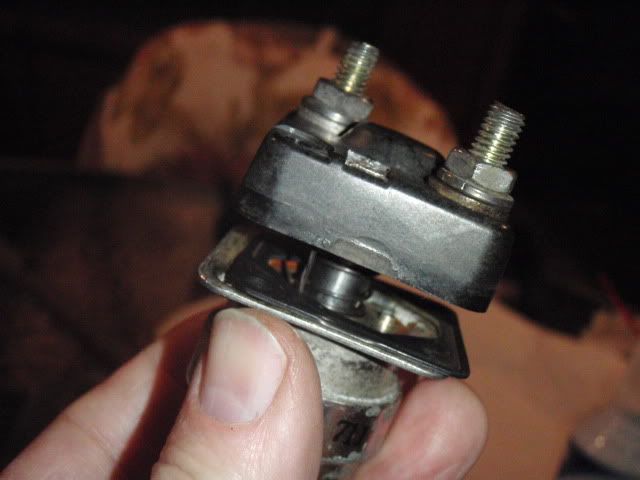
You start here. The solenoid is mounted behind the right side cover. Unbolt the negative ground cable, then unbolt the battery side and starter side cables. Disconnect the plastic two wire connector and slide the solenoid off the mounting brackets.
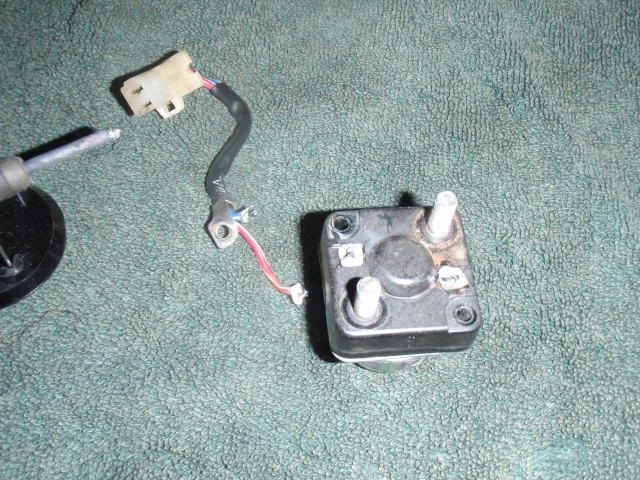
Next take a marker and mark the top side of the black plastic casing and the metal casing. You will want to know these reference marks for reassembly.
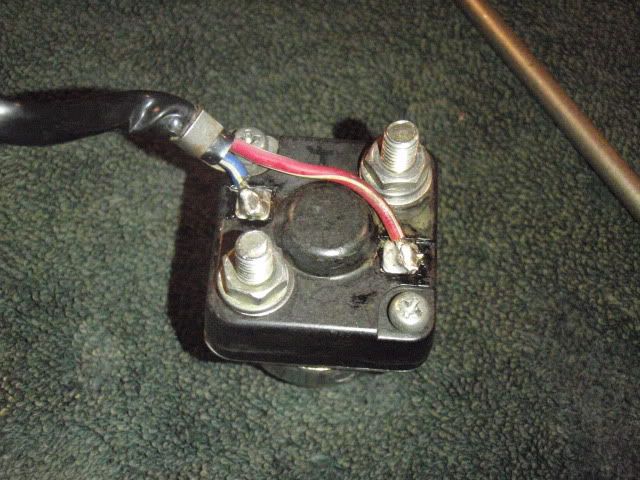
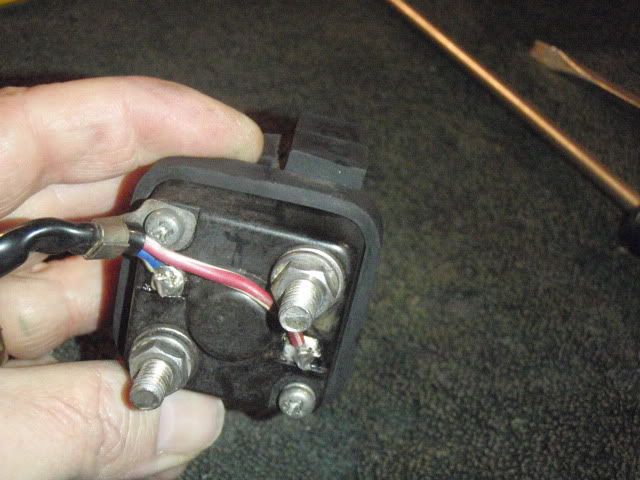
Remove the rubber mount and then remove the blue/white and red/white wires. Note the blue/white wire is the one in the top left corner when held with the top side up.
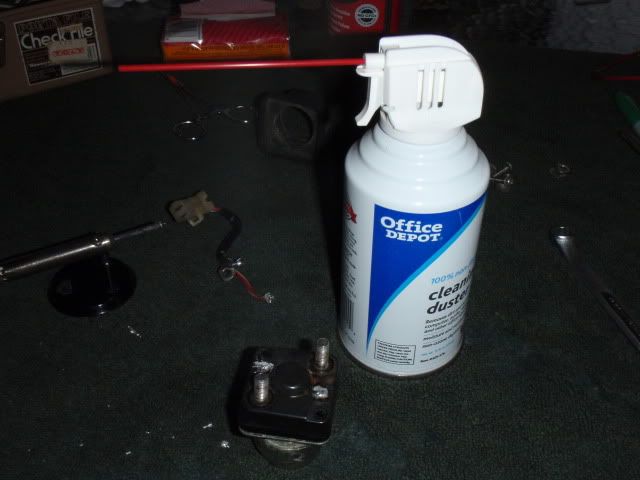
In order to get the solder removed, I used a non-flammable air can.

Get the solder hot then at the same time shoot it with the air. Be careful which way you point the air or you might blow it on you. As you can see it blows it right off.
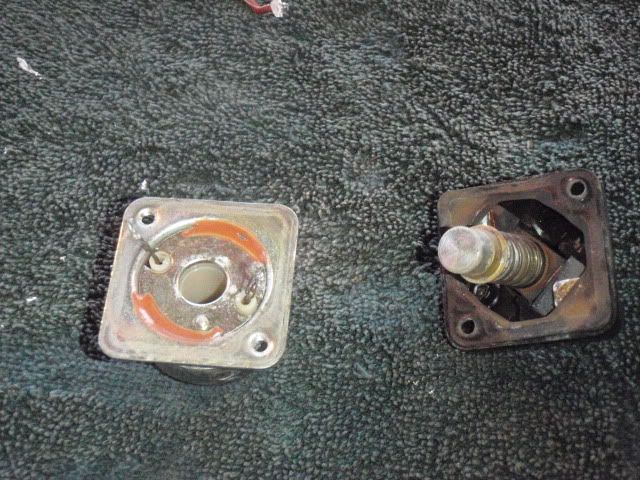
Straighten the wires leading to the coil inside and carefully separate the black plastic piece from the metal coil housing. There is a rubber seal between the two. That is what you want to be careful not to tear during the step.
The left half in this picture is nothing more than the coil that activates the plunger and the right side shows the contacts. I didn't open up the coil because it didn't have any signs of damage. I measured 3.9 ohms resistance through the coil. I also put my ohm meter on one wire and touched the case with the other lead. If there had been a short in the coil, I would have got a reading on my meter. No reading means no short. The plastic shield inside the coil showed no signs of damage. If you have any of these conditions you will want to explore further. However, damage to the coil probably means you have to give the solenoid a proper burial.
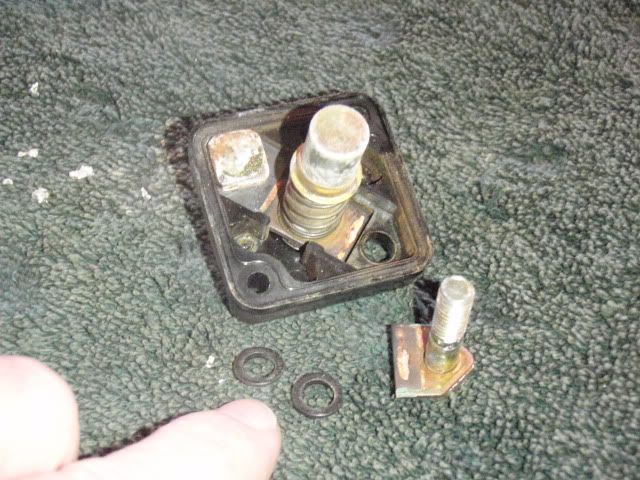
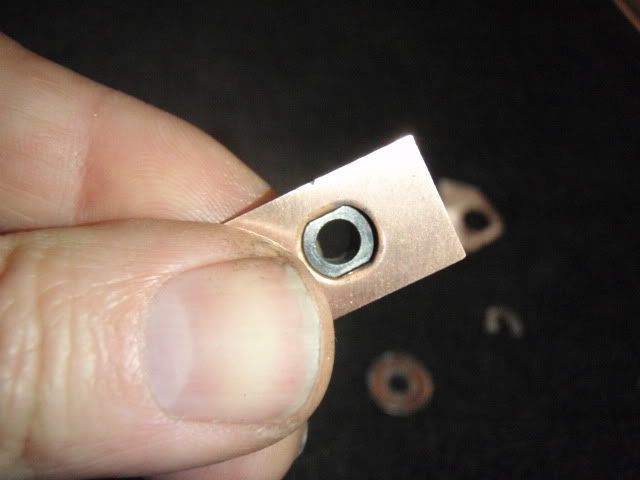
When disassembling the contacts, take note of these two plastic washers. They reside behind the large cable bolts on the outside of the black plastic case.
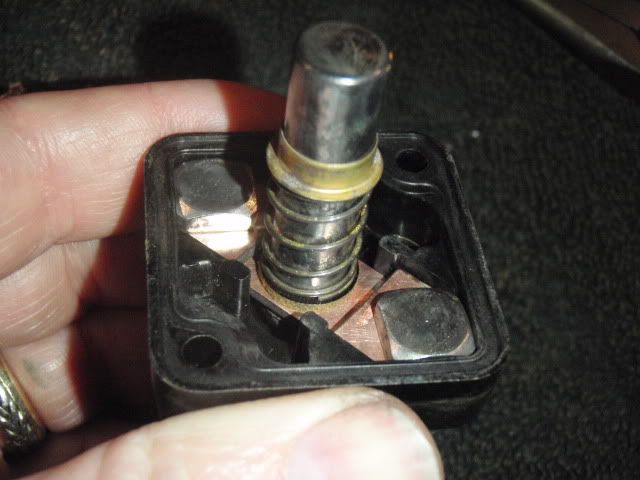
As you can see here, the damage to my solenoid is the pitted contacts and corroded plunger.

I started to simply refurbish the pitted surface with sand paper. In this picture I used some 120 grit emery cloth, but found that was too abrasive. Those contacts are made of soft copper, so I recommend 600 grit or finer.
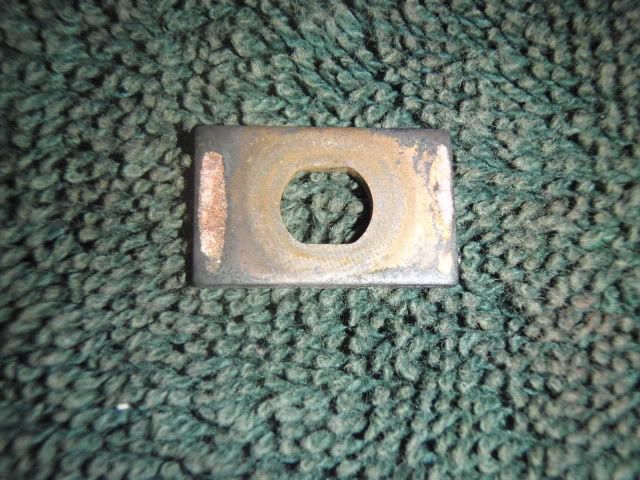
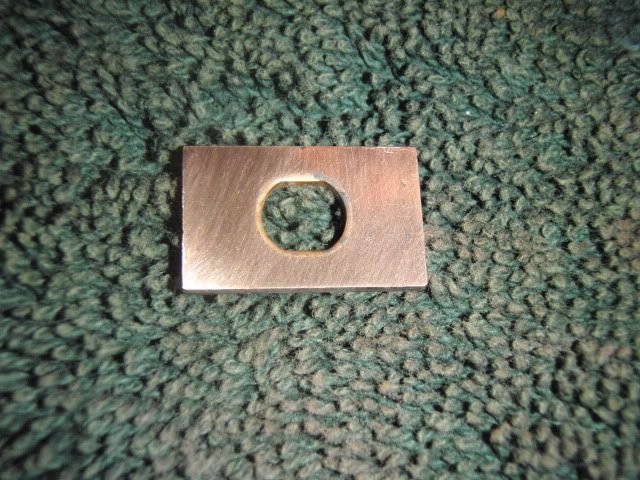
What I found was the pitting was really too deep to try and sand out. So I simply flipped both bolt contacts over and used that side. No pits to worry about and way easier to clean up.
Same deal with the plunger contact. Back side is just like the front side except for those deep pits.

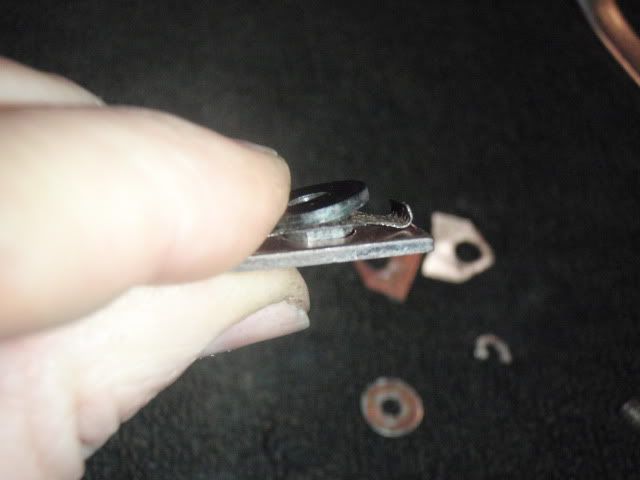
The next step is to refurbish the plunger. The clip on the end holds all the pieces together.
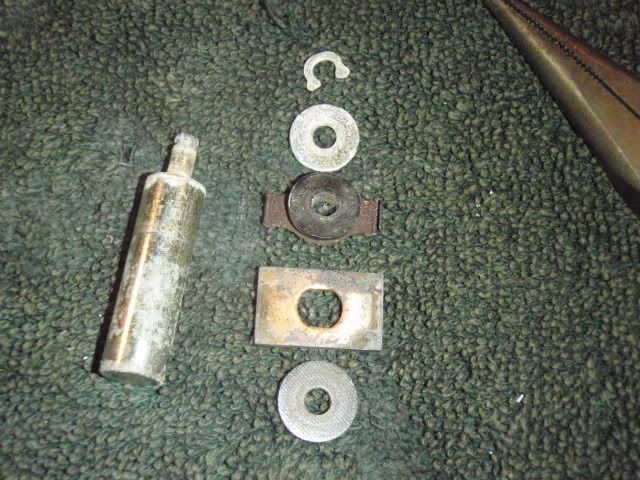
Here is what they look like in sequence. Take note of which piece goes where and which way that sping washer is turned.
You can see that the plunger contact is deeply pitted in this picture.
Flip it over and clean it up with sandpaper. That's your new contact side.
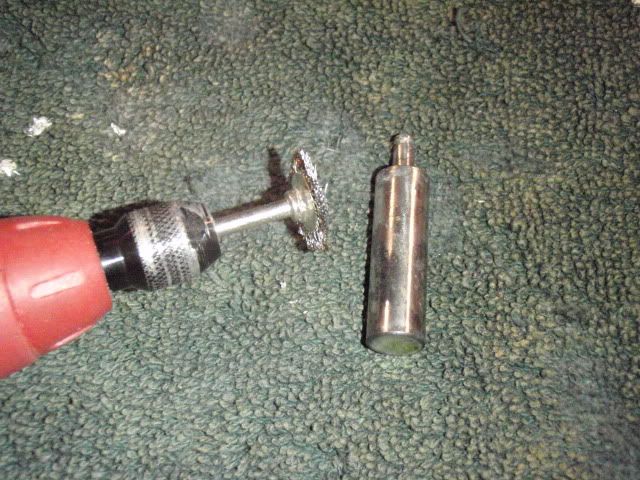
I used a dremel tool to clean up my plunger. The corrosion was a little too strong for a plastic wheel so I used a steel wheel. I also used the steel wheel on my washers, spring washer and other metal parts needing attention.
To reassemble the plunger, start with the contact plate, spring washer and plastic washer. Note which way the spring washer is mounted.
Also note the two flat sides of the center hole on all three pieces. They have to go back together with the flat sides matched up. Pay attention to which way you want that contact plate to face. The good side needs to be facing up when installed.
Here is what you have once the clip is in place. The clip is not a spring clip, but rather a squeeze clip. You have to use pliers to squeeze it back on, but don't get macho with it or you might break the ends.
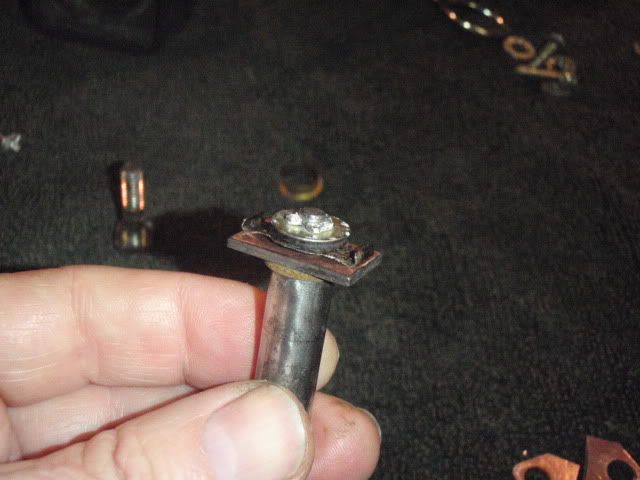
After cleaning the black plastic housing, install the plunger like this. Note the good side of the contact plate is facing up.
Now install the bolt contacts with the good side facing the plunger contact. The spring and spring retainer can be installed now or after you have secured the bolts in place.
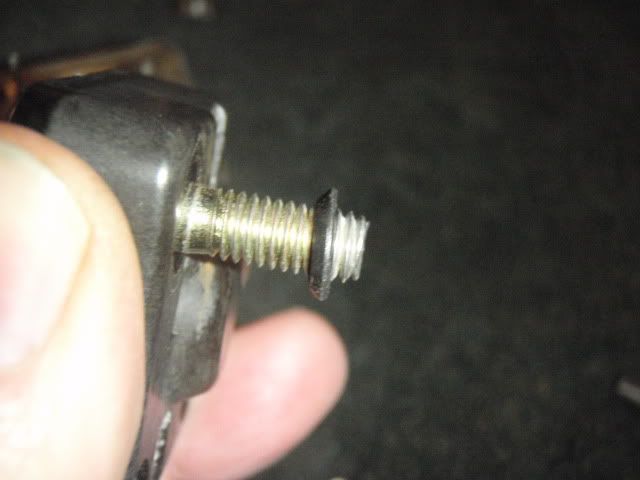
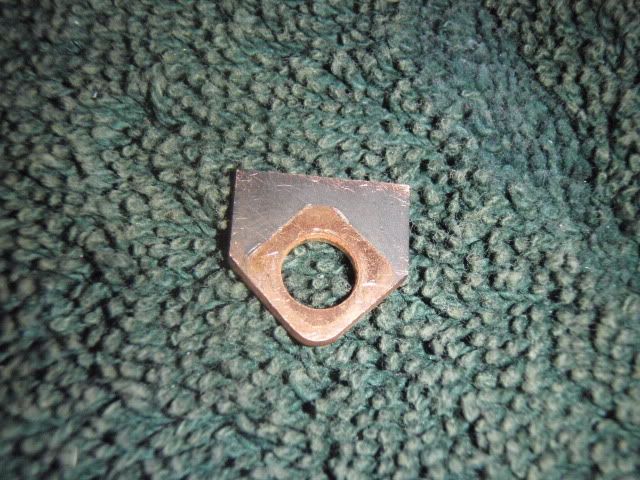
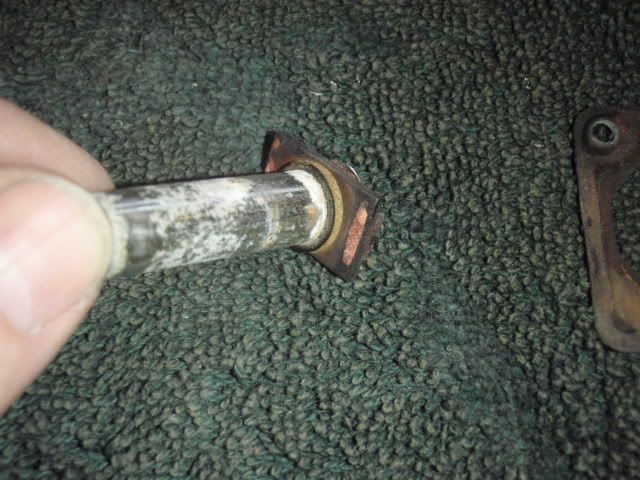
When you install the bolts, notice the plastic washers are beveled. The beveled side goes against the black plastic housing.
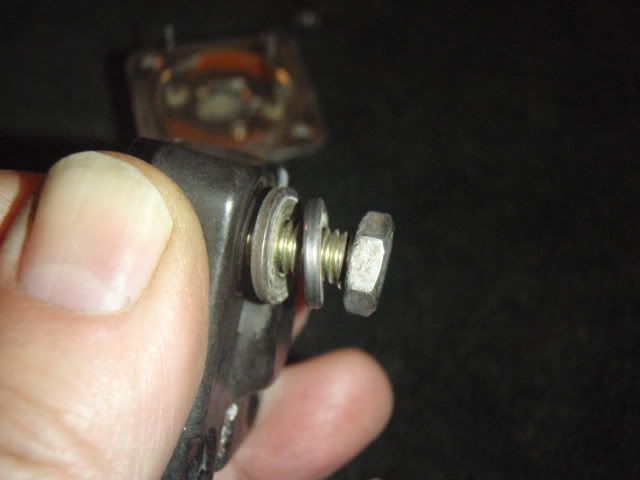
Then add a flat washer, lock washer and nut. Tighten them snuggly, but no need to get macho here either.
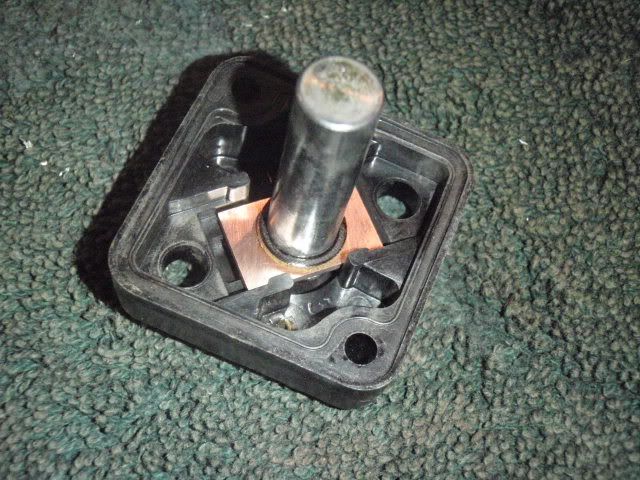
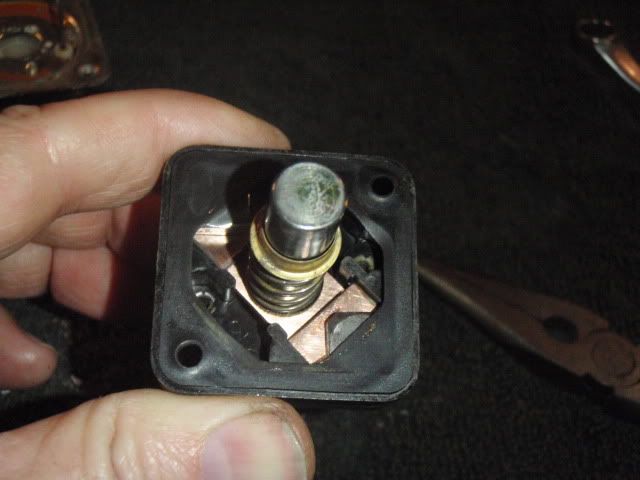
This is what it looks like once bolted up.
Put the rubber gasket in place.
Probably the trickiest part of this rebuild is threading the coil leads back through the holes. I didn't have that much trouble, but you have to go slow and be patient.
Start by straightening out the leads as much as possible. Orient the coil and contact components so that the top sides match. Then go somewhere with good lighting. Look between the top and bottom pieces. You should be barely able to see the holes. Work the leads through them. Once there, place a mounting screw in one hole to hold it.
Bend the coil wires to one side and mount the blue and red connector wires with the mounting screw. That will help hold them in place to make soldering easier.
Now you slide the rubber mount on the metal case. Notice the mounting slots are closer to the right side when holding the solenoid with the top side up.
That's it. Remount the solenoid on your bike. Be sure to reverse the cable process by connecting the starter and battery cables to the solenoid before connecting the negative cable to the battery. There is less chance of creating a spark that way.
Here is how I did it.
You start here. The solenoid is mounted behind the right side cover. Unbolt the negative ground cable, then unbolt the battery side and starter side cables. Disconnect the plastic two wire connector and slide the solenoid off the mounting brackets.
Next take a marker and mark the top side of the black plastic casing and the metal casing. You will want to know these reference marks for reassembly.
Remove the rubber mount and then remove the blue/white and red/white wires. Note the blue/white wire is the one in the top left corner when held with the top side up.
In order to get the solder removed, I used a non-flammable air can.
Get the solder hot then at the same time shoot it with the air. Be careful which way you point the air or you might blow it on you. As you can see it blows it right off.
Straighten the wires leading to the coil inside and carefully separate the black plastic piece from the metal coil housing. There is a rubber seal between the two. That is what you want to be careful not to tear during the step.
The left half in this picture is nothing more than the coil that activates the plunger and the right side shows the contacts. I didn't open up the coil because it didn't have any signs of damage. I measured 3.9 ohms resistance through the coil. I also put my ohm meter on one wire and touched the case with the other lead. If there had been a short in the coil, I would have got a reading on my meter. No reading means no short. The plastic shield inside the coil showed no signs of damage. If you have any of these conditions you will want to explore further. However, damage to the coil probably means you have to give the solenoid a proper burial.
When disassembling the contacts, take note of these two plastic washers. They reside behind the large cable bolts on the outside of the black plastic case.
As you can see here, the damage to my solenoid is the pitted contacts and corroded plunger.
I started to simply refurbish the pitted surface with sand paper. In this picture I used some 120 grit emery cloth, but found that was too abrasive. Those contacts are made of soft copper, so I recommend 600 grit or finer.
What I found was the pitting was really too deep to try and sand out. So I simply flipped both bolt contacts over and used that side. No pits to worry about and way easier to clean up.
Same deal with the plunger contact. Back side is just like the front side except for those deep pits.
The next step is to refurbish the plunger. The clip on the end holds all the pieces together.
Here is what they look like in sequence. Take note of which piece goes where and which way that sping washer is turned.
You can see that the plunger contact is deeply pitted in this picture.
Flip it over and clean it up with sandpaper. That's your new contact side.
I used a dremel tool to clean up my plunger. The corrosion was a little too strong for a plastic wheel so I used a steel wheel. I also used the steel wheel on my washers, spring washer and other metal parts needing attention.
To reassemble the plunger, start with the contact plate, spring washer and plastic washer. Note which way the spring washer is mounted.
Also note the two flat sides of the center hole on all three pieces. They have to go back together with the flat sides matched up. Pay attention to which way you want that contact plate to face. The good side needs to be facing up when installed.
Here is what you have once the clip is in place. The clip is not a spring clip, but rather a squeeze clip. You have to use pliers to squeeze it back on, but don't get macho with it or you might break the ends.
After cleaning the black plastic housing, install the plunger like this. Note the good side of the contact plate is facing up.
Now install the bolt contacts with the good side facing the plunger contact. The spring and spring retainer can be installed now or after you have secured the bolts in place.
When you install the bolts, notice the plastic washers are beveled. The beveled side goes against the black plastic housing.
Then add a flat washer, lock washer and nut. Tighten them snuggly, but no need to get macho here either.
This is what it looks like once bolted up.
Put the rubber gasket in place.
Probably the trickiest part of this rebuild is threading the coil leads back through the holes. I didn't have that much trouble, but you have to go slow and be patient.
Start by straightening out the leads as much as possible. Orient the coil and contact components so that the top sides match. Then go somewhere with good lighting. Look between the top and bottom pieces. You should be barely able to see the holes. Work the leads through them. Once there, place a mounting screw in one hole to hold it.
Bend the coil wires to one side and mount the blue and red connector wires with the mounting screw. That will help hold them in place to make soldering easier.
Now you slide the rubber mount on the metal case. Notice the mounting slots are closer to the right side when holding the solenoid with the top side up.
That's it. Remount the solenoid on your bike. Be sure to reverse the cable process by connecting the starter and battery cables to the solenoid before connecting the negative cable to the battery. There is less chance of creating a spark that way.


 CZ
CZ
Comment