 Tweet
Tweet
Petcock Repair for Specials
Do not recall seeing this posted before, and needed to make this repair. Seen a few members asking about it lately, so I decided to again post my process for posterity and or your entertainment and mockery
 It is really simple and easy, but just to ease the tension of the unknown for some of you, here it is.
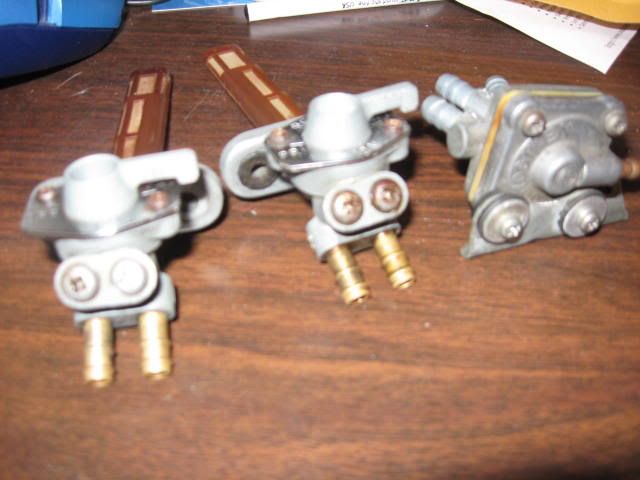
I ordered my repair kits form Georgefix on ebay. He has been a great resource for seals and kits for the XS1100 in my experience. The kit for the special model comes with the parts to repair both petcocks and the vacuum valve or “Octy”. I actually eliminated the Octy on Thunderstruck when I first got her due to it not operating correctly and I would rather not mess with repairing a third safety in my view. But, since the kit came with the parts, I went ahead and repaired it. BTW, the two large o-rings in the kit are not used. Also note that the special model petcocks have four settings, on (down) Reserve (up) Prime ( toward rear of the bike) and OFF (toward fornt of the bike). Also note, each petcock has a letter L or R to indicate which side of the bike it goes on. In stock position, the front outlet nozzle is the Prime outlet and the rear is the On and or Reserve outlet.

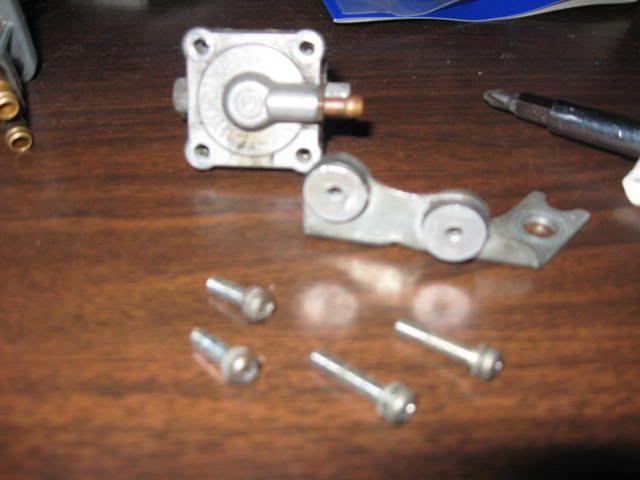
I started with the petcock. First thing is to open it up by removing the two small screws on the face plate. This will let you remove the face plate and the spring that keeps pressure on the seals. You can see here the parts laid out after removal.
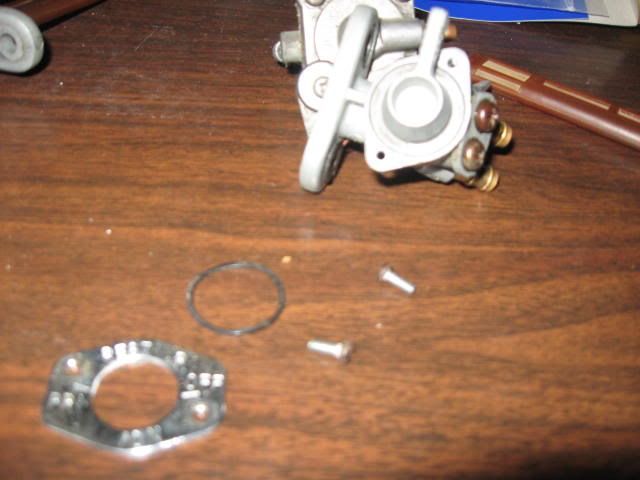
Next remove the operating part of the valve. Just grab the handle and twist it as you pull it out. It has a rubber o-ring in the edge for the seal.
Next just pull the black seal disc out of the valve, it’s the piece with four circle cutouts in it and it just peals out. You will want to clean up the valve after removing these seals.
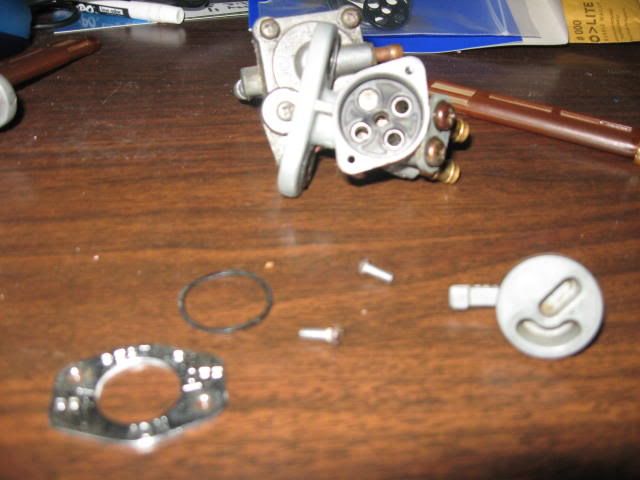
From here, just put the new seal in the valve and replace the o-ring with the ones in the kit. Then reassemble. You will have left the old o-ring and seal.
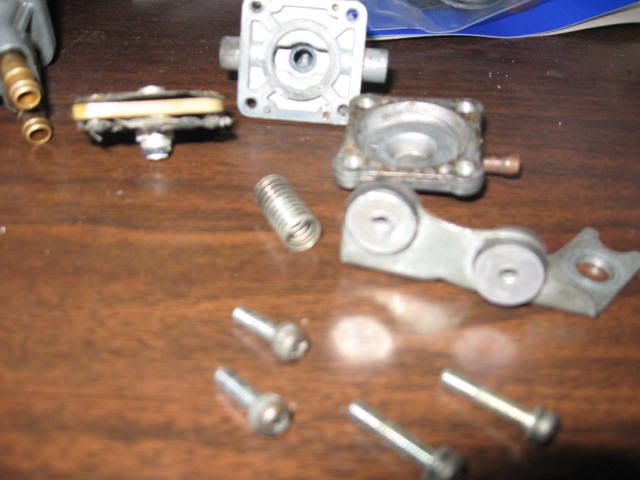
Next is the octy, a little more complicated, but still pretty easy. First is to remove the four screws that hold it together.
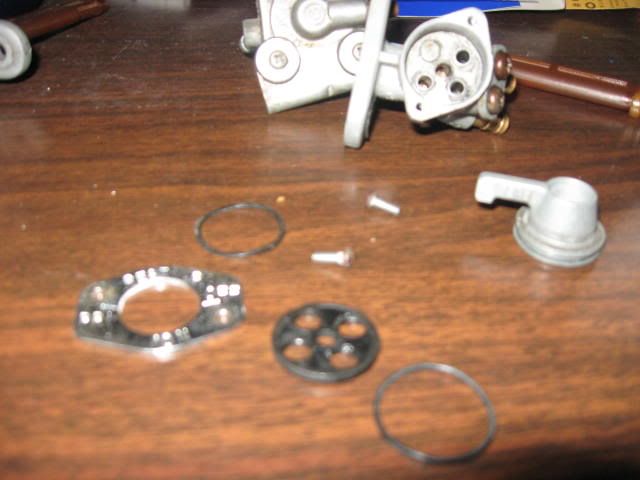
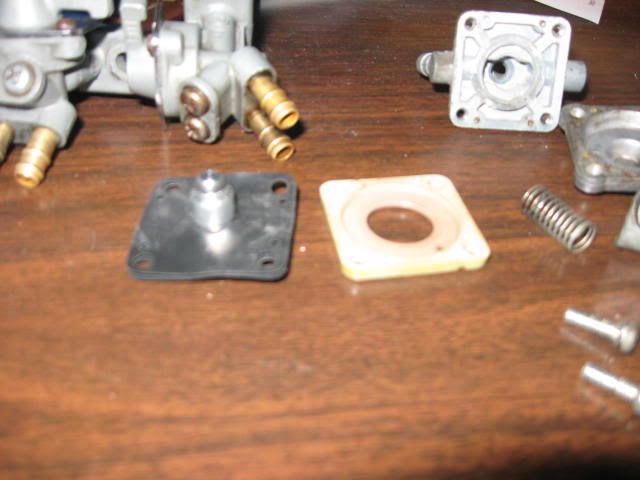
Then remove the front plate. Under it is a spring. You can also see the old octy valve. Note the small o-ring on the valve that is down against the table top. That is what stops gas flowing from the petcocks to the carburators, the spring pushes it back into the opening where fuel comes in from the two petcocks. You can see the openings in the piece in the back. With the Octy in use, you could use only one petcock to feed both carbs. Both petcocks feed lines meet here and can feed either/both carbs.
At this time I also made sure the vacuum path was clear by using my mityvac to suck air out through the vacuum connection. Use what ever method serves you best to test this. It does have a one way valve, so blowing into it will move no air.
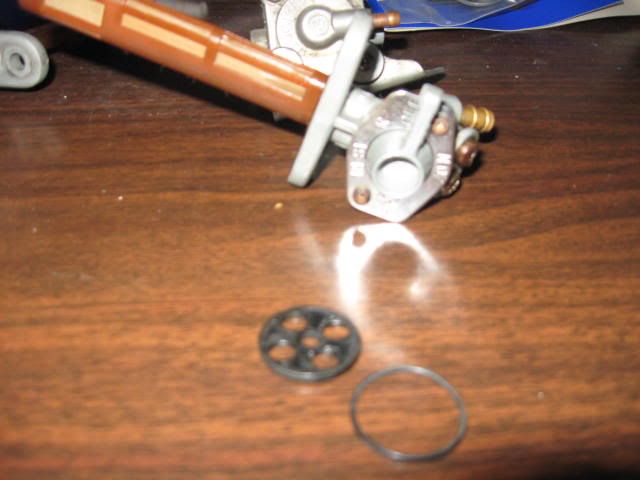
Next you will need to push that smaller valve piece and its seal through the hole in the plastic middle of the valve. You end up with the pieces shown. The repair kit comes with a new valve/seal. Everything else is reused.
Next push the new seal and valve through so one flap is on each side of the plastic piece. Be sure to pay attention to the recess in the plastic piece that the vacuum side disc goes into or you will need to pull it back apart and do this step again, the hardest part of the entire job.
Also note, the plastic stubs that the holes in the rubber seals go over and that mate with holes in both sides of the metal valve bodies. From here you just put the spring back on the large disc side of the assembly and sandwich it in between the metal valve bodies, then put the screws back in to hold it together.
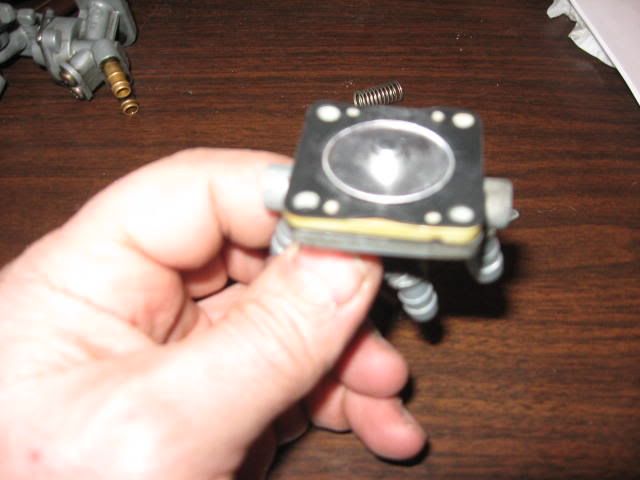
Newly rebuilt petcocks. BTW, the other larger screws are just drains. If your as detailed and obsessive as me, you can pull them out and run a Q-tip soaked in carb cleaner or pipe cleaner, brush, or whatever instrument you choose to clean that out as well. If those drains are leaking, you can cut new gaskets for them from a gasket sheet.
Hope this helps someone else. If not, well, it gave me another post.
Do not recall seeing this posted before, and needed to make this repair. Seen a few members asking about it lately, so I decided to again post my process for posterity and or your entertainment and mockery
It is really simple and easy, but just to ease the tension of the unknown for some of you, here it is.I ordered my repair kits form Georgefix on ebay. He has been a great resource for seals and kits for the XS1100 in my experience. The kit for the special model comes with the parts to repair both petcocks and the vacuum valve or “Octy”. I actually eliminated the Octy on Thunderstruck when I first got her due to it not operating correctly and I would rather not mess with repairing a third safety in my view. But, since the kit came with the parts, I went ahead and repaired it. BTW, the two large o-rings in the kit are not used. Also note that the special model petcocks have four settings, on (down) Reserve (up) Prime ( toward rear of the bike) and OFF (toward fornt of the bike). Also note, each petcock has a letter L or R to indicate which side of the bike it goes on. In stock position, the front outlet nozzle is the Prime outlet and the rear is the On and or Reserve outlet.
I started with the petcock. First thing is to open it up by removing the two small screws on the face plate. This will let you remove the face plate and the spring that keeps pressure on the seals. You can see here the parts laid out after removal.
Next remove the operating part of the valve. Just grab the handle and twist it as you pull it out. It has a rubber o-ring in the edge for the seal.
Next just pull the black seal disc out of the valve, it’s the piece with four circle cutouts in it and it just peals out. You will want to clean up the valve after removing these seals.
From here, just put the new seal in the valve and replace the o-ring with the ones in the kit. Then reassemble. You will have left the old o-ring and seal.
Next is the octy, a little more complicated, but still pretty easy. First is to remove the four screws that hold it together.
Then remove the front plate. Under it is a spring. You can also see the old octy valve. Note the small o-ring on the valve that is down against the table top. That is what stops gas flowing from the petcocks to the carburators, the spring pushes it back into the opening where fuel comes in from the two petcocks. You can see the openings in the piece in the back. With the Octy in use, you could use only one petcock to feed both carbs. Both petcocks feed lines meet here and can feed either/both carbs.
At this time I also made sure the vacuum path was clear by using my mityvac to suck air out through the vacuum connection. Use what ever method serves you best to test this. It does have a one way valve, so blowing into it will move no air.
Next you will need to push that smaller valve piece and its seal through the hole in the plastic middle of the valve. You end up with the pieces shown. The repair kit comes with a new valve/seal. Everything else is reused.
Next push the new seal and valve through so one flap is on each side of the plastic piece. Be sure to pay attention to the recess in the plastic piece that the vacuum side disc goes into or you will need to pull it back apart and do this step again, the hardest part of the entire job.
Also note, the plastic stubs that the holes in the rubber seals go over and that mate with holes in both sides of the metal valve bodies. From here you just put the spring back on the large disc side of the assembly and sandwich it in between the metal valve bodies, then put the screws back in to hold it together.
Newly rebuilt petcocks. BTW, the other larger screws are just drains. If your as detailed and obsessive as me, you can pull them out and run a Q-tip soaked in carb cleaner or pipe cleaner, brush, or whatever instrument you choose to clean that out as well. If those drains are leaking, you can cut new gaskets for them from a gasket sheet.
Hope this helps someone else. If not, well, it gave me another post.


") ). Like Fred indicated, the rubber in those seals is made for petroleum use.
). Like Fred indicated, the rubber in those seals is made for petroleum use. 


Comment