Announcement

Collapse
No announcement yet.

Cam Chain gurus needed

Collapse
X
 
  • Filter
  • Time
  • Show
Clear All
new posts

  • Cam Chain gurus needed

    So I'm installing a cam chain for another member (80 SG) and I'm running into a problem. When I set the cams so the dots are dead on the marks, I end up with the crank either 15 degrees ATDC or 6.5 degrees BTDC (measured with a degree wheel). I did a little figuring, and with 34 teeth on a cam sprocket it comes out to 10.59 degrees for each tooth. Since the crank goes around twice for each rotation of the cams, that gives me a change of 21.58 degrees for each tooth at the crank.

    The new cam chain is from Partsnmore, and it's identical to the one I put in my 79F. On mine the marks lined up perfectly. Before I took the old chain out, I checked the marks, and it was very close on top, but at the crank it was off considerably. I don't remember exactly what the reading was as I was only looking at the timing plate, but if memory serves it was around 15 degrees ATDC (I checked for TDC with a dial indicator and found the T mark on the timing wheel to be pretty darn close). I checked the tensioner, and found that it was within 1/16" of being all the way out with the old chain. I remember looking at it and thinking that, if the chain had stretched it might account for the marks being off at the timing plate.

    So here's my dilemma - where should I set it, with the pointer 15 degrees ATDC, or 6.5 degrees BTDC when the dots are properly aligned? Does anyone know how far a cam chain will actually stretch? Can I use the degree wheel to determine when the cams are in the proper orientation, and will that tell me which tooth the chain needs to be on? I'd like to get it right before I close it up, so as to avoid another trip into it to change a tooth on the chain.
    I think I have a loose screw behind the handlebars.

    '79 XS11 Standard, Jardine 4/1, Dyna DC1-1 Coils, 145 mains, 45 pilots, plastic floats - 25.7mm, XV920 fuel valves, inline fuel filters, speed bleeders, Mikes XS pods, spade-type fuse block, fork brace, progressive fork springs/shocks, manual petcocks, 750 FD, Venture cam chain tensioner, SS brake lines

  • #2
    This sounds like that bike you've been working on with the funky timing problem that was in another thread. I'd find TDC thru the spark plug hole. That should be your true TDC no matter what the timing plate says. Put a mark on the timing plate for TDC, align the dots, set the tensioner, slowly spin the motor with a wrench with all the plugs out. Check for proper alignment and valve/piston interference . Sorry, can't help you with the degree wheel .
    Last edited by bikerphil; 10-16-2009, 02:05 PM.
    2H7 (79) owned since '89
    3H3 owned since '06

    "If it ain't broke, modify it"

    Comment


    • #3
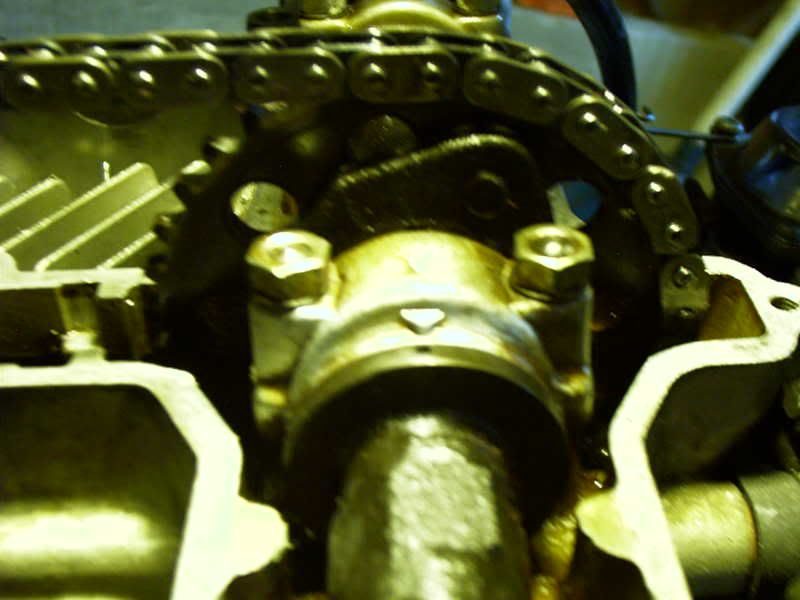
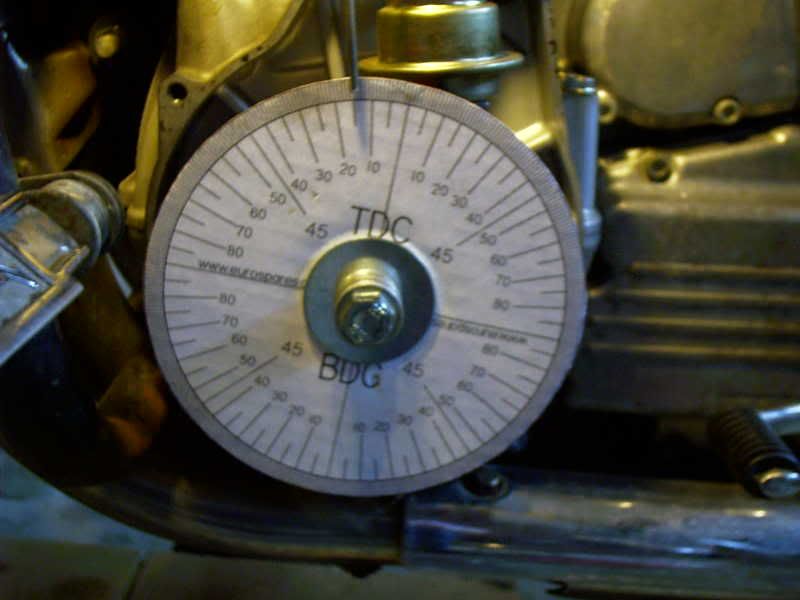
      I thought some pics might be helpful

      Phil - I calibrated the degree wheel with a dial indicator through the #1 spark plug hole, and it's pretty close to dead on. If it's off it's less than a degree. I can rotate the crank 'till the cows come home with no unpleasant sounds from the motor or sticking points.

      Degree Wheel


      Intake cam


      Exhaust cam
      Last edited by dbeardslee; 10-16-2009, 02:06 PM.
      I think I have a loose screw behind the handlebars.

      '79 XS11 Standard, Jardine 4/1, Dyna DC1-1 Coils, 145 mains, 45 pilots, plastic floats - 25.7mm, XV920 fuel valves, inline fuel filters, speed bleeders, Mikes XS pods, spade-type fuse block, fork brace, progressive fork springs/shocks, manual petcocks, 750 FD, Venture cam chain tensioner, SS brake lines

      Comment


      • #4
        Ivan was recently telling me about how he held up two cam gears together, front to back. When he lined up the bolt holes, the teeth didn't match up. They were about a 1/2 tooth off. So that being the case, you could install one backwards and be off half of the 21.58 degrees.. so roughly 10 degrees?

        I would suggest getting them as close to TDC and cams on the dots as possible.

        Just a thought...


        Tod
        Try your hardest to be the kind of person your dog thinks you are.

        You can live to be 100, as long as you give up everything that would make you want to live to be 100!

        Current bikes:
        '06 Suzuki DR650
        *'82 XJ1100 with the 1179 kit. "Mad Maxim"
        '82 XJ1100 Completely stock fixer-upper
        '82 XJ1100 Bagger fixer-upper
        '82 XJ1100 Motor/frame and lots of boxes of parts
        '82 XJ1100 Parts bike
        '81 XS1100 Special
        '81 YZ250
        '80 XS850 Special
        '80 XR100
        *Crashed/Totalled, still own

        Comment


        • #5
          Phil - this is a different bike, but strangely reminiscent of the other bike. On the other one the marks lined up right, but the timing was way advanced when checked with a light. Seems like I'm getting all the interesting ones lately .

          The guy who owns this particular machine has had it since it was new, so however the sprockets are attached to the cams is how they'be been since it rolled off the factory floor. So if I set it at 6.5 degrees BTDC (which is as close as I can get it to TDC), as the chain stetches it should move closer to the TDC mark, right? Isn't there a way to tell by where the valves open compared to the position of the crank when it's right?
          I think I have a loose screw behind the handlebars.

          '79 XS11 Standard, Jardine 4/1, Dyna DC1-1 Coils, 145 mains, 45 pilots, plastic floats - 25.7mm, XV920 fuel valves, inline fuel filters, speed bleeders, Mikes XS pods, spade-type fuse block, fork brace, progressive fork springs/shocks, manual petcocks, 750 FD, Venture cam chain tensioner, SS brake lines

          Comment


          • #6
            Hmmm....This is very interesting, I feel bad to Doug, I drove past about noon today and thought you were not workin on the bike since the garage door was closed. and chose not to bother you.

            I know that valve cover had most likely never been off before since it rolled off the factory line as Doug suggested (we both know the owner). It is a different machine than the one with the goofy timing. On that bike, we found TDC using a screwdriver through #1 plug hole and it matched dang close to the T mark if not dead on it. Cams line up with the T mark and yet the timing light shows the timing off by alot.

            I'll ask the stupid question that comes to mind, like, are you sure your turning the engine the right direction? not that I am certain it would make a difference.

            I also remember that when we looked at the timing with the old chain, we thought the chain was not stretched much as the timing marks all lined up almost perfectly, then we pulled the tensioner and it was almost all the way extended indicating a worn chain. I'll keep scratching my head for you Doug.
            Life is what happens while your planning everything else!

            When your work speaks for itself, don't interrupt.

            81 XS1100 Special - Humpty Dumpty
            80 XS1100 Special - Project Resurrection


            Previously owned
            93 GSX600F
            80 XS1100 Special - Ruby
            81 XS1100 Special
            81 CB750 C
            80 CB750 C
            78 XS750

            Comment


            • #7
              Don - If you recall, the marks lined up on the cams (albeit a tiny bit to the outside of both), but it didn't line up on the 'T' with the old chain. Seems to me like the old one was off about as much as the new one is showing, but I can't remember exactly where the pointer was indicating on the timing plate. I'm thinking it was pointing after top dead center by around 1/2" measured on the edge of the timing plate.
              I think I have a loose screw behind the handlebars.

              '79 XS11 Standard, Jardine 4/1, Dyna DC1-1 Coils, 145 mains, 45 pilots, plastic floats - 25.7mm, XV920 fuel valves, inline fuel filters, speed bleeders, Mikes XS pods, spade-type fuse block, fork brace, progressive fork springs/shocks, manual petcocks, 750 FD, Venture cam chain tensioner, SS brake lines

              Comment


              • #8
                Apparently I do not remember correctly But if it was off of the T I would swear it had to be ATDC or toward the rest of the marks and not before it.
                Life is what happens while your planning everything else!

                When your work speaks for itself, don't interrupt.

                81 XS1100 Special - Humpty Dumpty
                80 XS1100 Special - Project Resurrection


                Previously owned
                93 GSX600F
                80 XS1100 Special - Ruby
                81 XS1100 Special
                81 CB750 C
                80 CB750 C
                78 XS750

                Comment


                • #9
                  Don - Now your getting me confused . ATDC is in the area where there are no marks. If it was in the marked area then it was BTDC. At any rate, that's what I'm having trouble remembering - which side of the mark it was on. Your recollection would support setting it to the 6.5 degree BTDC mark, which is as close as I can get it to TDC. Means I have to break the chain again, but luckily I have an extra master link.
                  I think I have a loose screw behind the handlebars.

                  '79 XS11 Standard, Jardine 4/1, Dyna DC1-1 Coils, 145 mains, 45 pilots, plastic floats - 25.7mm, XV920 fuel valves, inline fuel filters, speed bleeders, Mikes XS pods, spade-type fuse block, fork brace, progressive fork springs/shocks, manual petcocks, 750 FD, Venture cam chain tensioner, SS brake lines

                  Comment


                  • #10
                    Sorry Doug, its been a looonngg week. I've racked up 1200 miles since the 7th and very little sleep involved. Which is why I gave you the pictoral recollection as I knew I was not gonna think the BTDC and ATDC through correctly today.
                    Life is what happens while your planning everything else!

                    When your work speaks for itself, don't interrupt.

                    81 XS1100 Special - Humpty Dumpty
                    80 XS1100 Special - Project Resurrection


                    Previously owned
                    93 GSX600F
                    80 XS1100 Special - Ruby
                    81 XS1100 Special
                    81 CB750 C
                    80 CB750 C
                    78 XS750

                    Comment


                    • #11
                      Being the orginal owner of said bikethe valves have been set many times up to the 50,000 mile mark when Yamaha said they shouldn't need setting anymore..well at least that is what they said back in '80.The bike has never been beat,orginal everything 80k on it now.
                      '80 XS1100 SG
                      Don't let the good times pass you by..grab all you can
                      https://www.youtube.com/watch?v=x_Z4cjUlIo4

                      Comment


                      • #12
                        You should treat this job as if you had removed the cams to do the chain. The manual says ....
                        - Make sure # 1 cylinder is at TDC
                        - Install the cams in their proper positions with the dots aligned with the arrows on the center caps (Don't mix up the cams. Intake on the carb side and exhaust on the front side)
                        - Once the cams are installed rotate the cams SLIGHTLY to get dot and arrows perfectly aligned
                        - Make sure the cam chain is properly engaged with the crankshaft sprocket, lift to remove all slack in the chain and place the cam chain onto the intake cam sprocket while lining up the bolt hole in the sprocket with the hole in the cam shoulder. While keeping all the slack out of the chain adjust the chain on the sprocket as necessary to get the holes lines up as close as you can.
                        - Repeat for the exhaust cam with no slack between the sprockets and while not allowing slack to develop behind the intake sprocket. Place both sprockets onto the cam shoulders.
                        - Rotate the sprocket slightly to line up the holes. This is a very slight adjustment. If not slight repeat the chain hanging part again.
                        - once the bolt hole are lines up install one bolt on each cam sprocket starting with the intake side. you can get the holes to line up on the exhaust side by pushing on the chain through the cam chain tensioner hole. tighten these bolts finger tight only
                        - CONFIRM TDC on your pointer and if good rotate the engine CLOCKWISE to the "C" mark (about 45 degrees).
                        - Install the cam chain tensioner with the tensioner shaft locked in the full back position. Once installed loosen the shaft lock nut and allow the tensioner shaft to apply it full tension to the chain. You will hear the "click". Torque the tensioner shaft and lock nut in place as you would for normal tensioner maintenance.
                        - NOW rotate the engine CLOCKWISE 2 complete revolutions to TDC" and confirm alignment of the arrows and dots.
                        - if all is good rotate the engine CLOCKWISE until the other un-torqued cam sprocket bolts are accessible and torque them
                        - Install the guide and you done.

                        Even if you did not remove the cams you MUST install the chain in this fashion as if the cams were removed or the pointers and dots will not line up because the slack in the chain must be removed at the "C" mark on the first partial rotation of the engine after putting the sprockets on the cam shoulders. If the chain and the teeth are properly engages at the crank shaft this mis-alignment issue will not happen. It goes without saying that the tensioner should be removed but if you can get the shaft locked in the full back position without removing it then that is OK. Also get out your manual and confirm each step as I have short formed it.
                        It is impossible for the engine to "pick up" or "loose" 10 degrees if it is set up properly. That could only happen if it is put together improperly

                        Rob
                        Last edited by 79XS11F; 10-16-2009, 07:25 PM.
                        KEEP THE RUBBER SIDE DOWN

                        1978 XS1100E Modified
                        1978 XS500E
                        1979 XS1100F Restored
                        1980 XS1100 SG
                        1981 Suzuki GS1100
                        1983 Suzuki GS750S Katana
                        1983 Honda CB900 Custom

                        Comment


                        • #13
                          Hey Dbeardslee,

                          I second what Rob has just posted. And you DON'T have to break the chain, just remove the sprockets from the shoulders, and reposition!? The manual also says and I've experienced that the dots don't always line up exactly, but are sometimes off a little, and you have to rotate the cams slightly to get the sprocket holes to line up to be able to put the bolts in.

                          Also, while you have the sprockets back off the cams...oh wait, you'd have to take the cams all the way out to be able to get the sprockets out to put them on top of each other to see how their teeth and bolt holes line up or not, but you don't really want to remove the cams if you don't have to!?

                          To get the sprockets off, you'll need to rotate the engine and cams so that they spin 180 degrees around with the dots on the bottom FIRST to remove the bolts that will be at the bottom and you would not be able to reach them, or get to them without rotating the engine. But after removing them, then when you rotate the engine back around so that the dots are up, then you'll only have the remaining 1 bolt to remove to get the sprockets off to be able to reposition the chain and sprockets.

                          T.C.
                          T. C. Gresham
                          81SH "Godzilla" . . .1179cc super-rat.
                          79SF "The Teacher" . . .basket case!
                          History shows again and again,
                          How nature points out the folly of men!

                          Comment


                          • #14
                            Thanks for the replies guys. Actually I did have the cams out. Since I was putting a new cam chain on it anyway, it was easier to install the proper shims by just getting them out of the way. I did it almost exactly like the way Rob described, with the exception that I haven't put the tensioner back in yet. I'm going to try setting it to the 6.5 degree BTDC mark, and then tension the chain and see if that pulls the chain around a little bit farther. I'm hesitant to monkey with the sprockets as they've been in the same location for the last 30 years, and they been working fine all that time. I'll post some more pics after I make the adjustment.

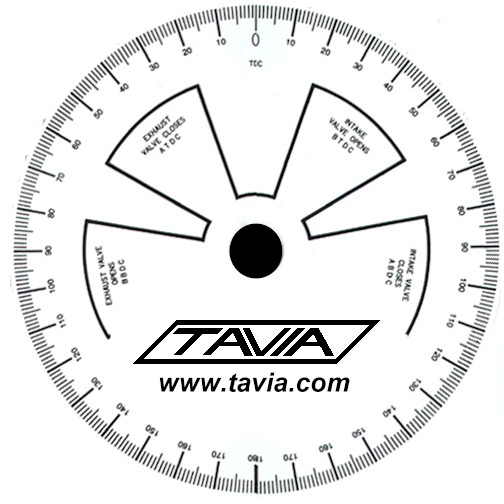
                            I still have questions about where the valves open and close in relation to the crank. Time for a pic of a different degree wheel -


                            This pic shows the exhaust valve opening between 60 degrees BBDC and 80 degrees ATDC (translated for the degree wheel that's installed). Is this just the range where the exhaust valves on all engines should open, and is there a more precise measurement for our XS's? I'm interested in the degree where the exhaust valve should open and close, as I can see that very clearly from on top. Does anyone know the exact degree where these events should occur?
                            I think I have a loose screw behind the handlebars.

                            '79 XS11 Standard, Jardine 4/1, Dyna DC1-1 Coils, 145 mains, 45 pilots, plastic floats - 25.7mm, XV920 fuel valves, inline fuel filters, speed bleeders, Mikes XS pods, spade-type fuse block, fork brace, progressive fork springs/shocks, manual petcocks, 750 FD, Venture cam chain tensioner, SS brake lines

                            Comment


                            • #15
                              The timing is fixed once the cams and chain are installed. It can only be changed if it is changed deliberately. Make sure you move the chain sprockets and not the cams to align those first bolt holes. Make sure NO SLACK gets past the tensioner and to the back side of the crank. Slack that finds its way past the tensioner to the back side of the crank or to the point between the sprockets will cause a change in timing.
                              Rob
                              Last edited by 79XS11F; 10-17-2009, 10:57 AM.
                              KEEP THE RUBBER SIDE DOWN

                              1978 XS1100E Modified
                              1978 XS500E
                              1979 XS1100F Restored
                              1980 XS1100 SG
                              1981 Suzuki GS1100
                              1983 Suzuki GS750S Katana
                              1983 Honda CB900 Custom

                              Comment

                              Working...
                              X