Announcement

Collapse
No announcement yet.

'80 XS1100SG So it begins

Collapse
X
 
  • Filter
  • Time
  • Show
Clear All
new posts

  • '80 XS1100SG So it begins

    I got my SG from a guy in Hollywood who didn't want to ride anymore and didn't have a garage to keep it in. I identified all of the problems with the bike and managed to agree on a very fair price for both of us. The bike showed 7500 on the clock and it looks like it has many of the parts my old SF was missing, but is in ill repair because of poor mechanics. I've already rebuilt the master cylinders and vented the slaves, brakes are much better, however they will require several bleedings. I have a Mity Vac but it's not bleeding correctly for some reason.
    I'm finding many parts are missing in the areas that have been worked on such as:
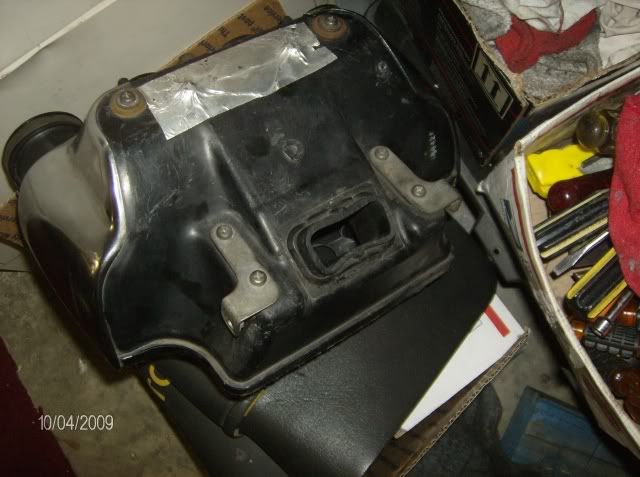
    The Air box snorkle was completely removed Unfiltered air simply goes around the air filter and directly into carbs (Haaa haa haa). This was done to make room for a fuel pump and filters (sorry I shoulda took pictures it was so funny) that leaked horribly. Thanks to Andreas I have new parts to replace the bastardized ones with. Half a can of carb cleaner later I got all of the built up dirt that had been sticking to the leaking fuel all over the carbs.
    This whole operation was done so that they wouldn't have to deal with a rusty tank (Andreas was able to supply me with a tank in fair condition as well) I will clean and treat the original tank at a later date, as I plan to re-paint it the way my old bike was. (I'll scan and post pics later).
    They bastardized the headlight fuse from the original fuse block to pull juice for the fuel pump, so I'll have to get that straightened out with one of TopCat's fuse blocks.
    Work is in progress.
    "There is a principle which is a bar against all information, which is proof against all arguments and which can not fail to keep a man in everlasting ignorance-that principle is contempt prior to investigation." --HERBERT SPENCER


    Active: 1932 Ford Model A; XS1100SF (Just got 'er); XS1100SG; 2000 F250 Turbo Diesel; 2003 Ford Mustang
    Broken: 1999 Kawi Vulcan 750; 1998 Triumph Trophy 1200
    Gonners: XS1100SF (my first ride); '82 Honda CB900F (bored to 1123cc); '86 Kawasaki ZG1000

  • #2
    Good luck with your project!! I'm about to start one of my own. Could be a real learning experience. Already know it has no fuses in it, PO just twisted and taped the wires together including the main. So I may end up rewiring the entire dang thing.
    Life is what happens while your planning everything else!

    When your work speaks for itself, don't interrupt.

    81 XS1100 Special - Humpty Dumpty
    80 XS1100 Special - Project Resurrection


    Previously owned
    93 GSX600F
    80 XS1100 Special - Ruby
    81 XS1100 Special
    81 CB750 C
    80 CB750 C
    78 XS750

    Comment


    • #3
      but it's not bleeding correctly for some reason.
      If you have a MC that does not want to build any pressure, pull the hose off, place a finger over the hose hole (don't ya just love technical terms ) and bleed just the MC. Finger over hole keeps any air from returning as the pedal or lever is released. Rest should go as planned.


      mro

      Comment


      • #4
        So I start digging into the fuel system yesterday and discover:
        The tank has 1/8" of crud inside it-the reason they had the hack fuel system and to make room for filters and pump, just ripped the air snorkle out to make room, totally disabling the air cleaner. After getting the tank off I find there are no tower filters on the petcocks. I'm using the 2nd tank to get 'er running now, and will deal with the 1st one later (I'm waiting for a coffee can full of ball bearings from my brother). If I could find this "mechanic" I'd put him out of our misery
        Today I will be installing T.C.'s fuse block
        "There is a principle which is a bar against all information, which is proof against all arguments and which can not fail to keep a man in everlasting ignorance-that principle is contempt prior to investigation." --HERBERT SPENCER


        Active: 1932 Ford Model A; XS1100SF (Just got 'er); XS1100SG; 2000 F250 Turbo Diesel; 2003 Ford Mustang
        Broken: 1999 Kawi Vulcan 750; 1998 Triumph Trophy 1200
        Gonners: XS1100SF (my first ride); '82 Honda CB900F (bored to 1123cc); '86 Kawasaki ZG1000

        Comment


        • #5
          Originally posted by Macamon View Post
          The tank has 1/8" of crud inside it-the reason they had the hack fuel system and to make room for filters and pump, just ripped the air snorkle out to make room, totally disabling the air cleaner.
          Hey Mac,

          I meant to comment earlier about how ripping the snorkel out does NOT negate the air filter functionality! The unfiltered air flows down into the center of the filter, and flows thru it out into the airbox where it then gets into the carbs. One of the mods folks do to get more air into the box is to drill 1/2" holes in the bottom of the box INSIDE the small oval zone where the filter fits. The lack of snorkel just means that it might draw in a bit more heated air from on top of the engine vs. possibly cooler air from under the seat, as well as a little more chance for water to get in during rain.

          The petcock filter towers often fall out/off, so you might find them stuck in the gunk inside the tank?
          T.C.
          T. C. Gresham
          81SH "Godzilla" . . .1179cc super-rat.
          79SF "The Teacher" . . .basket case!
          History shows again and again,
          How nature points out the folly of men!

          Comment


          • #6
            If I could find this "mechanic" I'd put him out of our misery
            LOL,thats why we get them so cheap.I love PO's
            Pretty soon you will be grinning ear to ear when that baby fires up and runs.
            80 SG XS1100
            14 Victory Cross Country

            Comment


            • #7
              I may just hack out the bottom of the airbox, that's a great idea! I've already custom made a replacement filter out of uni foam.
              Originally posted by TopCatGr58 View Post
              I meant to comment earlier about how ripping the snorkel out does NOT negate the air filter functionality! T.C.
              If they only cut off the top of the snorkle on the outside of the box I would agree. However they took the WHOLE THING out, all the way to the filter. The purpose of the snorkle is to isolate outside air until it reaches the center of the air filter. Basically the air comes in, flows over the filter (instead of through it) straight to the carb inlets WHICH they cut at the airbox wall
              No big, She's coming together now and I'm going to be....

              Originally posted by tarzan View Post
              grinning ear to ear when that baby fires up and runs.
              "There is a principle which is a bar against all information, which is proof against all arguments and which can not fail to keep a man in everlasting ignorance-that principle is contempt prior to investigation." --HERBERT SPENCER


              Active: 1932 Ford Model A; XS1100SF (Just got 'er); XS1100SG; 2000 F250 Turbo Diesel; 2003 Ford Mustang
              Broken: 1999 Kawi Vulcan 750; 1998 Triumph Trophy 1200
              Gonners: XS1100SF (my first ride); '82 Honda CB900F (bored to 1123cc); '86 Kawasaki ZG1000

              Comment


              • #8
                Yep, the snorkel must be left in place for the air box to function properly. I run mine cut off 1" from the base.... breathes much better.

                2H7 (79)
                3H3

                "If it ain't broke, modify it"

                Comment


                • #9
                  This is all the crap they put in to avoid cleaning the tank... That fuel pump might come in handy

                  And the poor airbox they hacked to make room for the pump/filters

                  The tank I took out has 2mm of crud and rust built up inside


                  Fortunately (Thanks to Andreasweiss) I have a backup tank, waiting for another set of petcocks and I'll be good to go. The hack that did this to my bike also took out the filter towers, probably because they kept getting clogged with rust. I'll be ordering a set of filter towers for the other tank soon.
                  I plan on painting the other set of tank/side covers with a design I made myself, but that's a post for another time

                  Fuse box
                  ================
                  Step 1 take a picture of your old setup just in case.

                  Step 2 Label your wires and figure out your routing for installation

                  Step 3 Retip your connections and put them on the block (You will need to have everything on the block, or remove the relay under the fuse block)

                  Step 4 Put the fuse block in place and add fuses... Easy right?

                  "There is a principle which is a bar against all information, which is proof against all arguments and which can not fail to keep a man in everlasting ignorance-that principle is contempt prior to investigation." --HERBERT SPENCER


                  Active: 1932 Ford Model A; XS1100SF (Just got 'er); XS1100SG; 2000 F250 Turbo Diesel; 2003 Ford Mustang
                  Broken: 1999 Kawi Vulcan 750; 1998 Triumph Trophy 1200
                  Gonners: XS1100SF (my first ride); '82 Honda CB900F (bored to 1123cc); '86 Kawasaki ZG1000

                  Comment


                  • #10
                    Hey Mac,

                    Great job on the fuseblock! I don't recall if I wrote to you when I sent it about the ability to incorporate the AUX terminal circuit into the fuseblock so you wouldn't have to deal with that glass fuse there as well....in case you wanted to run some AUX device from those terminals?

                    If you pull the AUX box off of the backing plate, you'll find 2 wires connected to it that are separate on the harness, Red and black. Run the red one to one side of the fuseblock, then continue it from the other side of the fuseblock to the (+) junction on the back that connects to the screw on the front. Then run the black wire to the (-) junction for that screw on the back. This way it bypasses that glass fuse, and you have a solid fuse protecting it....10 amp by the way.
                    T.C.

                    PS, you might want to put some electrical tape, or some sort of grommet over the metal edges of the backing plate to keep it from rubbing/cutting thru the wires due to vibration.....JAT!?
                    T. C. Gresham
                    81SH "Godzilla" . . .1179cc super-rat.
                    79SF "The Teacher" . . .basket case!
                    History shows again and again,
                    How nature points out the folly of men!

                    Comment


                    • #11
                      Do you need petcocks?Have a set that might go on E-bay.Took them off back in the 80's might need to be rebuilt though.Everything is there.
                      1980 XS1100 SG
                      Inline fuel filters
                      New wires in old coils-outer spark plugs
                      160 mph speedometer mod
                      Kerker Exhaust
                      xschop K & N air filter setup
                      Dynojet Recalibration kit
                      1999 Kawasaki ZRX1100
                      1997 Jeep Cherokee 4.5"lift installed

                      Comment


                      • #12
                        Well, it's been a while since I've checked in with you. Since I posted last not a lot has happened. For one tank, I ordered a set of filter towers for my existing set of petcocks, when I inqired about the "gasket" for the petcocks I was told they were $4 ea. (another 8 dollars?! AND I NEED 2 SETS??!!). My Scottish blood boiling, I went to Home Depot where I found a delta repair kit (DL15) which contained two of these wonderful "gaskets" for $1.98 for a grand savings of $12 (plus the bloody 10% los angeles tax) I grabbed 3 and wandered home as content as a stump trained sheep.
                        Then I ordered a set of petcocks for the other tank from Ebay with filter towers that seemed to be in tact...eeeeeehhhhhhNo. Instead they were missing their tops and were cracked up terribly. Dang! at $20 a pop and a requirement of two (2), I'm starting to think it's time for a reproduction. Anyhoo, I told the guy they were broke, and after giving me the typical bull about being broken in transit he agreed to send an in-tact set to me. Now, I have two complete petcock sets for two tanks (and "gaskets"), now all I have to do is learn to paint . I plan on installing petcocks in one of the tanks to get my bike on the road this weekend. I'll post more pics
                        "There is a principle which is a bar against all information, which is proof against all arguments and which can not fail to keep a man in everlasting ignorance-that principle is contempt prior to investigation." --HERBERT SPENCER


                        Active: 1932 Ford Model A; XS1100SF (Just got 'er); XS1100SG; 2000 F250 Turbo Diesel; 2003 Ford Mustang
                        Broken: 1999 Kawi Vulcan 750; 1998 Triumph Trophy 1200
                        Gonners: XS1100SF (my first ride); '82 Honda CB900F (bored to 1123cc); '86 Kawasaki ZG1000

                        Comment


                        • #13
                          Originally posted by Macamon View Post
                          For one tank, I ordered a set of filter towers for my existing set of petcocks, when I inqired about the "gasket" for the petcocks I was told they were $4 ea. (another 8 dollars?! AND I NEED 2 SETS??!!). My Scottish blood boiling, I went to Home Depot where I found a delta repair kit (DL15) which contained two of these wonderful "gaskets" for $1.98 for a grand savings of $12 (plus the bloody 10% los angeles tax)
                          Delta facets make fuel resistant "gaskets"? Just a thought.
                          http://www.myspace.com/i_give_you_power

                          1980 XS11 Special - chopped, dropped and OCTY is still installed - NOW IT'S FOR SALE! $1,800 OBO


                          Famous Myspace quote:

                          "Don't mess with TEXAS! It's not nice to pick on retards."

                          It's funny because I am from TEXAS!

                          Comment


                          • #14
                            Macamon,

                            Take a look at this for that rusty tank. I wouldn't risk the ball bearings.

                            http://www.xs11.com/forum/showthread...ght=rusty+tank

                            http://twinoak.altelco.net/~jacil/cl...ElecSetup.html

                            The washing soda really is about the easist thing for cleaning a rusty tank.

                            If it has sludge, (my backup tank had a load) try a good dose of acetone. Without the petcocks or fuel sender.

                            I left my tank set with the acetone for about a week just giving it a good shake everytime I went past the thing. I swear when I poured the stuff out of there it took the rust with acetone.

                            Rodger
                            RIP Whiskers (Shop Boss) 25+yrs

                            "It doesn't hurt until you find out no one is looking"

                            Everything on hold...

                            Comment


                            • #15
                              My $.02 worth.... Try a product called KBS Coatings. They have a 3 step product that does a very good job.

                              www.kbscoatings.com

                              if there is a LOT of thick rust, i would recommend eleminating some of it some way before using this product...especially if there was a lot of sludge in the bottom....any crap in there, no matter what product you use will not adhere well if there is any residual goo.

                              I used the kit on my 80 standard tank...took about 3 days....(after work).

                              I found that to dry the tank (after using cleaning products i.e. acid etching and rinsing.., rather than hold a hair dryer to it, remove the sender unit, petcocks, and filler cap: duct tape the end of a shopvac (try to completly seal it) to the filler neck, turn the baby on, and let it pull air from the 'cock holes and sender to dry it out...works great...and fast!!!!

                              Good luck my fellow Highlander!!
                              '81H (my first XS ) "Grey Ghost"
                              Stock Pilots/ 110 mains (to change)
                              4:1 Jardine w/ headerwrap
                              Windjammer(wiring issues)
                              SonyMarine unit for Ipod/Polk Speakers
                              New paint/brakes to come!!
                              ===============
                              '80G FrankenBike (parts bike)
                              ===============
                              '80G to fix "BlackSunshine"
                              Stock Pilots/125 mains
                              Pod filters; 4:1 Kerker??
                              SS Brake lines w/ new M/C's
                              LED Brake Lite
                              Needs paint....

                              It is better to be thought a fool than to open ones mouth and remove all doubt....

                              Comment

                              Working...
                              X