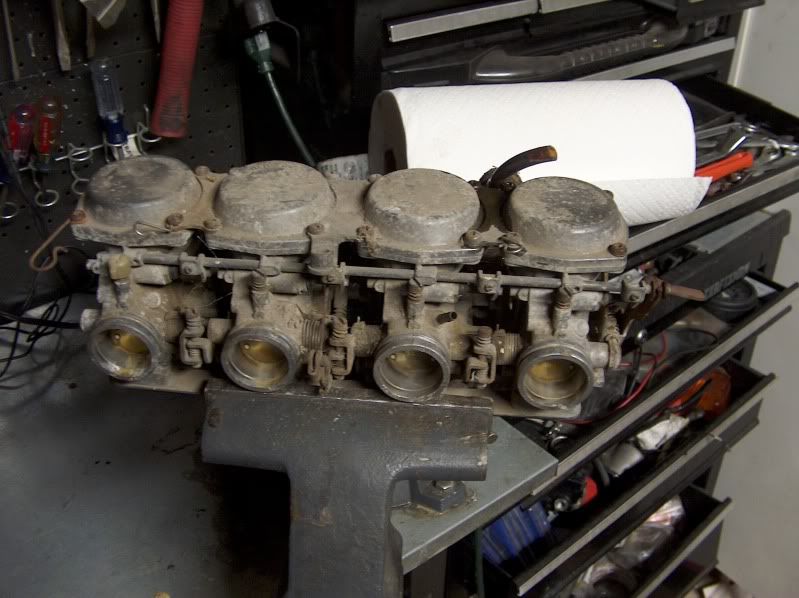
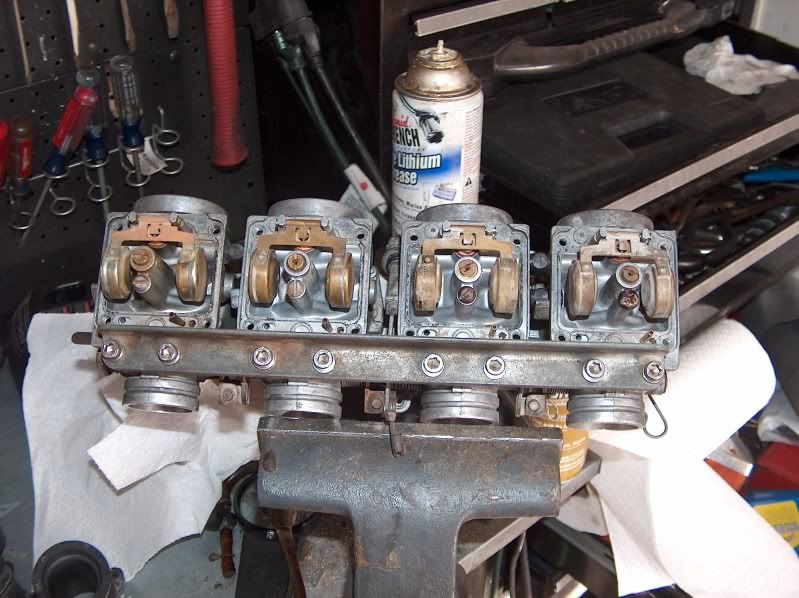
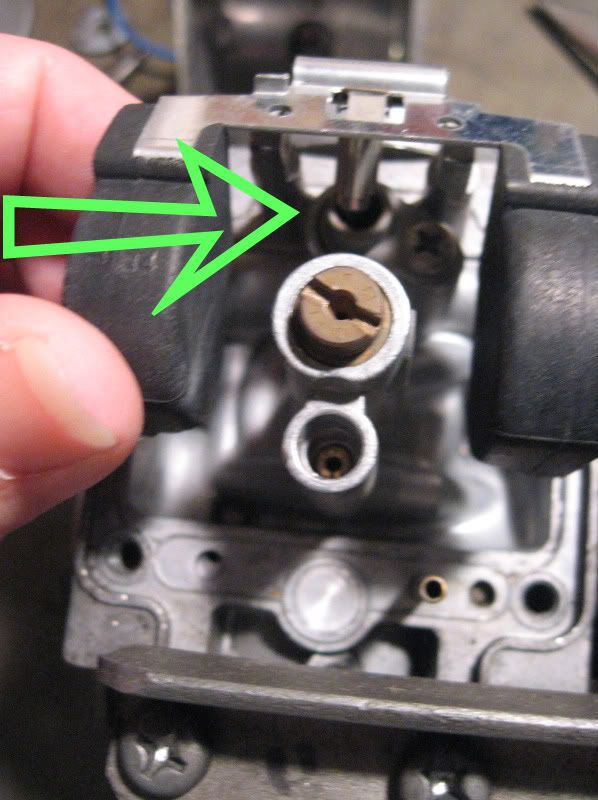
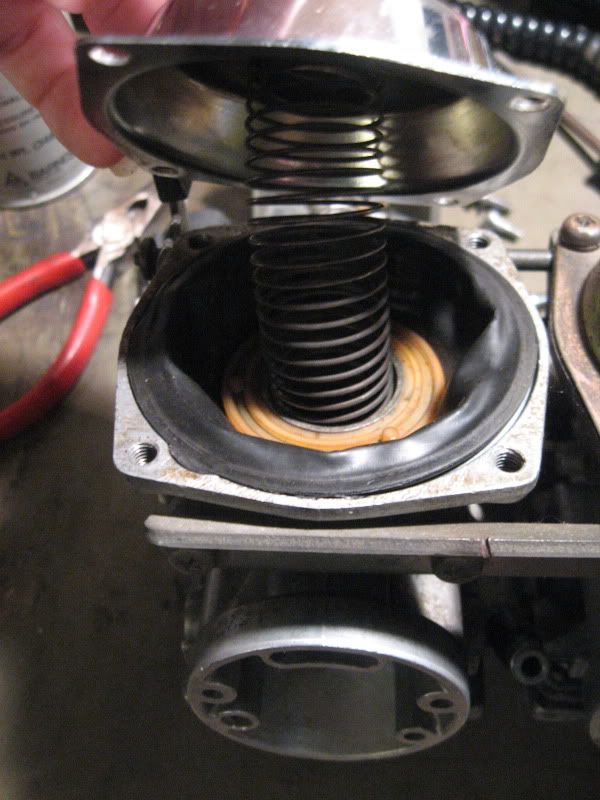
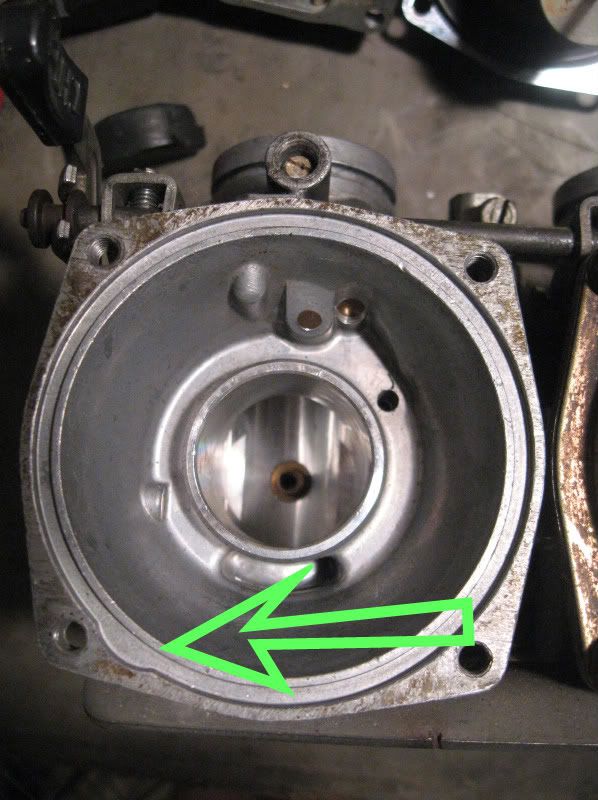
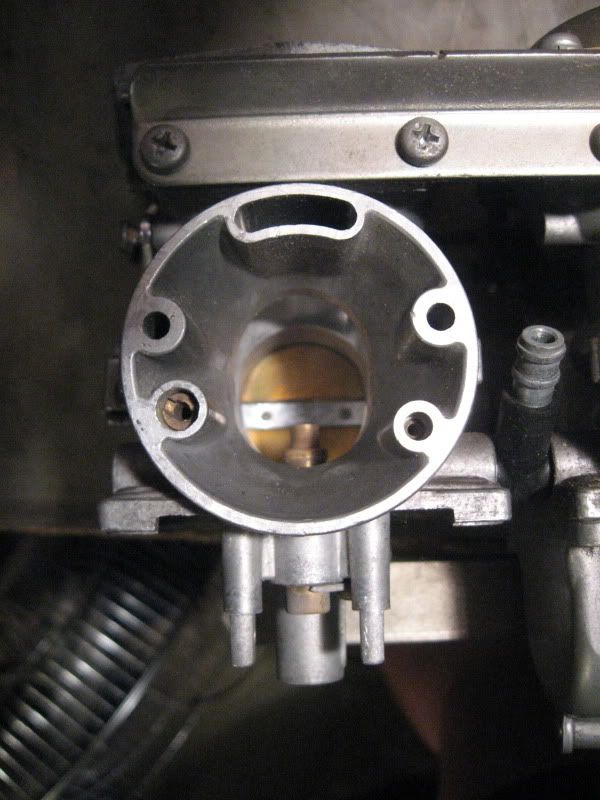
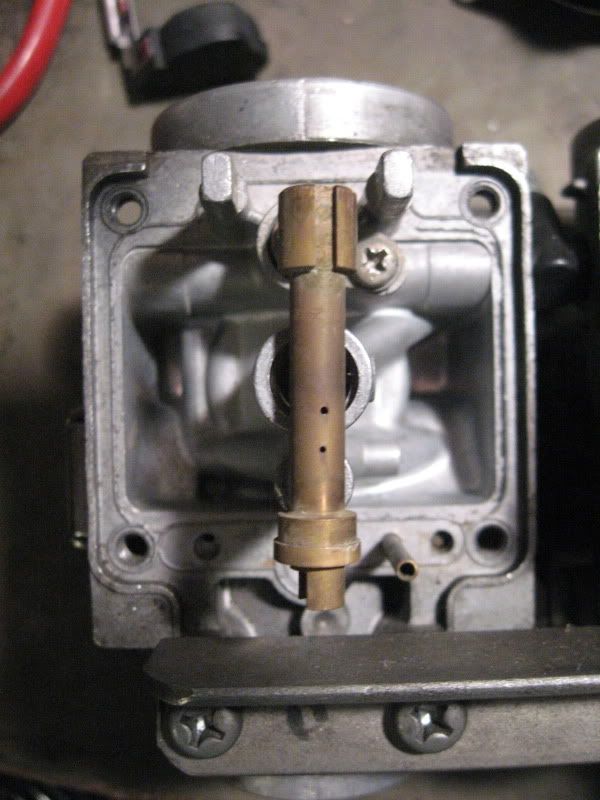
Announcement

Collapse
No announcement yet.

BlackSunshine stumbles at low RPM's......

Collapse
X
 
  • Filter
  • Time
  • Show
Clear All
new posts

  • #16
    carb

    you are going to have to pull them and take them apart at least a dozen times. im still trying to get it right myself with no luck yet. best wishes and good luck if you break the code pm me. im haveing the same problem.
    79 xs 1100 spec & 80 xs 1100 g

    Comment


    • #17
      Hey Tom and Rowdy,

      This idea, a photo walkthru of the teardown and cleaning of the carbs is just one of the tech tips I'm hoping to get put up this winter, but this doesn't help you NOW!

      However, as has been stated, there really aren't that many SMALL parts to worry about, but some are a bit delicate and depending on how long they've been in there, dirty, corroded, etc., can add levels of difficulty!

      This is why it's suggested to just break down one carb at a time so that you have the others as guides to putting it back together.

      Looking thru the existing tech tips, you can find info about how to remove the float post pin without breaking off the posts, how to remove broken pilot screw tips, as well as stuck/broken slots in pilot JETS, these are most of the main oopses that can befall you when tearing them down. Also don't soak the entire carb body in caustic cleaner lest you want to destroy the throttle shaft butterfly seals! 
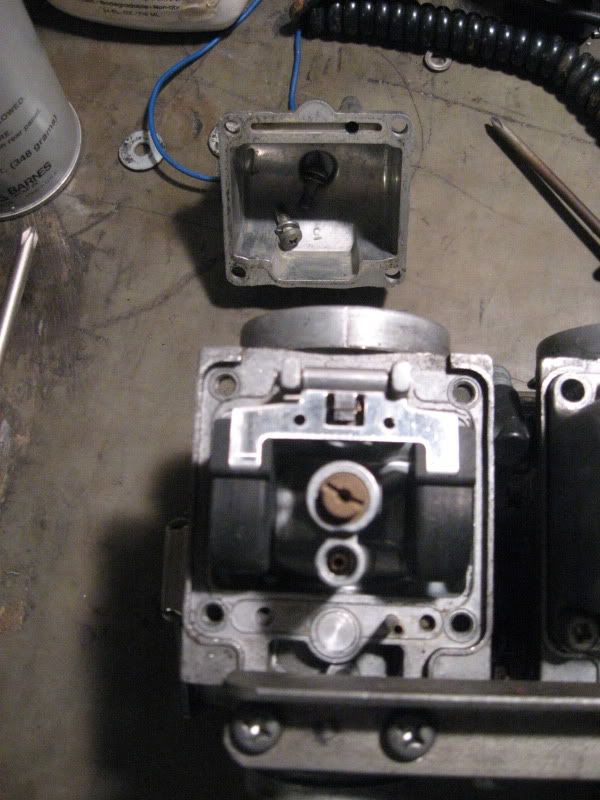
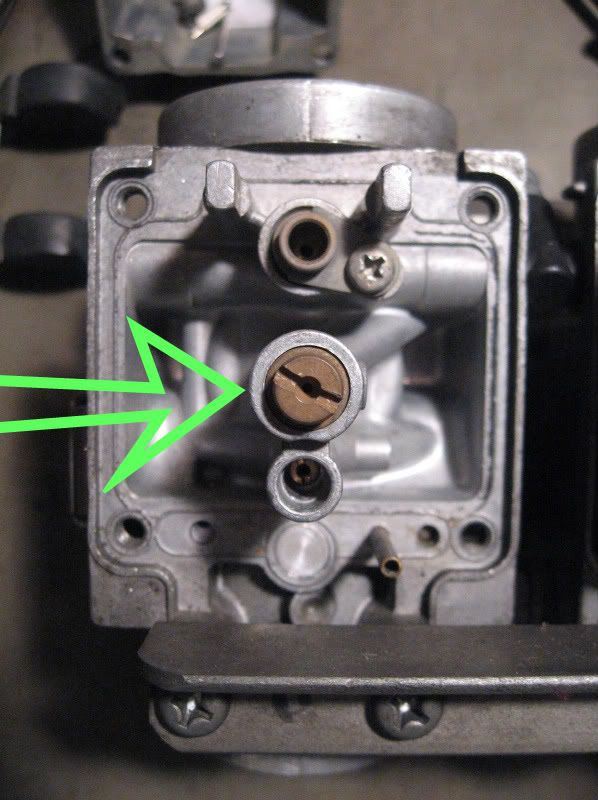
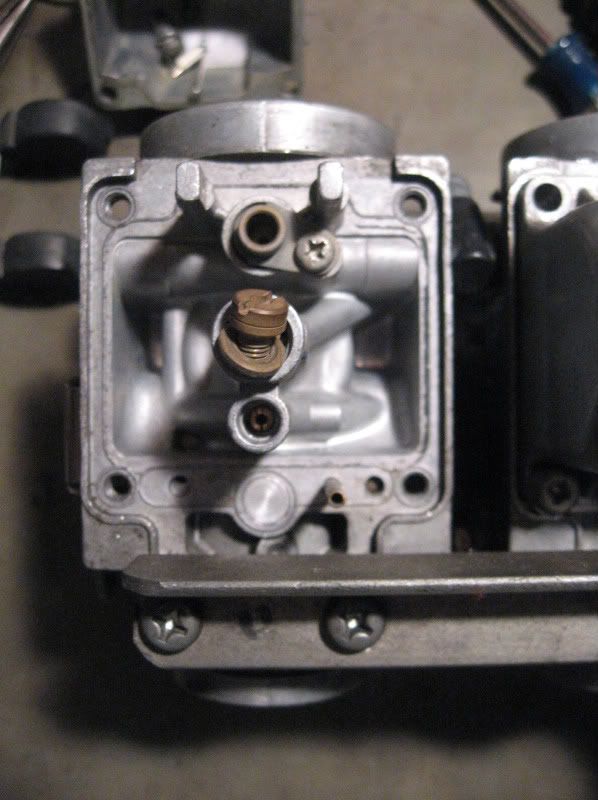
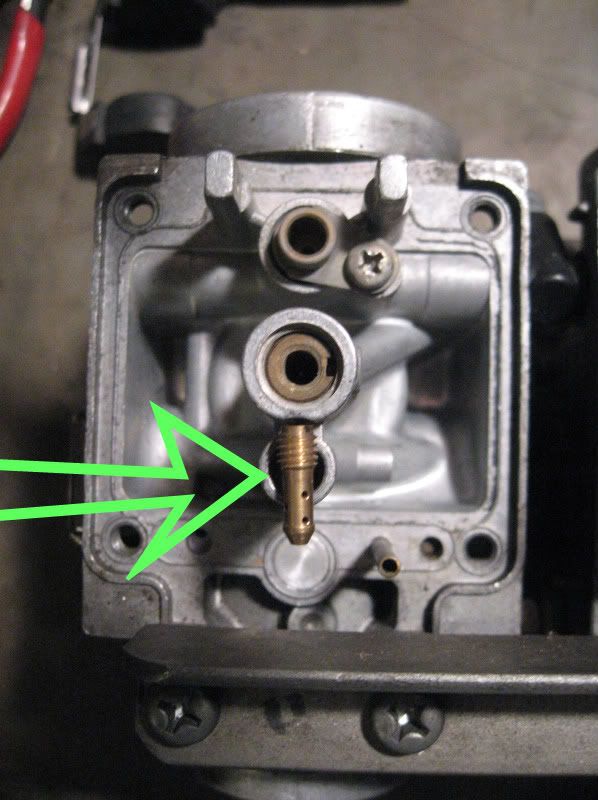
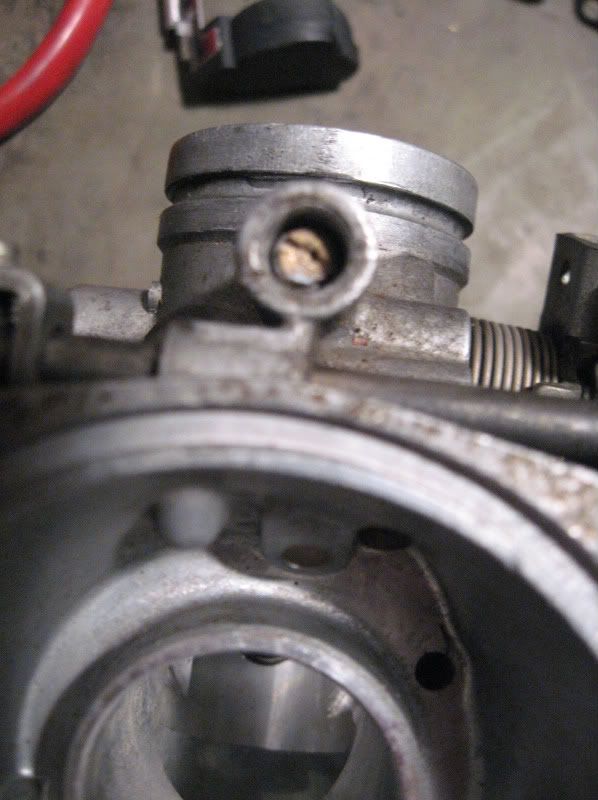
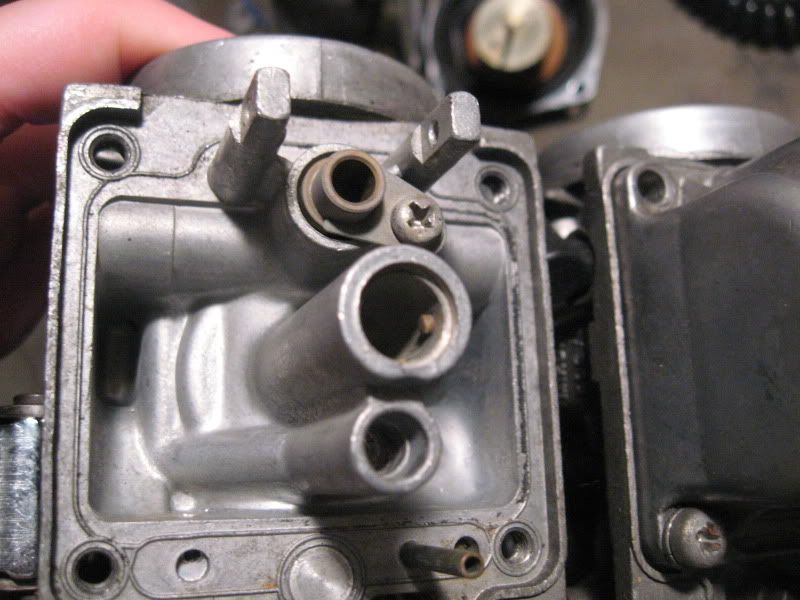
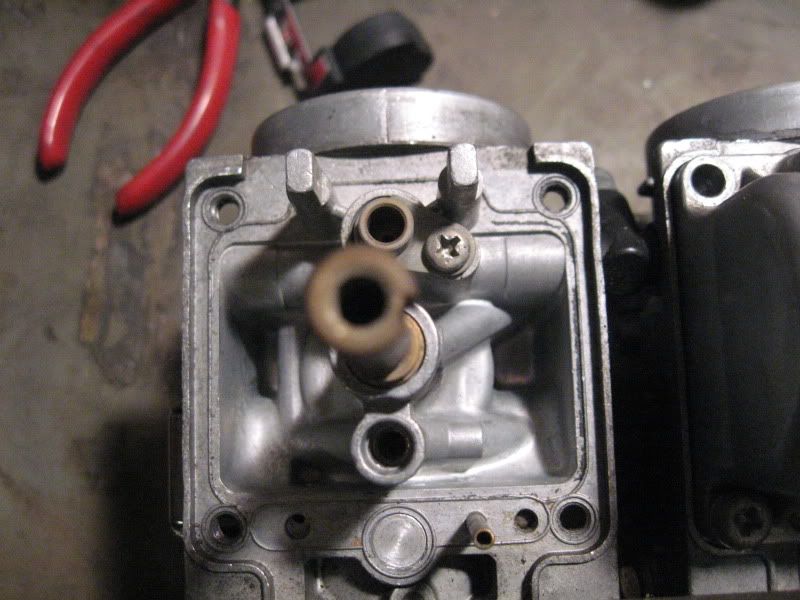
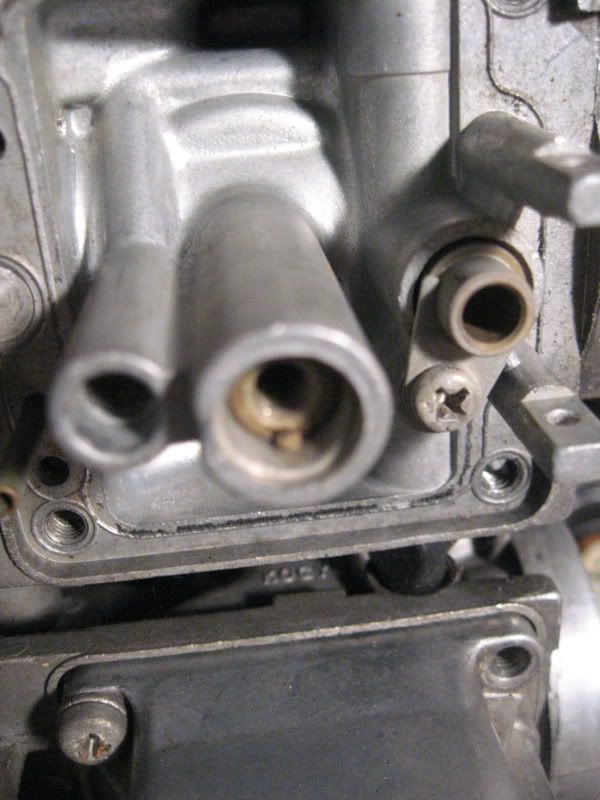
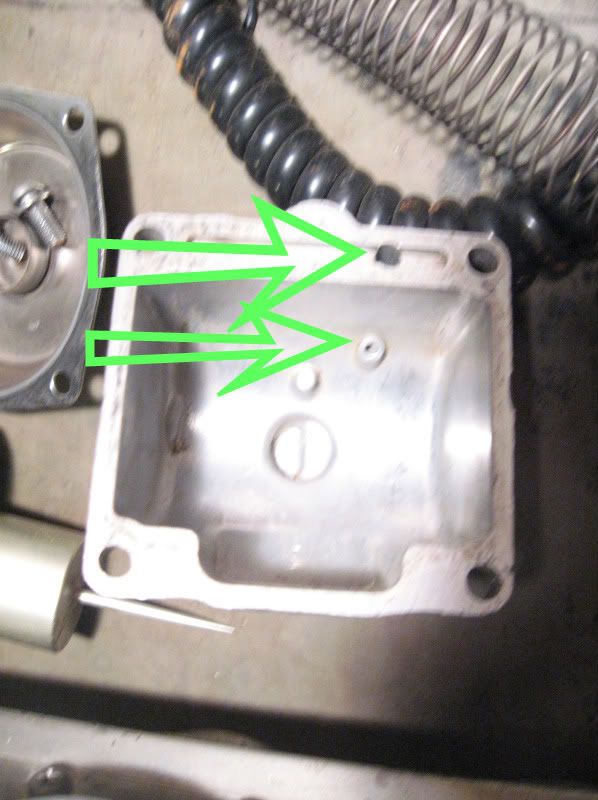
There's a small spring and ball bearing that will pop out of the front of the carb when you slide the choke/enrichener rod out of the carb rack....IF you aren't aware and ready for it. For the later carbs, there's an O-ring beneath the float valve seat that needs changing. There's also a small pressed in jet in the float bowl that feeds the enrichener, and if clogged can inhibit starting ease, a fine wire helps to penetrate it IF it's severely clogged.
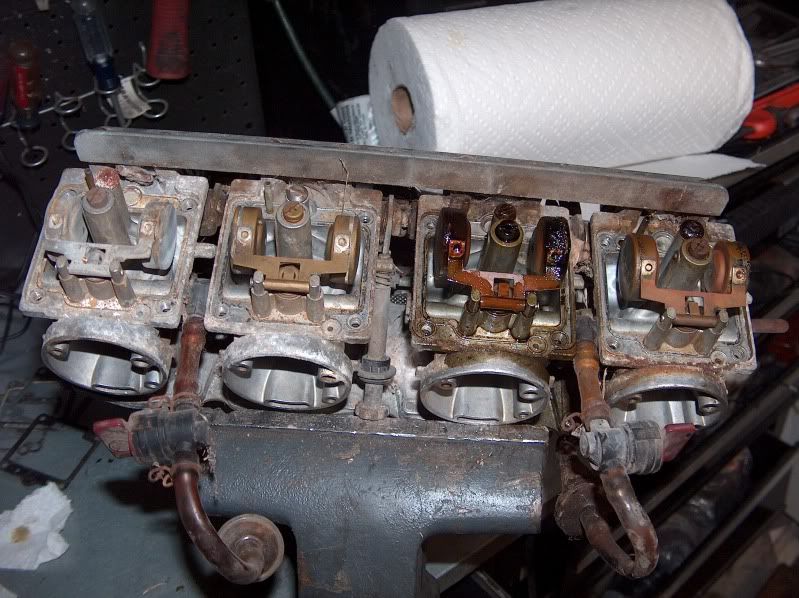
      I'm sure there are other fine points to look out for, but this off the top of my head covers the basics. Oh yeah, the MAIN JET NOZZLE/Emulsion tube comes out thru the TOP of the carb after you remove the Main Jet and washer, but there's a small notch and tab that engage together between the nozzle and carb body, and the brass nozzle is also fragile, so wooden dowel, or lightly tapping on the nozzle with the main jet still screwed in, but a few turns out can provide a better impact point reducing chances of damaging parts.
      T.C.
      T. C. Gresham
      81SH "Godzilla" . . .1179cc super-rat.
      79SF "The Teacher" . . .basket case!
      History shows again and again,
      How nature points out the folly of men!

      Comment


      • #18
        And besides, Tom, it's only gas in there. How bad could it be?


        And sometimes they gather a little dust sitting.


        But they still clean up.


        This bike runs nicely now. It's not near as scary as it looks. I didn't even need to replace the float bowl gaskets.

        Patrick
        The glorious rays of the rising sun exist only to create shadows in which doom may hide.

        XS11F (Incubus, daily rider)
        1969 Yamaha DT1B
        Five other bikes whose names do not begin with "Y"

        Comment


        • #19
          Carb Cleaning 101

          Okay... it's early and I'm prone to mistakes... so anyone who has other ideas... I won't be offended...
          However, here's the basic breakdown of carb cleaning... years vary, so yours may not be quite like this... but here goes:

          I've taken the carb cleaning tips here at XS11 starting at the disassembly and added pictures with a few of my own tricks thrown in...

          Removing and Cleaning your XS11 Carburators
          by Maans Smit

          Dissembling the carbs:

          I like to work cleanly, so I usually first wash the gunk off the outside of the bank of carbs before I start removing parts. The idea is to keep the insides of the four carbs separate. They must go back into the same carb they came out of. So put them in front of you on a biggish piece of clean paper/cloth the way they sit in front of you on the scoot. No 1 on the left and 4 on the right. Now just turn the bank of carbs upside down.

          Now you're going to remove the float bowls which are usually the bottoms of the carbs. I like to first spray all screws/nuts/connections lavishly with WD 40 or a similar product to make things easy. Unscrew the four Phillips (or whatever screws - mine came with Phillips and I replaced them with cap/Allen screws) on the corners of each float bowl, slowly lift each one off and put them on the other side of the carbs in line with the carb it came from (so you'll have four carb bodies and their insides in four heaps in the same order they are on the scoot, so you don't mix them).


          You'll see the float under the float bowl. It is held by a pin which goes through two posts which are part of the carb body. THOSE POSTS BREAK EASILY. Take a thin nail or Phillips screwdriver and softly tap the pin, from the side without a head, out of the post. You'll see you only have to loosen it a little bit and then you can pull it out from the "head" side.


          Almost in between the posts under the float you'll see the needle and seat where the fuel enters the carb.


          (I didn't remove this as the seat is very soft and can be distorted easily. One way to avoid this, is to put the end of a drillbit that fits precisely into the seat and gently - ahem - pull with some needle-nose pliers. Be REALLY careful not to hit the float posts.)

          Take the needle from seat and undo the seat with a ring or box spanner, rather not a flat/open spanner. When turning/loosening the seat with the spanner, see that you don't pull in the direction of one of the posts. If the spanner slips, you break a post. You'll see the seat has a minute dome like plastic filter which usually needs cleaning.
          Yep.. what he said...

          In the middle of the float bowl space you'll see a copper/ brass "nut" with a hole through it. That's the main jet and the size is usually written on it.


          Unscrew it and remember to take its copper/brass washer with it.


          Next to the main jet is a silver looking screw for a flat screw driver.
          Not all carb models have this... some are open towers...
          Unscrew it and take its washer with. Now take a thin flat screw driver cause inside the hole that was covered by the silver/aluminum screw,
          Continuing on...

          is the pilot jet which is about 10 mm long with (or without) holes in the side but with pin size holes at both ends.(BTW, on my 80 I could not get it to idle well, and eventually found that one of these pilot jets did not have holes in the side like the other three - so it seems it does matter that they are the same).


          The standard pilot jets are usually size 42,5. PLEASE NOTE: The pilot jets are also brass/copper and the screw driver slots on top of them mess up easily and then its hell to get them out. I had to drill one out. So when you put the thin screw driver in the hole, put some pressure on it and turn slowly. It helps to soak the jets in penetrating oil before you try and get them out. Especially if they haven't been out lately.
          Part 2 to follow
          81 SH Something Special
          81 frame, 80 tank and side covers, 79 tail light and carbs, 78 engine, 750 final drive mod, Geezer rec/reg, 140 mains, LH wheels


          79 SF MEAUQABEAUXS
          81SH Nor'eas tah (Old Red)
          80 LG Black Magic
          78 E Standard Practice


          James 3:17

          If I can make at least one person smile, or pee their pants a little, or maybe spit out their drink; then my day is not wasted.

          “Alis Volat Propriis”

          Yamaha XS 1100 Classic
          For those on FB

          Comment


          • #20
            Turn the carbs around, put a thick cloth under them so the posts don't break or get damaged, and unscrew the screws holding the tops of the carbs/ diaphragm covers and remove them, the diaphragm springs and the brackets between the carbs.


            Slide the diaphragm assembly out (thin rubber like diaphragm with the slide) and needle. REMEMBER: These diaphragm assemblies cost mucho bucks (i.e. terrible wallet trauma), so handle with care and don't spray carb cleaner on them. I try not to even put fuel on the diaphragm. I just wipe it with a cloth dipped in fuel and wipe it dry immediately afterwards.

            Upon reassembly... make certain to match up this part of the diaghragm with the carb body.


            Turn the carb around again and look in the hole where the main jet came out. You'll see the "main screw" (according to the manual) but its really a seat for the needle in the diaphragm assembly. If it doesn't come out easily, soak it as well with the penetrating oil, and tap it from the bottom of the carb, i.e. the main jet hole, with a thin flat screwdriver (round the sides of the hole so you don't damage the thread for the main jet). Some people pull it from the top with long nose pliers but I don't like to come near the seat (for the diaphragm needle) with a metal object, so I don't scar it.


            I usually use a small wooden dowel or a pencil to gently tap it through...


            You don't have to disassemble the diaphragm assemble any further (diaphragm/ slide/needle), except if you want to check at which notch the needle is adjusted for your mid range fuel supply. I believe if the circlip is in the middle notch its standard. In the bottom notch is rich (needle sits higher) and the top notch is lean (needle sits lower - thus closing the hole in the seat more). There are only three notches on the needle. You have to remove a spring clip from the top of the diaphragm assembly to remove the needle assembly. Be careful not to damage the plastic "megody" with the two or three (can't remember) prongs for going into holes. It can go in only one way.
            If you look at the inlet/airbox side of the carb body you'll see at 8 o'clock the air pilot jet that can be removed to be cleaned.


            On top of the outlet side of the carb (small mouth which connects to the carb boot/engine) is the idle mixture screw (there are other names for this screw) which is the screw you turn to adjust your idle mixture, e.g. when you Colortune. It has a spring round it. First turn it slowly all the way in until it is LIGHTLY SEATED, and at the same time count the turns and write them down per carb (to get your idle mixture adjustment at least back to what it was when you re-assemble the carbs). If you turn this screw in too far it breaks off in the hole and you have a .....time trying to remove the stuck point. So be careful. If you want to get the settings of the idle mixture screws back to standard before you start adjusting with ,e.g. the Colortune, turn it in to a lightly seated position and then 1,25 (one and a quarter) turns out.


            When you clean the carb bodies, open the choke and spray carb cleaner into all the holes. let it soak and then blow it out with compressed air. I also throw the jets and other metal insides of each carb in the float bowl and cover it in strong carb cleaner/wonder juice/whatever takes you through the night?? and let it soak for at least 6 to 8 hours. I also found that a wooden tooth pick soaked in carb cleaner helps to clean out the small holes in the pilot jet and other holes. metal things like sowing needles might just scar the sides of the holes. I also normally rinse the carbs afterwards in clean fuel before I start assembling them. Sometimes some of the dirt is blown against a corner or something inside the carb and comes out in the rinse. It's just something I do to play safe. Or you'll have to blow each hole in the carb from both sides with the compressed air.
            When disassembling the carbs, I usually put all of the pieces into the float bowl and let them soak while I disassemble the others... and I use a small piece of wire to kind of ream out the holes in the sides of the jets and emulsion tubes...


            If you want to dissemble the choke assembly or the bank of carbs further, shout and we'll explain. If your carbs differ in construction, and I believe the later models do, or I have left something out, will someone PLEASE add to/change the above, cause I don't know the new models and could have missed something. BTW, as a side line, I use baby oil (very thin) to oil the grooves in which the diaphragm seats in the top of the carbs, and the slides when I re-assemble the carbs. It works good. The oil doesn't get thick or gunky over time. You could also swipe your wife's machine oil for her sewing machine. Also pretty thin oil.

            Hope it helps.
            Many miles
            Smitty
            What he said...

            Hope this helps...
            Oh! I guess he said that too...
            lol
            Last edited by Wildkat; 10-04-2009, 07:54 AM.
            81 SH Something Special
            81 frame, 80 tank and side covers, 79 tail light and carbs, 78 engine, 750 final drive mod, Geezer rec/reg, 140 mains, LH wheels


            79 SF MEAUQABEAUXS
            81SH Nor'eas tah (Old Red)
            80 LG Black Magic
            78 E Standard Practice


            James 3:17

            If I can make at least one person smile, or pee their pants a little, or maybe spit out their drink; then my day is not wasted.

            “Alis Volat Propriis”

            Yamaha XS 1100 Classic
            For those on FB

            Comment


            • #21
              Upon reassembly...

              make sure you take note of the notch and pin when putting the emulsion tube back into place...


              The tube does NOT go in from this side... It's sitting here for the picture ONLY...
              (Thank you Don)


              Also.. make sure you clean this particular tunnel in the float bowl... and it WILL hit you in the eye as it goes through if you aren't careful... DAMHIKIJD


              (sorry the clarity isn't better... apparently my camera is tired today too)

              By the way... a MAJOR thanks to John for being so patient in teaching me all of this...
              Last edited by Wildkat; 10-04-2009, 09:09 AM.
              81 SH Something Special
              81 frame, 80 tank and side covers, 79 tail light and carbs, 78 engine, 750 final drive mod, Geezer rec/reg, 140 mains, LH wheels


              79 SF MEAUQABEAUXS
              81SH Nor'eas tah (Old Red)
              80 LG Black Magic
              78 E Standard Practice


              James 3:17

              If I can make at least one person smile, or pee their pants a little, or maybe spit out their drink; then my day is not wasted.

              “Alis Volat Propriis”

              Yamaha XS 1100 Classic
              For those on FB

              Comment


              • #22
                Very nice Kat. Excellent photodocumentary!!

                I would add that in my experience, WD40 is NOT a good penetrating oil, PB Blaster works GREAT. And definitely make sure you spray and soak the parts well with blaster and long BEFORE you try to disassemble them.

                i would suggest pulling the float valve seat. On the carbs shown, the phillips screw is what holds it in. Then you can use a pliers or whatever to grab the OUTER side of that ring and pull it out. It has an o-ring to seal it and can be tough to pull out, but you won't hurt the seating area if you only grab the outside.

                Another word to the wise is to have a couple scrap or old screwdrivers and custom grind the tips to fit the slots in the jets. A good tight fit in those slots is essential to getting them to come out most of the time.

                And that emulsion tube removes by pushing it down into the carb mouth area where you pulled the slide out of, and goes back in form that side. Great pics but the way they show it I could see some goofball like me trying to push the tube in form the wrong side.
                Life is what happens while your planning everything else!

                When your work speaks for itself, don't interrupt.

                81 XS1100 Special - Humpty Dumpty
                80 XS1100 Special - Project Resurrection


                Previously owned
                93 GSX600F
                80 XS1100 Special - Ruby
                81 XS1100 Special
                81 CB750 C
                80 CB750 C
                78 XS750

                Comment


                • #23
                  Originally posted by DGXSER View Post
                  Great pics but the way they show it I could see some goofball like me trying to push the tube in form the wrong side.
                  LOL
                  I meant to mention about that... I had just set the tube on top for the pic... Yeah... DON'T try to push it in from that direction... otherwise, you'll have more problems than just dirty carbs...
                  lol

                  Thanks Don
                  81 SH Something Special
                  81 frame, 80 tank and side covers, 79 tail light and carbs, 78 engine, 750 final drive mod, Geezer rec/reg, 140 mains, LH wheels


                  79 SF MEAUQABEAUXS
                  81SH Nor'eas tah (Old Red)
                  80 LG Black Magic
                  78 E Standard Practice


                  James 3:17

                  If I can make at least one person smile, or pee their pants a little, or maybe spit out their drink; then my day is not wasted.

                  “Alis Volat Propriis”

                  Yamaha XS 1100 Classic
                  For those on FB

                  Comment


                  • #24
                    He said the only issue I possibly would encounter with my setup is sluggishness in the midrange. If I find that to be the case, he said, I should shim the needles, not change the jets.

                    What Patrick is talking about here is the needle on the slide that goes up and down in your carbs. You access it by taking off the top of your carbs then pulling up on the rubber diaphram... BUT.. there's really no need in you doing this. The 78-79 carbs had adjustable needles here where the later carbs aren't adjustable.

                    Just from personal experience with this.. I went with pod filters and ended up going up one size on the main jet and everything else stock. Seems to run just fine for many thousands of miles.


                    Tod
                    Try your hardest to be the kind of person your dog thinks you are.

                    You can live to be 100, as long as you give up everything that would make you want to live to be 100!

                    Current bikes:
                    '06 Suzuki DR650
                    *'82 XJ1100 with the 1179 kit. "Mad Maxim"
                    '82 XJ1100 Completely stock fixer-upper
                    '82 XJ1100 Bagger fixer-upper
                    '82 XJ1100 Motor/frame and lots of boxes of parts
                    '82 XJ1100 Parts bike
                    '81 XS1100 Special
                    '81 YZ250
                    '80 XS850 Special
                    '80 XR100
                    *Crashed/Totalled, still own

                    Comment


                    • #25
                      I know it sounds crazy, but I was having the not wanting to run well below 3000 rpm, and it turned out to be loose/corroded connections in the kill switch/starter contraption on the handle bars. It went on for a while and I tried a lot of stuff, especially with carbs, and finally the bike just wouldn't start or stay running once I push started it. I kept jiggling stuff at that point and traced it to that mechanism with the jiggle it till it starts troubleshooting method. So I took it appart, cleaned up the connections and it started up and ran. Took for ride and my "not running well below 3000 rpm" issue was gone also. I think running it past that 3000 mark gives you enough juice to fire the cylinders well when you have a week connection.

                      Any way, just a thought.
                      79 XS11 special

                      Comment


                      • #26
                        Update....
                        grabbed my carbs off the running bike, put them on BlackSunshine...and VROOOM...had to adjust the idle a bit, but it ran.. now onto cleaning the original set of carbs!!!!!

                        im going to practice on a set that i kknow is GUMMED up bad, just to see what happens...then onto the "dirty ones"

                        Thanks!!!!
                        '81H (my first XS ) "Grey Ghost"
                        Stock Pilots/ 110 mains (to change)
                        4:1 Jardine w/ headerwrap
                        Windjammer(wiring issues)
                        SonyMarine unit for Ipod/Polk Speakers
                        New paint/brakes to come!!
                        ===============
                        '80G FrankenBike (parts bike)
                        ===============
                        '80G to fix "BlackSunshine"
                        Stock Pilots/125 mains
                        Pod filters; 4:1 Kerker??
                        SS Brake lines w/ new M/C's
                        LED Brake Lite
                        Needs paint....

                        It is better to be thought a fool than to open ones mouth and remove all doubt....

                        Comment


                        • #27
                          Hey all...

                          Read the previous posts...

                          took the 3rd set of carbs i have and started digging in.... two of the 4 carbs on this set had the float posts on one side broke off. i had to use my bench grinder to "modify" a screwdriver to fit the little pilot jets..OMG were they gummed up...looked like tar. Now i can go through each of the "dirty" carbs i pulled off of "Sunshine" and clean them out. BTW i purchased all stainless allen cap screws and 6 sided machine bolts to put everything back together. i had to use vicegrips to get the screws off the diaphram covers....an impact driver to get the screws off the bowls of the "dirty" carbs. Hey..on the set of carbs that i slapped on "Sunshine" from the '81, there are no drain bolts on the bottom of the carbs...only a little "dome" with a phillips screw in them...i suppose this doesnt make a difference, but something i noticed...

                          also, now that "Sunshine" is running, i noticed that the exhaust is a little "rich"...smells a bit and is a bit "gagging" with a heavy white fog.... is the mixture too rich? or could it be that this beast needs to be run for a while to "clear its throat"?

                          Forge on and conquer....
                          '81H (my first XS ) "Grey Ghost"
                          Stock Pilots/ 110 mains (to change)
                          4:1 Jardine w/ headerwrap
                          Windjammer(wiring issues)
                          SonyMarine unit for Ipod/Polk Speakers
                          New paint/brakes to come!!
                          ===============
                          '80G FrankenBike (parts bike)
                          ===============
                          '80G to fix "BlackSunshine"
                          Stock Pilots/125 mains
                          Pod filters; 4:1 Kerker??
                          SS Brake lines w/ new M/C's
                          LED Brake Lite
                          Needs paint....

                          It is better to be thought a fool than to open ones mouth and remove all doubt....

                          Comment


                          • #28
                            "BUT.. there's really no need in you doing this. The 78-79 carbs had adjustable needles here where the later carbs aren't adjustable."

                            BUT POs have a nasty habit of putting the washer in the wrong spot, so it never hurts to check!

                            BTW If you end up with a #1 carb body left over....
                            Nice day, if it doesn't rain...

                            '05 ST1300
                            '83 502/502 Monte Carlo for sale/trade

                            Comment


                            • #29
                              White smoke from the exhaust of an engine that hasn't run for a long time is not that unusual. My bet is something collected in the exhaust that needs to burn off. When I got Incubus started for the first time after it sat for a decade or more it produced so much smoke that the woman across the street yelled at me to ask if I needed the fire department.

                              It runs fine now. No smoke.

                              Patrick
                              The glorious rays of the rising sun exist only to create shadows in which doom may hide.

                              XS11F (Incubus, daily rider)
                              1969 Yamaha DT1B
                              Five other bikes whose names do not begin with "Y"

                              Comment

                              Working...
                              X