Well, I can finally rest this afternoon! If you're having a nice lazy day and have the time to read this NOVEL, please continue along!  I'm posting this partly to show that I just don't talk the talk, I occasionally walk the walk!
Last week I saw a thread by Bigge Al from Greensboro, NC regarding his skipping 2nd gear, being his first bike, lack of $$ and mech experience (like Greg Maz) and so I offered to help him if he wanted to bring it up to my place. Well, he took me up on the offer, and hauled his XJ to my place this Holiday weekend. He had replaced the engine/middle/final drive oils when he got it, had some leaky carbs, used Seafoam which had calmed down the leaking...verified that he didn't have gas in his oil, but was possibly getting only 20 mpg. So..along with the skipping 2nd gear, I figured a carb rebuild and tune would be in order. Okay, a full weekend, plus Friday PM/Night, should be able to get things done and him back on the road home by midday Sunday! He normally works Saturdays, but would have the Holiday Weekend free, so we planned for it. BTW, Bigge Al likes Pink Floyd, so there will be many references to their work.
We had talked a bit by email planning the supplies and procedures that we would be doing when he got here. I was able order the float valves and replacement clutch springs from MikesXS, along with the YamaBond equivalent sealant. I acquired the other stuff, oil/filter, spark plugs, gasket material, carb and brake cleaner, Synthetic Hypoid and Dexron ATF for fork oil. I had a mini die grinder and an assortment of diamond bits that I was anxious to try out vs. the Dremmel.
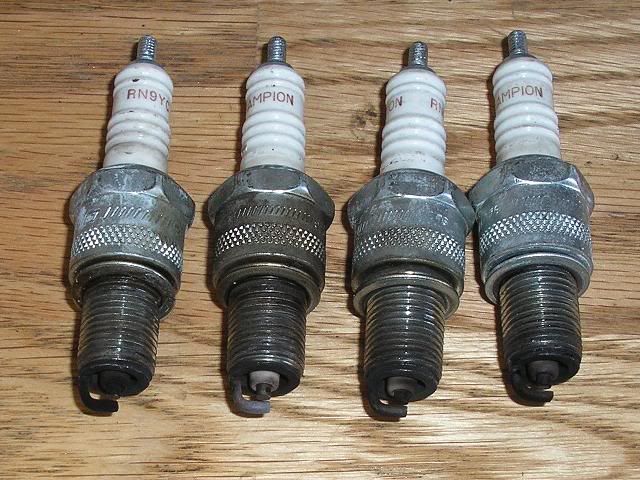
He rolled into town at 4PM Friday with the XJ in the back of his pickup, we got it unloaded and got to work. Pulled the tank, seat, air filter and carbs...I feel for you XJ guys with OEM box! First I showed him the cam chain tensioner and we performed the basic adjustment. Then we proceeded to do a compression test. Got 155-130-135-160. A bit beyond the 10% variance, but attributed it to many factors, cold engine, possibly carboned chambers, see plugs below! Main thing was to prove it had decent comps! Also NOTE that it requires the use of the starter spinning the engine to get these readings, this will play into things later on.
Then we pulled the valve cover, and checked the clearances. Only found 1 that was just slightly under at .003 for intake. Before I did the calculations I went ahead and used the Motion Pro valve bucket tool (THANKS John/WILDKAT ) and found the shim to be a 285. Then realised that using a 280 would make the clearance a whopping .008, and since we didn't have any replacement shims, we left the slightly close shim in there, but he knows how to replace it now!
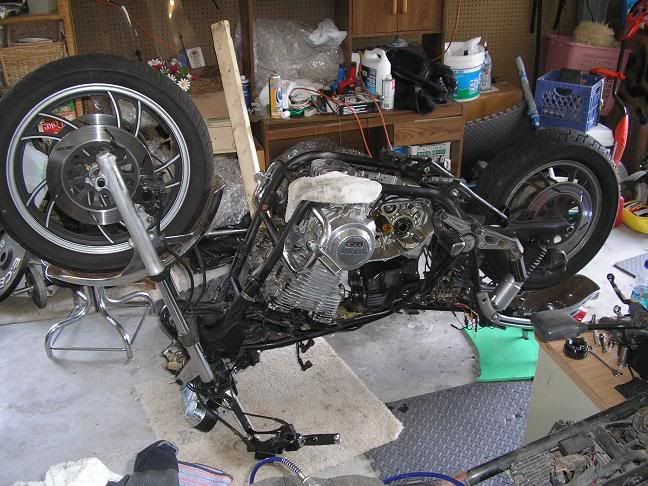
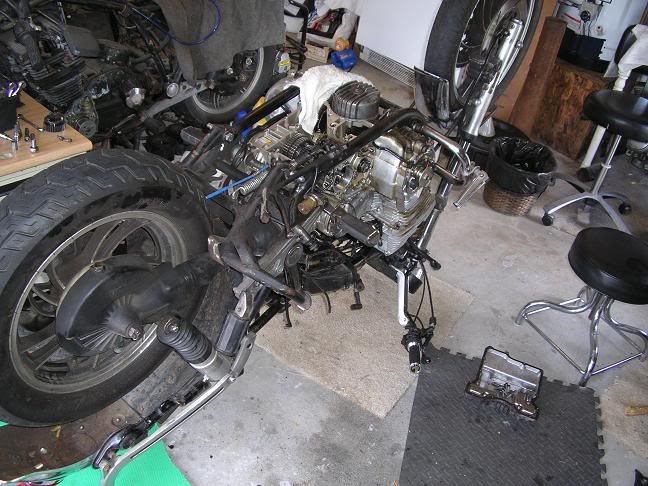
Next, we drained the fluids, engine, middle, final drives. The hex heads in his refill plugs had been rounded/wallered out, he had previously gotten them loosened with the screwdriver/chisel approach, but we needed to replace them. We then pulled the shift cover, clutch cover, mirrors, side covers, left rear turn signal, and also the clutch basket. Then we got the bike flipped over on it's back. Then we saw that the modified welded on mufflers on his OEM 2-1's for each side would not clear the tranny pan, so they had to come off. Then we got the tranny pan off without damaging the gasket, but we found a mysterious washer in it? When I got the clutch basket off, saw that there wasn't a "C/E" ring on the end of the shift fork shaft at the oil pump idler gear? And the "C/E" ring behind the gear was pushed farther inwards towards the engine past the notch?
We had stopped about 7pm for 30 minutes for a nice home cooked chicken dinner with potato salad. We then removed the countershaft axle bolt, and the bearing cap/cover end from the other end of the countershaft. Then slid
5th gear out, pulled the shift fork shaft out, let the shift forks drop out of the way, and with just some modest wiggling of the gears, got them out. But it was getting late, so we held off of the gear grinding for the next day. But we went ahead and pulled down the carbs, soaked the jets, emulsion tubes, found the pilot screws were some 5-6 turns OUT , found some black gunk in the right bank of carbs inlet channels, spritzed them thoroughly with cleaner, bench synched, then put them back together with the new float valves. I had bought a 180 piece set of metric nitrile o-rings, but a size that seemed right was too thick for the valve seat seal, finally used a smaller overall diameter, but it had a smaller section thickness that worked, and got them back in. Got the carbs all back together, and went to bed about midnight!
Saturday, had breakfast, got back to garage at 9am, and started to try to do the grinding on the gears. Even with my spare 10 gal tank along with my 4.5 gallon pancake compressor, it wouldn't provide enough continuous volume of air to effectively drive the grinder more than 20-30 seconds! And the only cylinder shaped grinding stone (white) wasn't holding up very well anyways, and was wearing away way too fast!
  SO....we decided to make a run for parts, the C/E rings, possibly the K&N 33-2586 that was mentioned in Maximan's substitute filter for XJ's tip, as well as some fresh grinding bits for my trusty Dremmel! Also wanted to try to find some single walled rubber fuel line, he had gotten some that he was told was single walled, but was regular 1/4" ID double walled stuff! Napa didn't even have any, but got the C/E ring clips. Went to LOWES and got the stones, and also some air fitler FOAM that I thougth we could use in place of the badly clogged OEM filter element material.
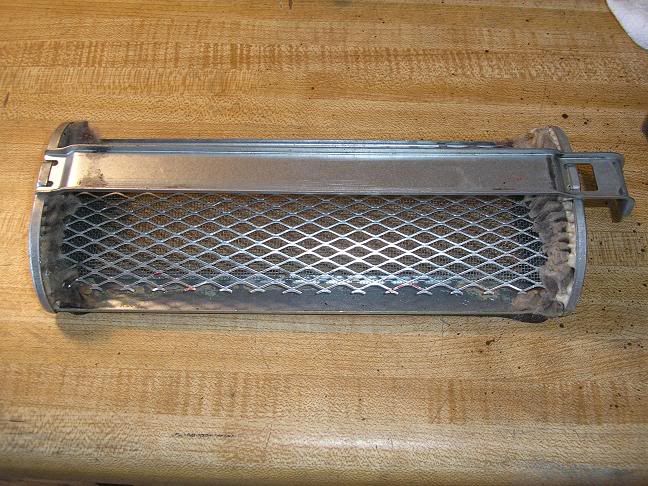
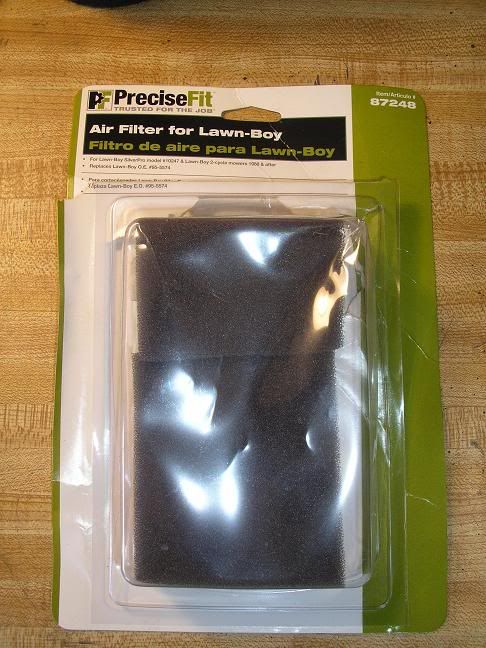
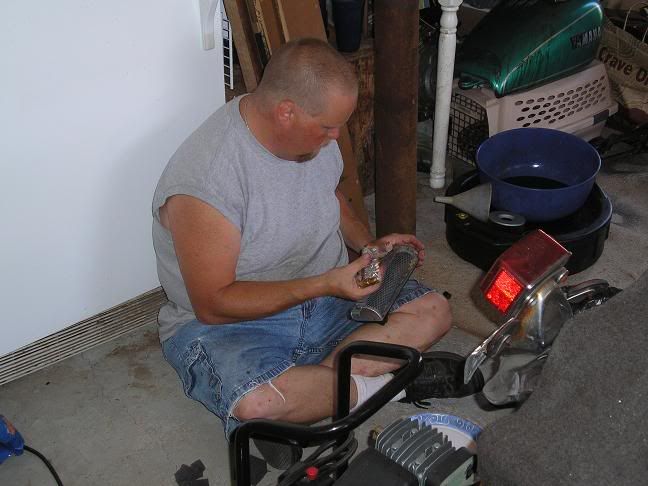
We got 2 of these packages, put them across the filter, and cut off the ends, and used the cut off for the open middle section. Then used some gasket red RTV to seal it to the frame. Here's "AL" being attacked by the sharp metal screen edges of the filter frame!!
Spent about 1 hour on this shopping spree, got back and got to work! I got the gears ground in about an hour, ALL 4, 2nd, 5th, and 1st and 4th since we were in there and they also showed some signs of wear, skipping wasn't too far away! Stopped for 15 minutes for a sandwich break. Got the gears all cleaned up, oiled and back into the engine with a minimal battle with the forks, the shift shaft with proper new C/E clips, found where that washer needed to go, and then "AL" mentioned that it seemed like he didn't have a
5th gear when riding! A closer look at the shift drum revealed the bent tang and missing 5th gear dowel that wasn't found in the oil pan!
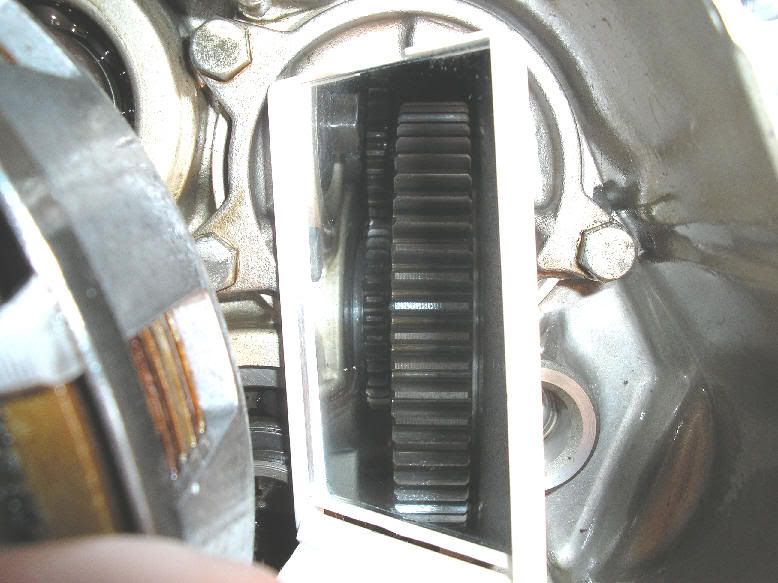
Fortunately I was able to canabalize a parts engine for the dowel and unbent plate! Pulled clutch basket apart, all frictions miked to about 2.95 or so, well beyond the 2.8 minimum(only 30K on the Odometer), springs measured to just within spec, but were possibly 25 years old, so replaced with the new almost 2mm longer MikesXS springs! Just deglazed the steels, a couple had some blue friction burn markings. Got the clutch basket back in just fine, making sure the gears engaged the oil pump idler gear. A trick to verify this is to use a mirror to peak around behind the basket!
We stopped for a great 4th of July dinner, SWMBO cooked some fine NY Strip steaks, Garlic mashed potatos, and a healthy garden salad!
"AL" made a run to the auto store for the replacement middle/final drive refill plug bolts/nylon washers. I pulled the rear wheel and final drive off, cleaned and regreased the wheel and drive splines, and put it back together. We also bled all of the brake lines, topped off the MC's. The rear brake pedal didn't want to return, found the big return spring had come undone from it's retaining position and was bent!
So...got the clutch and shift covers and tranny pans back on. Flipped the bike back over, and proceeded to work on the FUSEBLOCK, classic broken clips, spliced in single glass fuseholders. "AL" drained the fork tubes and got some yucky grey fluid out! Pulled the fork caps to be able to refill. When putting the drain bolts back in, one broke off in the tube! Was actually able to drill it and use an easy out to get it. Used a spare metric screw with an O-ring to seal it. Was able to get the caps back on fairly easily since jacking up the front end to release tension. Refilled all fluids, put the carbs back on with OEM box, new foam air filter, new NGK plugs, hooked up portable synching fuel tank, reconnected charged up battery, and turned key, hit the starter, and engine cranked, popped to life for second and then died!
Then wouldn't crank! Kept hitting starter button, no go, just pilot box lights flickered a little, but nothing! We had previously repaired the clutch interlock switch...wire had gotten pulled from switch. Hooked up jumper box with it on the starter side of the solenoid, and applied power and it cranked and started and kept running. So we proceeded to perform the vac. synch utilizing the YICS tool, BTW, the 5/32" vac hose works, the 3/8" fuel line was too wide! I then thought that since the solenoid had worked before, and quit, and we had not done anything else, that it must have gone bad, took one off of parts bikes, wired it in, but it also didn't work. Checked the continuity of the blue/white wire to the ground/starter button, it was good. Then checked the red/white wire and was NOT getting 12 volts!?
Again, it was now midnight, and "Time" to rest, the brain was fried, and I felt like we had hit "Another Brick in the Wall"! It was at this time that I thought of Randy or 3Phase/Scott..electrical Gurus..."Wish you were Here", to help me diagnose this beast! I reviewed the XJ wiring diagram on my way to bed.
Sunday Morning, 9am, started to troubleshoot. Took the alleged bad solenoid, hooked the red/white and blue/white wires to my booster box, and got the required click/click sound, it was actually good! Put it back in. Then pulled the connectors for the side stand switch connecting all 3 wires together, still nothing. Pulled the clutch switch connector, same! Pulled the tipover switch connector and still nada. This was when Al mentioned that he had had an intermittent starting problem before. The neutral light was on. So....then took a jumper wire to provide 12 volts to solenoid red/white wire, and it cranked with the starter button just fine. SO....since time was not on our side, and "AL" wasn't worried about the safety interlocks, we elected to do the down and dirty quick fix and just spliced the aux terminal power supply that we hadn't run thru the fuseblock into the solenoid switch, he always checks to make sure it's in neutral before starting anyways, and it fired up. Rolled it out, and took it for a test run up and down the neighborhood, shifted just great thru all 5 gears. I hadn't had a chance to ride it before, but "AL" said after his test run that it definitely had more power, pep, and throttle response than before. You could say that it would "Run Like hell".
We got it loaded into his truck and he was on the road going back home by 1pm, and I got word that he made it by 6pm safely! I took my shower, did the weekly shopping, and have been sitting here resting and composing this report for the last few hours while watching TV!
Here's hoping the rest of you had a restful and enjoyable Holiday Weekend. Mine was a bit busy, but helping a fellow Xsive get his bike into proper running order was also very rewarding.
 I'm posting this partly to show that I just don't talk the talk, I occasionally walk the walk!
Last week I saw a thread by Bigge Al from Greensboro, NC regarding his skipping 2nd gear, being his first bike, lack of $$ and mech experience (like Greg Maz) and so I offered to help him if he wanted to bring it up to my place. Well, he took me up on the offer, and hauled his XJ to my place this Holiday weekend. He had replaced the engine/middle/final drive oils when he got it, had some leaky carbs, used Seafoam which had calmed down the leaking...verified that he didn't have gas in his oil, but was possibly getting only 20 mpg. So..along with the skipping 2nd gear, I figured a carb rebuild and tune would be in order. Okay, a full weekend, plus Friday PM/Night, should be able to get things done and him back on the road home by midday Sunday! He normally works Saturdays, but would have the Holiday Weekend free, so we planned for it. BTW, Bigge Al likes Pink Floyd, so there will be many references to their work.

We had talked a bit by email planning the supplies and procedures that we would be doing when he got here. I was able order the float valves and replacement clutch springs from MikesXS, along with the YamaBond equivalent sealant. I acquired the other stuff, oil/filter, spark plugs, gasket material, carb and brake cleaner, Synthetic Hypoid and Dexron ATF for fork oil. I had a mini die grinder and an assortment of diamond bits that I was anxious to try out vs. the Dremmel.
He rolled into town at 4PM Friday with the XJ in the back of his pickup, we got it unloaded and got to work. Pulled the tank, seat, air filter and carbs...I feel for you XJ guys with OEM box! First I showed him the cam chain tensioner and we performed the basic adjustment. Then we proceeded to do a compression test. Got 155-130-135-160. A bit beyond the 10% variance, but attributed it to many factors, cold engine, possibly carboned chambers, see plugs below!
 Main thing was to prove it had decent comps! Also NOTE that it requires the use of the starter spinning the engine to get these readings, this will play into things later on.
Then we pulled the valve cover, and checked the clearances. Only found 1 that was just slightly under at .003 for intake. Before I did the calculations I went ahead and used the Motion Pro valve bucket tool (THANKS John/WILDKAT
 ) and found the shim to be a 285. Then realised that using a 280 would make the clearance a whopping .008, and since we didn't have any replacement shims, we left the slightly close shim in there, but he knows how to replace it now!
 Next, we drained the fluids, engine, middle, final drives. The hex heads in his refill plugs had been rounded/wallered out, he had previously gotten them loosened with the screwdriver/chisel approach, but we needed to replace them. We then pulled the shift cover, clutch cover, mirrors, side covers, left rear turn signal, and also the clutch basket. Then we got the bike flipped over on it's back. Then we saw that the modified welded on mufflers on his OEM 2-1's for each side would not clear the tranny pan, so they had to come off. Then we got the tranny pan off without damaging the gasket, but we found a mysterious washer in it? When I got the clutch basket off, saw that there wasn't a "C/E" ring on the end of the shift fork shaft at the oil pump idler gear?
 And the "C/E" ring behind the gear was pushed farther inwards towards the engine past the notch?

We had stopped about 7pm for 30 minutes for a nice home cooked chicken dinner with potato salad. We then removed the countershaft axle bolt, and the bearing cap/cover end from the other end of the countershaft. Then slid
5th gear out, pulled the shift fork shaft out, let the shift forks drop out of the way, and with just some modest wiggling of the gears, got them out. But it was getting late, so we held off of the gear grinding for the next day. But we went ahead and pulled down the carbs, soaked the jets, emulsion tubes, found the pilot screws were some 5-6 turns OUT
 , found some black gunk in the right bank of carbs inlet channels, spritzed them thoroughly with cleaner, bench synched, then put them back together with the new float valves. I had bought a 180 piece set of metric nitrile o-rings, but a size that seemed right was too thick for the valve seat seal, finally used a smaller overall diameter, but it had a smaller section thickness that worked, and got them back in. Got the carbs all back together, and went to bed about midnight!
 Saturday, had breakfast, got back to garage at 9am, and started to try to do the grinding on the gears. Even with my spare 10 gal tank along with my 4.5 gallon pancake compressor, it wouldn't provide enough continuous volume of air to effectively drive the grinder more than 20-30 seconds!
 And the only cylinder shaped grinding stone (white) wasn't holding up very well anyways, and was wearing away way too fast!
  SO....we decided to make a run for parts, the C/E rings, possibly the K&N 33-2586 that was mentioned in Maximan's substitute filter for XJ's tip, as well as some fresh grinding bits for my trusty Dremmel! Also wanted to try to find some single walled rubber fuel line, he had gotten some that he was told was single walled, but was regular 1/4" ID double walled stuff! Napa didn't even have any, but got the C/E ring clips. Went to LOWES and got the stones, and also some air fitler FOAM that I thougth we could use in place of the badly clogged OEM filter element material.

We got 2 of these packages, put them across the filter, and cut off the ends, and used the cut off for the open middle section. Then used some gasket red RTV to seal it to the frame. Here's "AL" being attacked by the sharp metal screen edges of the filter frame!!


Spent about 1 hour on this shopping spree, got back and got to work! I got the gears ground in about an hour, ALL 4, 2nd, 5th, and 1st and 4th since we were in there and they also showed some signs of wear, skipping wasn't too far away! Stopped for 15 minutes for a sandwich break. Got the gears all cleaned up, oiled and back into the engine with a minimal battle with the forks, the shift shaft with proper new C/E clips, found where that washer needed to go, and then "AL" mentioned that it seemed like he didn't have a
5th gear when riding!
 A closer look at the shift drum revealed the bent tang and missing 5th gear dowel that wasn't found in the oil pan!
Fortunately I was able to canabalize a parts engine for the dowel and unbent plate! Pulled clutch basket apart, all frictions miked to about 2.95 or so, well beyond the 2.8 minimum(only 30K on the Odometer), springs measured to just within spec, but were possibly 25 years old, so replaced with the new almost 2mm longer MikesXS springs!
 Just deglazed the steels, a couple had some blue friction burn markings. Got the clutch basket back in just fine, making sure the gears engaged the oil pump idler gear. A trick to verify this is to use a mirror to peak around behind the basket!
We stopped for a great 4th of July dinner, SWMBO cooked some fine NY Strip steaks, Garlic mashed potatos, and a healthy garden salad!
"AL" made a run to the auto store for the replacement middle/final drive refill plug bolts/nylon washers. I pulled the rear wheel and final drive off, cleaned and regreased the wheel and drive splines, and put it back together. We also bled all of the brake lines, topped off the MC's. The rear brake pedal didn't want to return, found the big return spring had come undone from it's retaining position and was bent!
So...got the clutch and shift covers and tranny pans back on. Flipped the bike back over, and proceeded to work on the FUSEBLOCK, classic broken clips, spliced in single glass fuseholders. "AL" drained the fork tubes and got some yucky grey fluid out!
 Pulled the fork caps to be able to refill. When putting the drain bolts back in, one broke off in the tube! Was actually able to drill it and use an easy out to get it. Used a spare metric screw with an O-ring to seal it. Was able to get the caps back on fairly easily since jacking up the front end to release tension. Refilled all fluids, put the carbs back on with OEM box, new foam air filter, new NGK plugs, hooked up portable synching fuel tank, reconnected charged up battery, and turned key, hit the starter, and engine cranked, popped to life for second and then died!
 Then wouldn't crank! Kept hitting starter button, no go, just pilot box lights flickered a little, but nothing!
 We had previously repaired the clutch interlock switch...wire had gotten pulled from switch. Hooked up jumper box with it on the starter side of the solenoid, and applied power and it cranked and started and kept running. So we proceeded to perform the vac. synch utilizing the YICS tool, BTW, the 5/32" vac hose works, the 3/8" fuel line was too wide! I then thought that since the solenoid had worked before, and quit, and we had not done anything else, that it must have gone bad, took one off of parts bikes, wired it in, but it also didn't work. Checked the continuity of the blue/white wire to the ground/starter button, it was good. Then checked the red/white wire and was NOT getting 12 volts!?
 Again, it was now midnight, and "Time" to rest, the brain was fried, and I felt like we had hit "Another Brick in the Wall"!
 It was at this time that I thought of Randy or 3Phase/Scott..electrical Gurus..."Wish you were Here", to help me diagnose this beast! I reviewed the XJ wiring diagram on my way to bed.
Sunday Morning, 9am, started to troubleshoot. Took the alleged bad solenoid, hooked the red/white and blue/white wires to my booster box, and got the required click/click sound, it was actually good! Put it back in. Then pulled the connectors for the side stand switch connecting all 3 wires together, still nothing. Pulled the clutch switch connector, same! Pulled the tipover switch connector and still nada. This was when Al mentioned that he had had an intermittent starting problem before. The neutral light was on. So....then took a jumper wire to provide 12 volts to solenoid red/white wire, and it cranked with the starter button just fine. SO....since time was not on our side, and "AL" wasn't worried about the safety interlocks, we elected to do the down and dirty quick fix and just spliced the aux terminal power supply that we hadn't run thru the fuseblock into the solenoid switch, he always checks to make sure it's in neutral before starting anyways, and it fired up. Rolled it out, and took it for a test run up and down the neighborhood, shifted just great thru all 5 gears. I hadn't had a chance to ride it before, but "AL" said after his test run that it definitely had more power, pep, and throttle response than before. You could say that it would "Run Like hell".
We got it loaded into his truck and he was on the road going back home by 1pm, and I got word that he made it by 6pm safely! I took my shower, did the weekly shopping, and have been sitting here resting and composing this report for the last few hours while watching TV!
Here's hoping the rest of you had a restful and enjoyable Holiday Weekend. Mine was a bit busy, but helping a fellow Xsive get his bike into proper running order was also very rewarding.


Comment