'Been crimping things on cables all my working life, with all sorts of voltages, from 1/2 a volt to 11,000 volts, and I've never had a problem with crimped connections. Seen plently fail over the years though. Mostly it's down to the quality of the crimp tool, and the current load carried by the cable. A poor crimp on a low current cable will probably hold up okay, but on a high current cable it's most likely going to heat up and fail. Oxidation can be a problem but usually only if the crimp is poor in the first place. A tight crimp is far less likely to oxidise. Golden rule is use the right tool for the job, a small hand crimper for small cables .5 to 4.0mm, a ratchet type for cables up to 16mm, and a hydraulic crimper for the big stuff (not that that's likely on a bike). Soldering is fine in the right application but I find that on a bike for the most part it's unnecessary and can cause problems of it's own, especially if the cable is subject to movement or vibration. I rate it right up there with Lucas electrics, and only use solder when nothing else is available.
Crimping the 90 degree fuseblock connectors, what's the Trick?
Collapse
X
-
1980 SG. (Sold - waiting on replacement)
2000 XJR1300. The Real modern XS11. Others are just pretenders.
Woman (well, my wife anyway) are always on Transmit and never Receive.
"A man should look for what is, and not for what he thinks should be" Albert Einstien. -
Sorry guys, but solder connections on anything that vibrates is BAD. Reasons for NOT soldering include:Hi TC,
us old farts don't believe in crimp connectors. (OK the expensive ones on aircraft work fine with the $50 crimping tool but not the el-cheapo connectors and sheetmetal crimpers from Harbor Freight) First put a shrink sleeve on the wire then strip the plastic off the connector and solder it on then slide the sleeve over the soldered joint and take the heat gun to it.
Under a high-heat situation, the solder will melt; a mechanical joint will hold. Soldered wire connections have been illegal in the electrical industry for years and that's the main reason.
It removes the temper from the wire strands, making them MUCH softer and easier to break.
It removes the flexibility of the stranding. You can mitigate this somewhat by installing shrink tube over the connection, but you still don't have the best possible joint.
Insulated crimps got a bad reputation, and deservedly so when used on vehicles. They're not sealed, and you don't get a 100% crimp when using the 'proper' tool. If you look closely at the factory crimps, you'll also see that there's a secondary crimp into the wire insulation. This helps tranfer the bending stress, and is what's missing in most of the aftermarket crimps.
Best way to do this? Use uninsulated crimps (hard to find; you'll probably need to cut the plastic off the regular ones) and use a tool like that Channel-Lock one with the 'U' shaped opening. There are better ones out there; Ideal, T&B, and Greenlee all make these tools with two/three sizes of crimp and they work the best. Expect to pay $25-50 for one new, and it will last your lifetime. You can get a full, 100% crimp with these, then use a shrink tube over the joint and overlap it onto the insulation to tranfer the bending stress and seal the connection. Do this, and you'll have a joint that is equal to the uncut wire in electrical continuity and mechanical strength/flexibility.
And I AM one of those 'old farts'....
'78E original ownerFast, Cheap, Reliable... Pick any two
'78E original owner - resto project
'78E ???? owner - Modder project FJ forks, 4-piston calipers F/R, 160/80-16 rear tire
'82 XJ rebuild project
'80SG restified, red SOLD
'79F parts...
'81H more parts...
Other current bikes:
'93 XL1200 Anniversary Sportster 85RWHP
'86 XL883/1200 Chopper
'82 XL1000 w/1450cc Buell, Baker 6-speed, in-progress project
Cage: '13 Mustang GT/CS with a few 'custom' touches
Yep, can't leave nuthin' alone...Comment
-
I just used a regular pair of pliers and crimped them down really hard. Then, I filled the socket with dielectric grease. They were stiff, but not impossible. I also filled the entire underside of the fuse block with dielectric grease and covered the underside with a piece of cardboard 1980 XS850SG - Sold
1981 XS1100LH Midnight Special (Sold) - purchased 9/29/08
Fully Vetterized and Dynojet Kit added, Heated Grips, Truck-Lite LED headlight, Accel Coils, Irridium plugs, TKAT Fork Brace, XS850LH Final Drive & Black SS Brake lines from Chacal.
Here's my web page devoted to my bike! XS/XJ User's Manuals there, and the XJ1100 Service Manual and both XS1100 Service manuals (free download!).
Whether you think you can, or you think you cannot - You're right.
-H. FordComment
-
Remember:
Soldered connections anneal the wire and make the soldered joint very brittle, thus causing a weak point if there is much flexing of the wire. Properly crimped (gas tight) connections allow the wire to flex without breaking and last much longer. Soldered joints are very proper where connections are to be made permanent and no vibration and flexing. Crimped connectors are proper on connections that you may remove over the years from time to time. Choose wisely, as I would hate to have a connection break loose a 100 miles from home.Comment
-
A while back I picked up a set of these Conduct-Tite Crimpers. Haven't had one connection fail yet.
 .
.
They also came with another set of anvils you can change out for crimping small battery cables.
 Richard
Comment
-
x2 on the dielectric grease in the socket, where the wire goes in just before inserting the wire. Also dielectrric grease on the fuse terminals and female connector and every other plug connector on the bike.
also x2 on the "U" shape on one side and a "tooth" on the other side of the jaw.
If you are using the two half mooned sided jaw crimp, barrow your neighbors "U"/"tooth" style tool. You'll thank me later.
Also put the "U" side of the tool on the split side of the terminal and the "tooth" on the side with no split. Look into the end of the wire connector where the wire goes in and you should see what I mean. This has been my best personal experience, since the "tooth" may only catch one of the ears on the split end of the connector or cut some of the wire.
Also if the wire is too small for your type of connector get a smaller gage wire connector or strip the wire a little longer and fold it in half then insert it into the connector for a firmer crimp.
If this don't help hit it with a hammer........ Flatlander
'81 XS11HComment
-
Very interesting thread. And as a bonus, another excuse to buy a tool I don't already have! Ken Talbot
Comment
-
Mike's XS sells the tool as well.
http://www.mikesxs.net/products-49.html#products
Part #35-0008
How about couplers and terminals?
http://www.mikesxs.net/products-78.html#products
I couldn't be caught dead crimping with pliers!Marty (in Mississippi)
XS1100SG
XS650SK
XS650SH
XS650G
XS6502F
XS650EComment
-
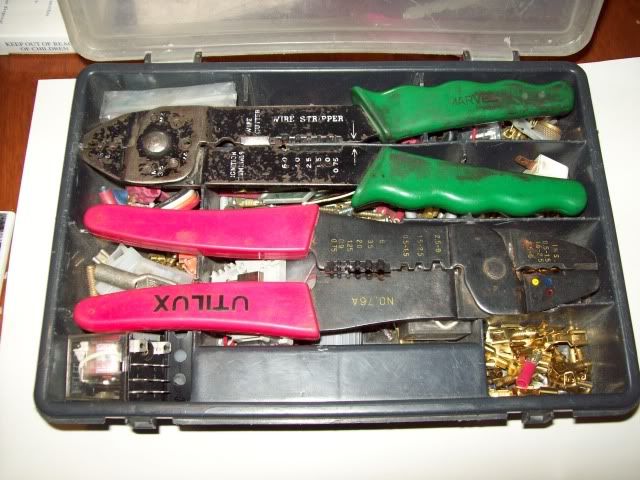
Okay, here's what I use..
For these....
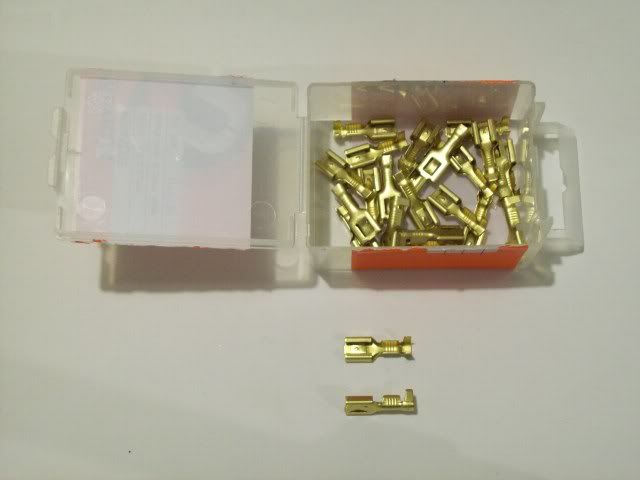
I use these.
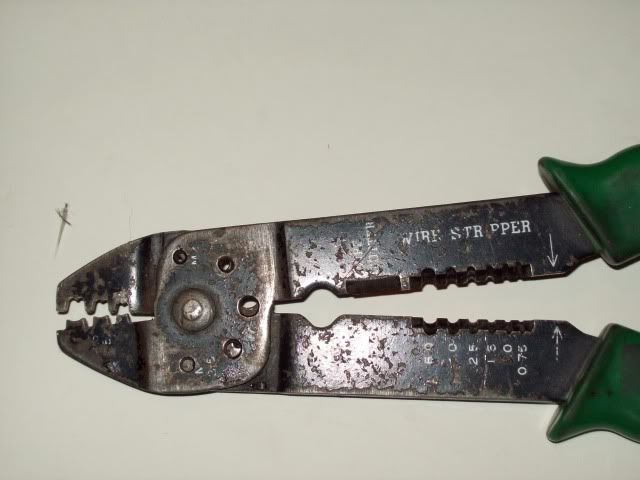
For these....
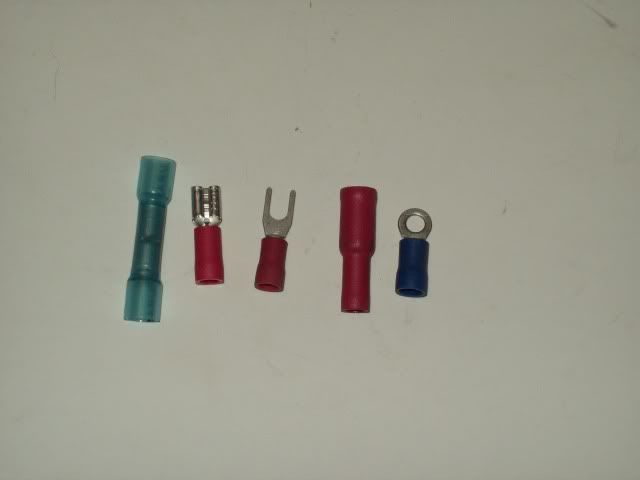
I use these.
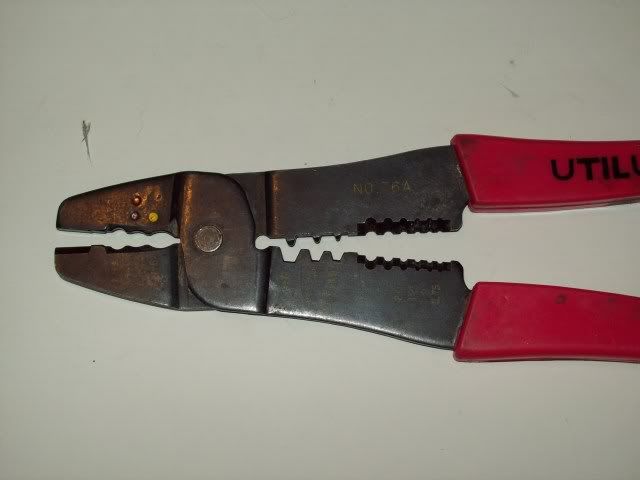
For these....
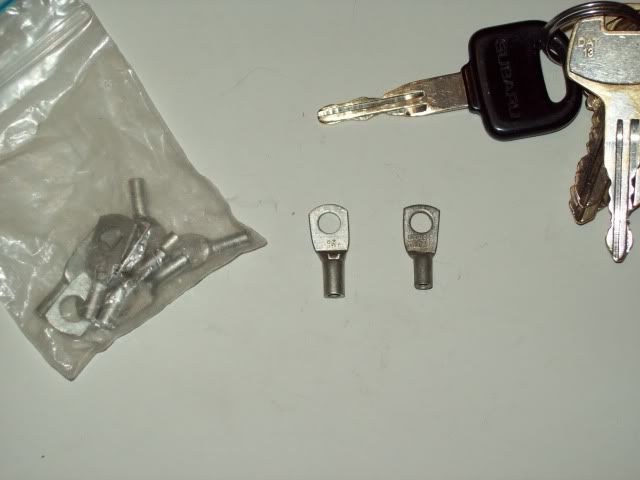
I use these.
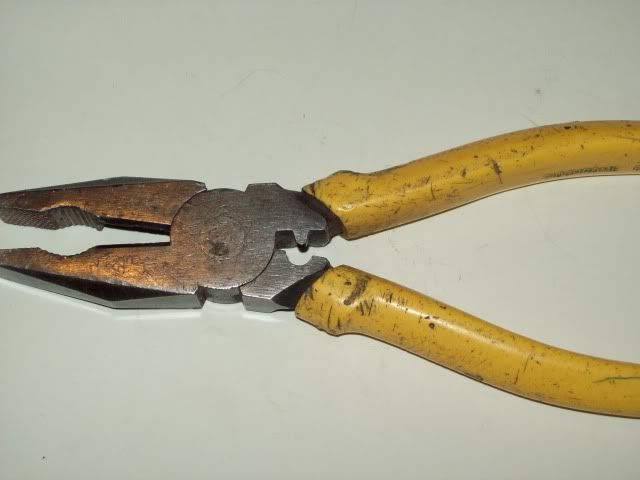
For these....
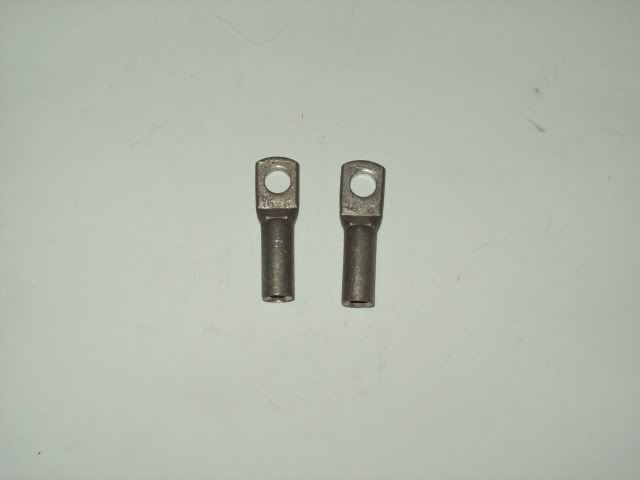
I use these.
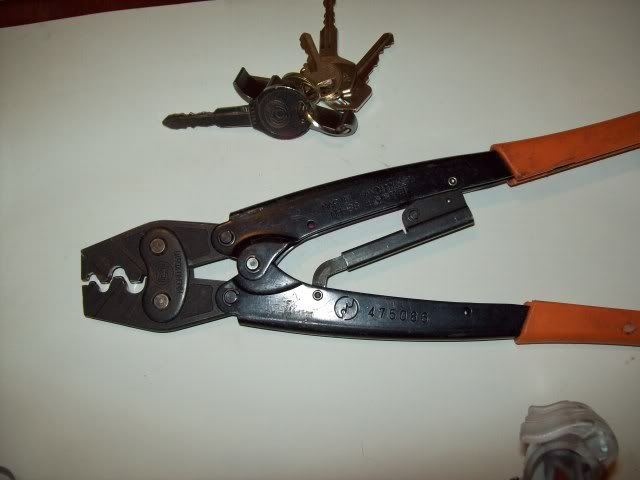
Most of it lives in here....
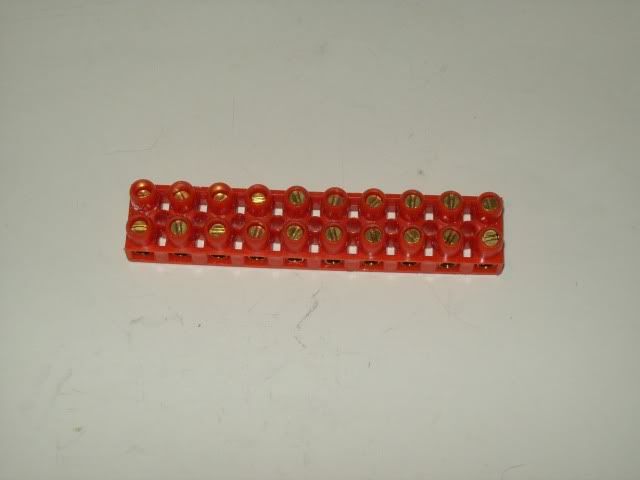
And I always carry some of these on the bike, just in case...
 1980 SG. (Sold - waiting on replacement)
2000 XJR1300. The Real modern XS11. Others are just pretenders.
Woman (well, my wife anyway) are always on Transmit and never Receive.
"A man should look for what is, and not for what he thinks should be" Albert Einstien.Comment
-
Headline: Kiwi Characterizes Quality Crimpers
Nice collection, Brian. Why do I get the feeling the crimper museum has been robbed .
I think I have a loose screw behind the handlebars.
'79 XS11 Standard, Jardine 4/1, Dyna DC1-1 Coils, 145 mains, 45 pilots, plastic floats - 25.7mm, XV920 fuel valves, inline fuel filters, speed bleeders, Mikes XS pods, spade-type fuse block, fork brace, progressive fork springs/shocks, manual petcocks, 750 FD, Venture cam chain tensioner, SS brake linesComment
-
melting solder?
I've got to ask, how serious of a concern is the solder melting? Assuming you are using lead-tin solder, you are talking about a temperature of about 190°C. Typical insulation only allows up to 90°C temperatures. It seems like you would have bigger problems to worry about before you have a connection hitting that temperature.
Also, how would annealing wire, a process meant to make metal ductile, make it more brittle? Does soldering even do this to a metal?It's pronounced "Joey"
1979 XS1100 SpecialComment
-
If mashing the splice with a pair of pliers works, I wouldn't be too concerned about a solder joint.
One of the keys to a good solder connection is not to allow the solder to wick up under the wire insulation. It should come up short. It's not going to melt unless you have a short circuit and no fuse protection. At that point, the insulation will be melting.Marty (in Mississippi)
XS1100SG
XS650SK
XS650SH
XS650G
XS6502F
XS650EComment
-
Well, it's not common, but it does happen. A short or poor connection elsewhere could cause enough heat to cause a solder failure. And remember, insulation is RATED for up to 90C, but that doesn't mean it runs off the wire at that temp. There is a cheat factor there. Sure, you'll have other problems if you see these kinds of temps, but why add to them? I've seen electrical gear that used mechanical wire connections, where the wire insulation was GONE and it still worked; that won't happen with solder.I've got to ask, how serious of a concern is the solder melting? Assuming you are using lead-tin solder, you are talking about a temperature of about 190°C. Typical insulation only allows up to 90°C temperatures. It seems like you would have bigger problems to worry about before you have a connection hitting that temperature.
Also, how would annealing wire, a process meant to make metal ductile, make it more brittle? Does soldering even do this to a metal?
The worst part about a solder joint is how brittle it makes the wire. Soldering removes the original annealing. Try this: clamp a piece of stripped stranded wire in a vise, then bend it back and forth and count how many times it takes before it breaks. Then do the same thing except clamp a spot that's been soldered. I'll guarantee that will break MUCH faster....
And anytime you heat any metal, it changes somehow. It all depends on what it is.
'78E original ownerFast, Cheap, Reliable... Pick any two
'78E original owner - resto project
'78E ???? owner - Modder project FJ forks, 4-piston calipers F/R, 160/80-16 rear tire
'82 XJ rebuild project
'80SG restified, red SOLD
'79F parts...
'81H more parts...
Other current bikes:
'93 XL1200 Anniversary Sportster 85RWHP
'86 XL883/1200 Chopper
'82 XL1000 w/1450cc Buell, Baker 6-speed, in-progress project
Cage: '13 Mustang GT/CS with a few 'custom' touches
Yep, can't leave nuthin' alone...Comment
-
Hi guys,
I have yet to mount my fuse box, but I was wondering did anyone seal the back of their box? If so, how did you do it? I like the box, and the cover has a weather tight seal but it doesnt matter much if the back of the box is exposed... Thanks!
P.S. I think my connections will get a crimp and weld, then heat shrink. Who says you can do both?'79 XS11 F
Stock except K&N
'79 XS11 SF
Stock, no title.
'84 Chevy K-10 "Big Blue"
GM 350, Muncie SM465, NP208, GM 10 Bolt with 3.42gears turnin 31x10.5 Baja Claws
"What they do have is an implacable, unrelenting presence and movement that bespeaks massive power lurking behind paint and chrome. They don't wail like a screeching ninja, the don't rumble like a harley. They just growl like a spactic, stressed out badger waiting to rip your face off and eat your soul." Trainzz~RIP~Comment
-
I packed the underside with dielectric grease, then just slapped a piece of cardboard over the hole to hold it in. I have no idea how secure the cardboard is gonna be, but at least I know everything in there has a lifetime supply of grease coating it.1980 XS850SG - Sold
1981 XS1100LH Midnight Special (Sold) - purchased 9/29/08
Fully Vetterized and Dynojet Kit added, Heated Grips, Truck-Lite LED headlight, Accel Coils, Irridium plugs, TKAT Fork Brace, XS850LH Final Drive & Black SS Brake lines from Chacal.
Here's my web page devoted to my bike! XS/XJ User's Manuals there, and the XJ1100 Service Manual and both XS1100 Service manuals (free download!).
Whether you think you can, or you think you cannot - You're right.
-H. FordComment
Comment