Announcement

Collapse
No announcement yet.

Question on porting the cylinder head

Collapse
X
 
  • Filter
  • Time
  • Show
Clear All
new posts

  • #16
    Port Surfaces

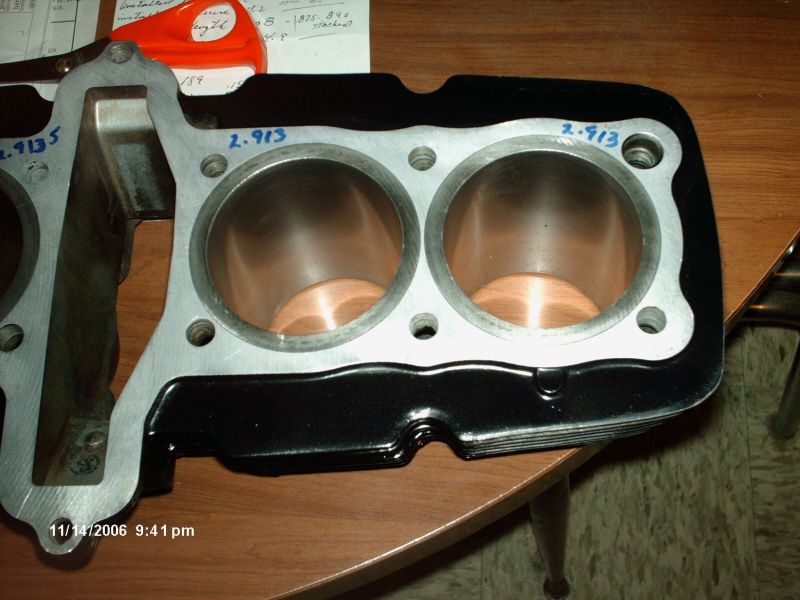
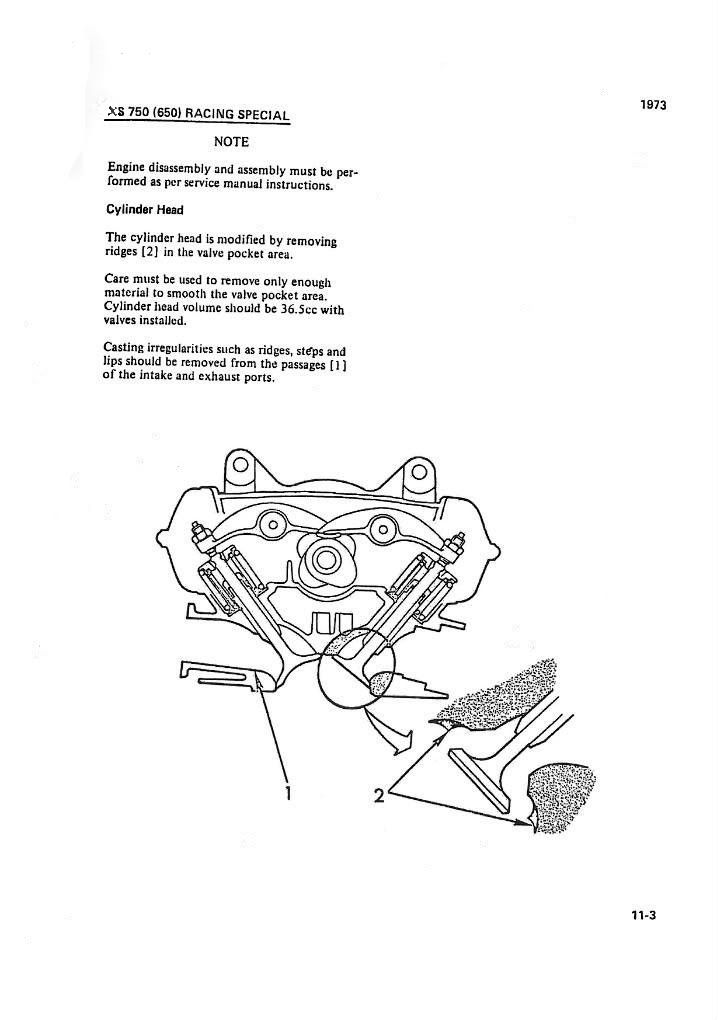
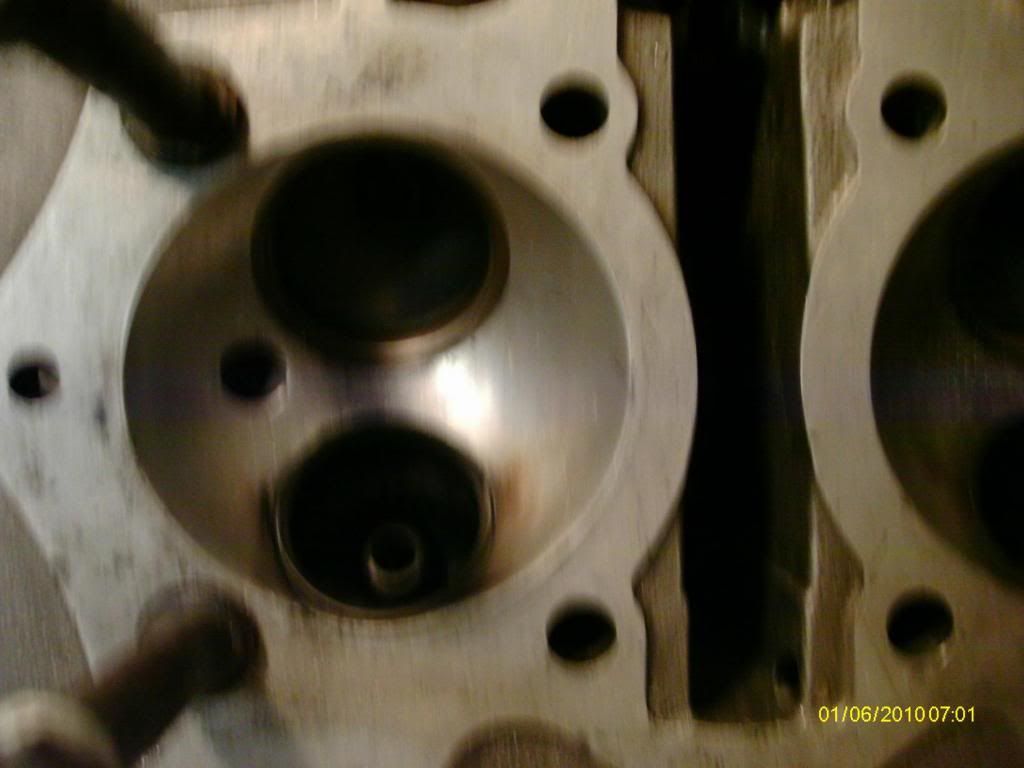
    The intake ports see wet flow and the exhaust see dry and so the intake ports should have a finish that is course, something on the order of 400 grit and the exhaust should be as slick as possible. The most important part of the port is the bowl just below the valve and the short side radius. The intake port measures about 1.35 inches at the opening and the intake valve on the late head measures 1.5 inches and the port should be funnel shaped and the guide which is huge in stock form blended and shaped favoring the entry and floor of the port and the two left ports enter the chamber differently than the two right ports. The shape is the most important and the port can easily be ruined if it's not correct and it's velocity that you are after not maximum size and flow. The port volume should be based on the displacement of the cylinder and the rpm in which the motor will be working which is not unlike camshaft timing in that the bigger the motor the bigger the port volume needs to be. The age old mod of blending the intake boot to the head (port matching) and removing the casting flash with a porting tool (400 grit tootsie roll) is all the novice porter should attempt. The chambers are slick enough to begin with and should be left alone because it's easy to take a couple cc's out of them and a couple cc's just lost you a half point of compression. A fine stainless steel rotary wire brush turned at slow speed will slick them up without removing any material. Mention is made that the late head in stock form will flow about 10% more than a stock early head and because of the larger valve in the late head the funnel shape can be more pronounced than that of the early head because the size of the entry is the same for both. The late head is much better in stock form from about .200 valve lift up than the early one and in modified form the disparity is even greater. The early head is fine for a heavy touring bike but if it's top end horsepower you are after it's not the plan. The ultimate torquer using stock parts for a Wing Ding type XS would be the early head, late pistons and late cams. If you were building a race head and using custom pistons you would do major work on the chambers but if you are using stock pistons or off the shelf Wiseco's you are fighting for compression and so leave the chambers alone. You can cut the head .016 without having to worry about cam chain problems or having to advance the cams and pick up .38 of a point of compression. You can paint the piston domes with VHT Hi Temp header paint and cook them in an oven at 300 degrees for one hour which cures and hardens the paint so it won't come off but all this really does is speed up the carbon build up on the piston dome, ditto for glass beading the piston tops and I've tried all this stuff on race car motors on the dyno and found nothing power wise. Wiseco, Venolia, J&E and others offer coating services for some of their pistons but any of this skirt coating stuff is tricky business and can do more harm than good if not applied properly. The latest generation of Wiseco pistons for our XS bikes are plenty trick and all they need is a properly finished bore to work and I might add that a properly finished bore cannot be obtained with a hand held hone especially a dry hone. My cylinders were bored and honed by Advanced Sleeves in Mentor Ohio on a Sunnen CK-10 machine and they came out perfect. See picture,


    Damn, I forgot what the original question was, I must be getting old.
    Last edited by Ken Talbot; 11-09-2008, 10:57 AM.
    81 Black "1179" Xcessively trick Super Special. One owner (me).

    Comment


    • #17
      Head was machined .012 so whatever I lost with the very minimal smoothing of the groves around the valves should have been picked up there.

      The product I use (GearKote) is very easy to apply and I have used it in the past on 2 stroke pistons and chambers as well as other areas.

      Performance gains would be a guess because I've never had access to a dyno, but my 2 stroke engines (KT100 Yamaha) were very competitive at the racetrack, and I was able to run head temps after using it of 400-420deg, with no seizing problems, whereas before using it I was running 360-380deg. The 2 strokes would make more HP as you leaned out the mixture and a lot of guys ran on the ragged edge of seizure all the time, but since my budget wouldn't allow it, the coating gave me a measure of insurance. Since the primary solid is Mos2, it sheds carbon well (a big concern with 2 stroke Kart engines and bean oil).

      After cleaning and degreasing, the part is heated to 120deg and the part is lightly coated with (I use 3 fog coats) GearKote and 3 fine coats is a thin enough coating that I have never had a problem with parts interference, the ideal coating thickness is .0004in. Up to 5 fine coats will not exceed that thickness. The part is then baked for an hour at 325deg. After baking it can only be removed by sandblasting, as it is resistant to all known solvents.

      I also use the stuff as a coating on the outside of the cylinders for an easy maintenance paint finish, and have seen entire engines done this way, (there used to be an outfit in NY which specialized in this finish on bike engines). They make it in the basic grey GearKote, and a colored version called GunKote, which I will be using on my clylinders and valve covers as a final finish in satin black.

      It is very tough... and easy to clean because of the moly, when I used it on the valve covers of my Guzzi (a 78 LeMans with a lot of engine mods) it lasted years with no maintenance except a damp cloth to wipe off road flm and bugs. The stuff was originally developed as a dry film lubricant for use on Navy Seal weapons as an anti corrosive dry film lubricant since they are often exposed to salt water...they still use it, and all M16s are coated inside and out with it as specified by the military.

      It is a bit expensive at about $30 a pint, but a pint goes pretty far.

      Guy

      '78E

      Quidquid latine dictum sit, altum videtur

      Comment


      • #18
        When I did my head I was advised to not bother doing anything to the intake side unless a flow bench was available. the directions I got were to concentrate on the exhaust side. Mostly enlarge the port to match the exhaust headers. When I did mine I cleaned the chambers up real good and polished them without removing any material. I took a far amount out of the exhaust side ports mind you and took a few 1000s off the gasket surface of the head. this was done as part of my 1179 kit. I did it as a DIY job after reading up on it and discovering that even a DIYer can get about 15% more flow by enlarging the exhaust side ports to match the header pipes. There are some photos of what I did on my spaces page.
        Rob
        KEEP THE RUBBER SIDE DOWN

        1978 XS1100E Modified
        1978 XS500E
        1979 XS1100F Restored
        1980 XS1100 SG
        1981 Suzuki GS1100
        1983 Suzuki GS750S Katana
        1983 Honda CB900 Custom

        Comment


        • #19
          Originally posted by 79XS11F View Post
          When I did my head I was advised to not bother doing anything to the intake side unless a flow bench was available. the directions I got were to concentrate on the exhaust side. Mostly enlarge the port to match the exhaust headers. When I did mine I cleaned the chambers up real good and polished them without removing any material. I took a far amount out of the exhaust side ports mind you and took a few 1000s off the gasket surface of the head. this was done as part of my 1179 kit. I did it as a DIY job after reading up on it and discovering that even a DIYer can get about 15% more flow by enlarging the exhaust side ports to match the header pipes. There are some photos of what I did on my spaces page.
          Rob
          Rob, I tried to find the pics on your myspace page. Really cool by the way. Can you give a little more direction to these exhaust port picks?
          Dan
          Current Rides: '82 XJ w/Jardine 4-1's, GIVI flyscreen, '97 Triumph Trophy 1200
          Former Rides: '71 CB350, '78 400 Hawk, '75 CB550/4;
          while in Japan: '86 KLR250, '86 VT250Z, '86 XL600R, '82 CB450(Hawk II), '96 750 Nighthawk, '96 BMW F650

          Comment


          • #20
            Originally posted by barberad View Post
            Rob, I tried to find the pics on your myspace page. Really cool by the way. Can you give a little more direction to these exhaust port picks?
            Dan
            There should be several photo albums there. Scroll down to engine hop up.
            Rob
            KEEP THE RUBBER SIDE DOWN

            1978 XS1100E Modified
            1978 XS500E
            1979 XS1100F Restored
            1980 XS1100 SG
            1981 Suzuki GS1100
            1983 Suzuki GS750S Katana
            1983 Honda CB900 Custom

            Comment


            • #21
              Here's a like to DIY porting

              http://www.sa-motorsports.com/diyport.aspx

              I think that link is also on my page.
              Rob
              KEEP THE RUBBER SIDE DOWN

              1978 XS1100E Modified
              1978 XS500E
              1979 XS1100F Restored
              1980 XS1100 SG
              1981 Suzuki GS1100
              1983 Suzuki GS750S Katana
              1983 Honda CB900 Custom

              Comment


              • #22
                Exhaust Porting

                The exhaust port of a cylinder head should flow 70%-80% of what the intake port does and once it get's much over this you have too much scavenging effect. Contrary to what a lot of people think, the exhaust side of these two valve motors including the Kawasaki and Susuki's of the same era have very good exhaust flow compared to the intake side because the intake port makes a somewhat tortuous series of turns when the mixture leaves the carb throttle body on it's way to the valve. This is why a lot of guys when going to aftermarket cams change only the intake cam and leave the exhaust cam stock and achieve such good results. The biggest hinderance to air flow in the exhaust port is the size and shape of the guide boss which is huge and the valve bowl itself and not the gasket surface area where it meets the pipe and it's the shape not the size that is important. Unless you know what you are doing and have access to a flow bench to check your work you should confine your port work to removing the casting flash from the ports and a good valve job and matching the intake boots to the intake ports by blending the entry. Attached is a picture of my head's exhaust port which was ported and flowed by Nigel Patrick racing.


                Last edited by Ken Talbot; 11-10-2008, 12:01 AM.
                81 Black "1179" Xcessively trick Super Special. One owner (me).

                Comment


                • #23
                  Just found this on a XS650 site about the XS650/750 "Lilly" heads. Clearly instructs racers to remove those ridges. Different heads although the idea is the same. I guess with the xs11 heads It just opens a can of worms as everyone is saying above.

                  Thought it was very interesting though.


                  Factory XS650 head:


                  Head smoothed as per instructions...


                  Full supplement here Scroll down for the links after the jump.
                  Living to EXcess.
                  1978 XS1100E Canadian, Cartridge emulators, NOS heavy duty fork springs,
                  Showa rear shocks, ACCT, Jardine 4-2 spaghetti pipes.
                  1979 XS1100F Canadian, stock exhaust. Top end rebuild in progress.

                  Comment


                  • #24
                    Interesting post of xs650 heads. But looking at that combustion chamber, it isn't polyspherical like the xs and I don't know if that makes a difference.

                    A lot of times, changes in the engine especially when it comes to fluid dymanics, has different reprecussions.

                    Like for example casting ridges near the valve throat. Sometimes these can promote turbulence in the combustion chamber and improve low speed power/torque. In fact, on the new-ish BMW k bike, the 1300, they paid a company, Ricardo, probably millions of dollar to fix driveability problems and overall refine the original k1200 bikes. You know what they did to the head? In addition to detuning the cam timing and duration, they simply carved a 2-3mm ridge in the intake runner about 1mm deep just above the throat to promote mixing and improve low speed running.


                    But back to this head. Thinking out loud, I wonder if unshrouding the valves have the unintended benefit of antireversion during overlap of the cams.Too bad that ridge on my head is less pronounced on the exhaust side.
                    XS850

                    Comment


                    • #25
                      I posted at the beginning of this thread a few years ago and I said that with head work sometimes less is more. Concerning the XS11 head all I can say is that fooling around with the chamber is not something to be embarked on lightly.....in other words, what you wish for you probably will not get.

                      Now a few things I have done with good results (though not a real seat of the pants pickup in power but noticable) is easily accomplished with a few burs and sanding cones and several hours. Sorry I do not have any pictures except for the valves. They are:

                      1. Size your intake ports to the intake boots and streamline the big boss in front of the valve stem. Roughen up the surfaces but do not remove much of the material in the bowl because you will change the intake charge speed (and probably lower the speed) into the head.
                      2. Use your old, crushed exhaust crush gaskets as a template to remove material in the exhaust ports leaving the ports 1/16" smaller than the gasket. Blend the port out to the new diameter and smooth the surface.
                      3. Remove the valves and do a 30 degree cut back which lets the fuel charge start moving toward the seat an instant quicker when the valve starts to open. See the picture....before on the right and after on the left. Do both intake and exhaust but the intake is more critical.

                      When removing material from the ports I used the quarter rule the car guys use but changed that to a nickel rule due to the smaller ports. The rule is generally if you remove more than a nickel size amount of aluminum from the ports you have taken off too much. As I said before, less is more.

                      Now I'm not saying you cannot get power from reworking the chambers but I am saying that to get it you must be ready to do a lot of work, testing and head replacing and history has shown you probably will not see much of a gain.

                      Back cut valves:

                      Mike Giroir
                      79 XS-1100 Special

                      Once you un-can a can of worms, the only way to re-can them is with a bigger can.

                      Comment


                      • #26
                        Hemi Heads

                        This head was not prepared per the instructions but was turned into a full hemispherical chamber and subsquently ruined.
                        The Yamaha two valve polyspherical head was state of the art in the late seventies and early eighties and although it needed two plugs per cylinder it was pretty efficient, much more so than a true Hemi chamber.

                        A good two valve head needs squish/quench bands to create turbulance which makes for a more rapid burn but too make a long story short, a Hemi combustion chamber is and has been obsolete for sometime even though Chrysler Corporation clings to it tighter than Nancy Pelosi does to Obamacare.

                        Actually the current Mopar Hemi isn't a true Hemi either even though the production version uses a north/south valve arrangement with two plugs per cylinder. The Mopar Pro/Stock car stuff is actually a twisted wedge with the plugs going through the top of the valve cover so asHemi Heads to enable the Mopar guys to sleep at night believing that their beloved Hemi is still around but the truth is it's only still popular in blown fuel burning applications i.e. top fuel and funny car drag racing..........even Harley Davidsons "OMG" don't use true Hemi's any more........ Whew, I'm outta here!
                        81 Black "1179" Xcessively trick Super Special. One owner (me).

                        Comment


                        • #27
                          I see what you mean about the squish band being gone. I guess that head was a bad example, but the Yamaha racing tech note clearly shows unshrouding the valves. Not that this is a good idea on our bikes without subsequent compression recovery. That being said, all this would mainly help in the upper rpm range which then requires stronger springs, slotted cam gears, timing etc. So can-o-worms stuff.
                          Living to EXcess.
                          1978 XS1100E Canadian, Cartridge emulators, NOS heavy duty fork springs,
                          Showa rear shocks, ACCT, Jardine 4-2 spaghetti pipes.
                          1979 XS1100F Canadian, stock exhaust. Top end rebuild in progress.

                          Comment


                          • #28
                            Hi Dan, nice to see your comments again. Are you saying that the head benefits from dual plugs? Is this also true for a stock head?
                            XS1100 3X0 '82 restomod, 2H9 '78 chain drive racer, 3H3 '79 customized.
                            MV Agusta Brutale 910R '06.
                            Triumph 1200 Speed Trophy '91, Triumph 1200 '93.
                            Z1 '73 restomod, Z1A '74 yellow/green, KZ900 A4 '76 green.
                            Yamaha MT-09 Tracer '15 grey.
                            Kawasaki Z1300 DFI '84 modified, red.

                            Comment


                            • #29
                              Dual Plugs

                              Originally posted by Mathh View Post
                              Hi Dan, nice to see your comments again. Are you saying that the head benefits from dual plugs? Is this also true for a stock head?
                              The XS head would benefit from dual plugs and Kawasaki did this on their old two valve Z-1100 retro bike back in the 90's.

                              On a combustion chamber like that employed on the XS the benefits of using a spark plug on each side of the chamber should be obvious.

                              The Ward two valve Susuki Pro/Stock drag race head also employs this arrangement but two valves in these types of heads is nothing new because the arrangement has been around since Otto himself.
                              81 Black "1179" Xcessively trick Super Special. One owner (me).

                              Comment


                              • #30
                                Does it make a difference if the second plughole is drilled vertically (90 degrees) instead of angled? Most setups I've seen show the second set mounted that way. That way the plug is not flush with the combustion chamber.
                                XS1100 3X0 '82 restomod, 2H9 '78 chain drive racer, 3H3 '79 customized.
                                MV Agusta Brutale 910R '06.
                                Triumph 1200 Speed Trophy '91, Triumph 1200 '93.
                                Z1 '73 restomod, Z1A '74 yellow/green, KZ900 A4 '76 green.
                                Yamaha MT-09 Tracer '15 grey.
                                Kawasaki Z1300 DFI '84 modified, red.

                                Comment

                                Working...
                                X