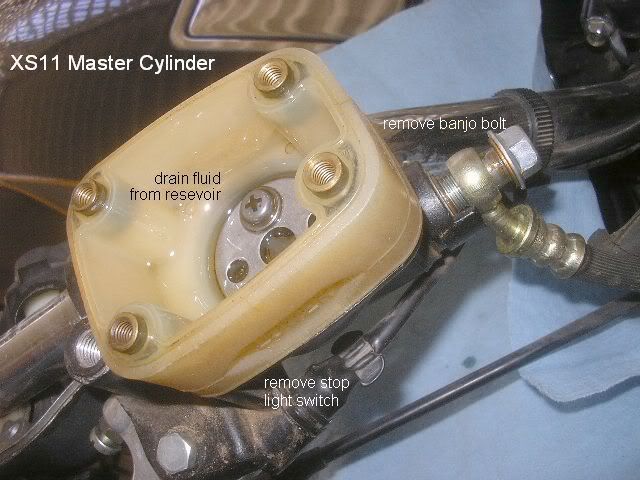
Today I rebuilt my leaky XS11 F model Front Brake Master Cylinder. Yamaha's Factory Service Manual has few details when servicing the master cylinder. Here's a few pics to assist the next forum member in making their ride stop as well as it goes. During this session I used the time to inspect the calipers & brake pads.
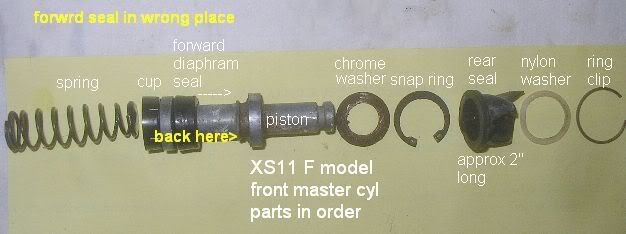
You will note the original rear seal (boot) was torn ... the forward rubber diaphram seal was found too far forward & not pushed back over the retaining lip on the piston.
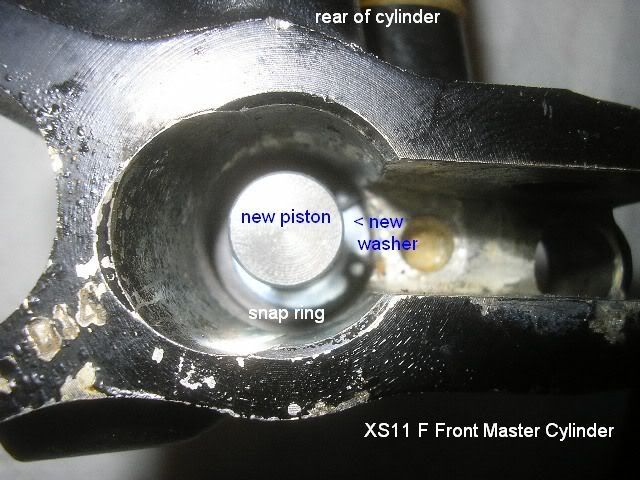
LAST ITEMS before master cylinder re-installation: Make sure you lube the new brake piston assy. with clean brake fluid and push it down as you insert the new steel snap ring [it has 2 small holes on the ends] in its groove - using the new snap ring pliers that you just bought.
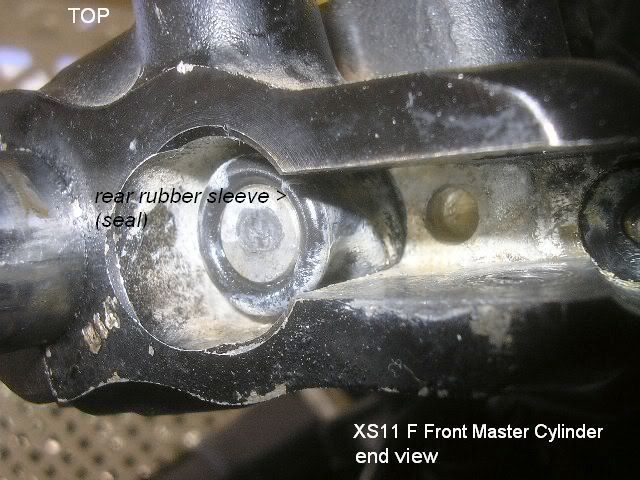
White nylon washer goes over the rear rubber boot (boot is approx. 2" long) and over the new piston assy, then the steel spring clip (thin wire) is pushed up against the nylon washer holding it securely.
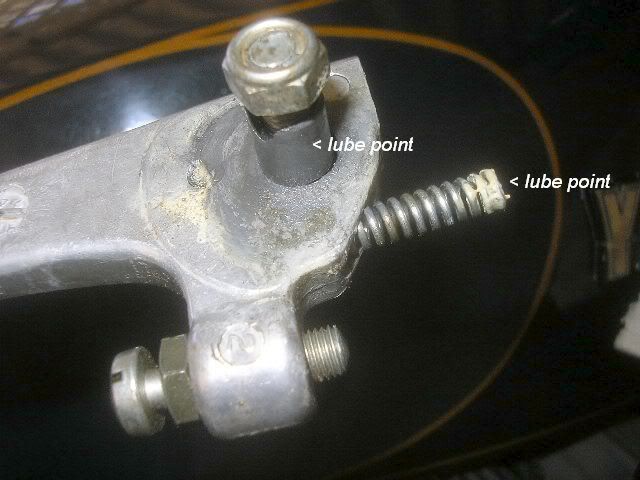
Last, but not least, remember to lube the brake lever pivot / bolt / small spring before re-installing the master cylinder. Quick bleed tip: first affix m/c on handlebar. Apply gentle pressure on brake lever, loosen the banjo bolt slightly - let major air bubbles escape, then re-tighten the bolt, before jumping into bleeding the brake calipers. This move saves time and frustration if you do it correctly.
Like many stock bikes of the era the bulky XS11 could benefit from retro-fitting stainless steel lines to gain positive brake feel. This linear feel is due to less brake line expansion. Plus benefit; you'll find the bike usually stops with more authority after this modification.
RJ
You will note the original rear seal (boot) was torn ... the forward rubber diaphram seal was found too far forward & not pushed back over the retaining lip on the piston.
LAST ITEMS before master cylinder re-installation: Make sure you lube the new brake piston assy. with clean brake fluid and push it down as you insert the new steel snap ring [it has 2 small holes on the ends] in its groove - using the new snap ring pliers that you just bought.
White nylon washer goes over the rear rubber boot (boot is approx. 2" long) and over the new piston assy, then the steel spring clip (thin wire) is pushed up against the nylon washer holding it securely.


Last, but not least, remember to lube the brake lever pivot / bolt / small spring before re-installing the master cylinder. Quick bleed tip: first affix m/c on handlebar. Apply gentle pressure on brake lever, loosen the banjo bolt slightly - let major air bubbles escape, then re-tighten the bolt, before jumping into bleeding the brake calipers. This move saves time and frustration if you do it correctly.

Like many stock bikes of the era the bulky XS11 could benefit from retro-fitting stainless steel lines to gain positive brake feel. This linear feel is due to less brake line expansion. Plus benefit; you'll find the bike usually stops with more authority after this modification.
RJ