 Tweet
Tweet
XSives -
Sometimes the XS11 Vacuum Advance & Centrifugal Advance reacts slowly or not at all. This is often a neglected maint. area.
Here are some Pics / slides useful ? for removing and servicing the XS11's Timing & Advance Plate and its internals; vacuum canister, an all-too-often; dirty / rusty advance mechanism, springs etc. 1979 XS11 Standard is the subject example.
This is not the last word on How-To to do this procedure. These pics are offered as a general guide since the Yamaha Factory Manual has almost no detailed info (no pics) on this vital service area.
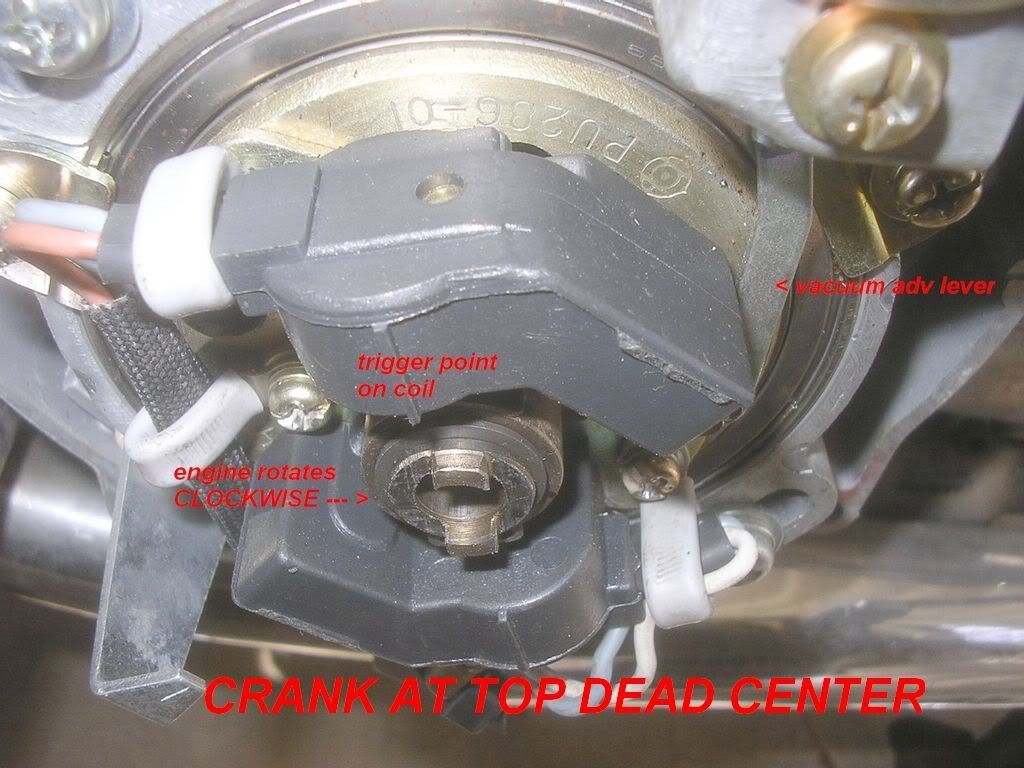
One detail: the XS11's crankshaft rotates in a clockwise direction (looking from the bike's left side). When removing the gray, marked timing plate the center retaining allen bolt turns - loosens to your left.
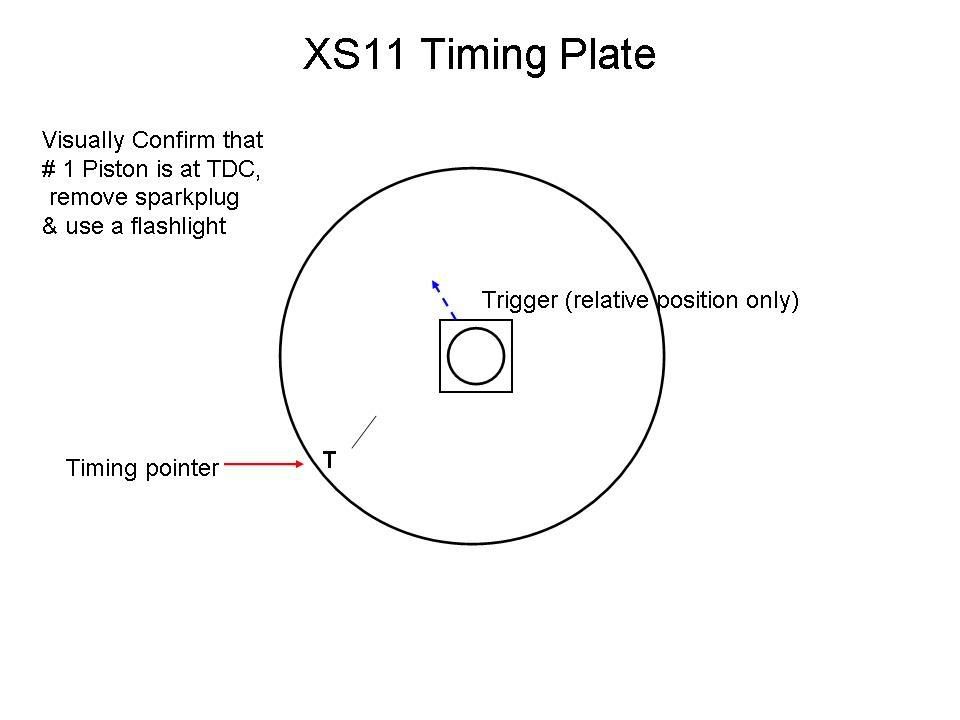
Its been suggested to set the crank & timing plate at TDC. I use a flashlight to peek thru #1 cyl. sparkplug hole, at the piston top, at Top Dead Center, in order to confirm this before doing any timing adv work.
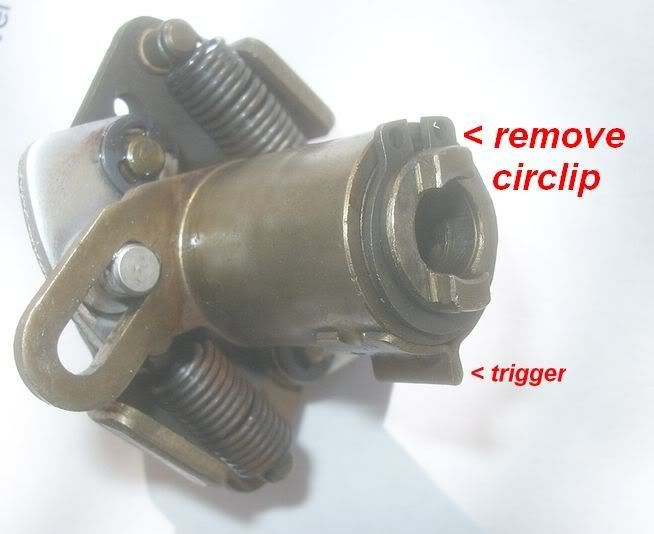
As one member has suggested: mark the relative (that is, the factory installed) position of the crank trigger to the other adv components before removal so that it will be re-installed in the same axis. If the trigger is installed facing downwards, "the engine will fire 180 degrees out-of-phase with lots of popping."
I've found taking notes has been helpful as well as being careful to put the wires, screws & retainers back in their exact original positions. There should be no need to disturb the large cast aluminum housing ring that receives the Adv Mechanism (the movable brass-plated assembly with its 2 pickup coils).
Feel free to copy the slides & to add any tech tips you have found helpful.


A Happy Owner rides a Well-Tuned Bike,
Rob
Sometimes the XS11 Vacuum Advance & Centrifugal Advance reacts slowly or not at all. This is often a neglected maint. area.
Here are some Pics / slides useful ? for removing and servicing the XS11's Timing & Advance Plate and its internals; vacuum canister, an all-too-often; dirty / rusty advance mechanism, springs etc. 1979 XS11 Standard is the subject example.
This is not the last word on How-To to do this procedure. These pics are offered as a general guide since the Yamaha Factory Manual has almost no detailed info (no pics) on this vital service area.
One detail: the XS11's crankshaft rotates in a clockwise direction (looking from the bike's left side). When removing the gray, marked timing plate the center retaining allen bolt turns - loosens to your left.
Its been suggested to set the crank & timing plate at TDC. I use a flashlight to peek thru #1 cyl. sparkplug hole, at the piston top, at Top Dead Center, in order to confirm this before doing any timing adv work.
As one member has suggested: mark the relative (that is, the factory installed) position of the crank trigger to the other adv components before removal so that it will be re-installed in the same axis. If the trigger is installed facing downwards, "the engine will fire 180 degrees out-of-phase with lots of popping."
I've found taking notes has been helpful as well as being careful to put the wires, screws & retainers back in their exact original positions. There should be no need to disturb the large cast aluminum housing ring that receives the Adv Mechanism (the movable brass-plated assembly with its 2 pickup coils).
Feel free to copy the slides & to add any tech tips you have found helpful.
A Happy Owner rides a Well-Tuned Bike,
Rob

Comment