Announcement

Collapse
No announcement yet.

My Kingdom for a valve spring compressor!

Collapse
X
 
  • Filter
  • Time
  • Show
Clear All
new posts

  • My Kingdom for a valve spring compressor!

    Hi All,

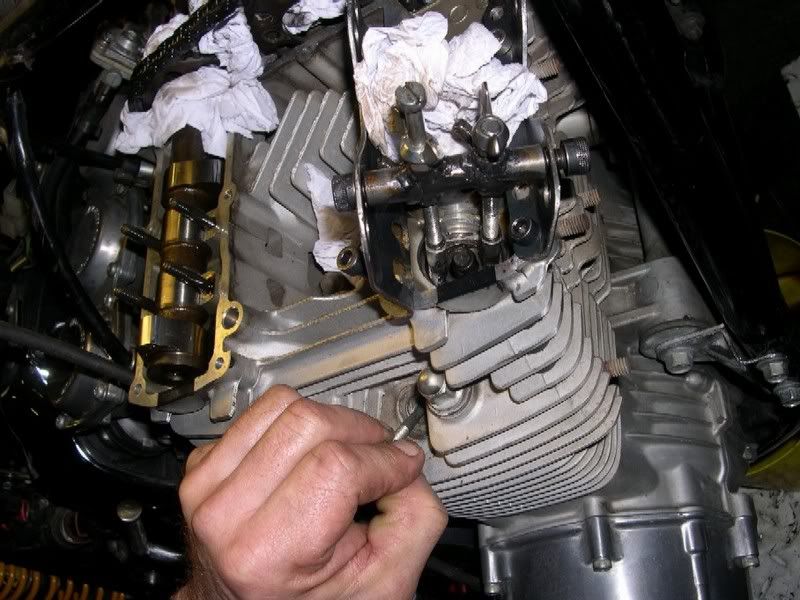
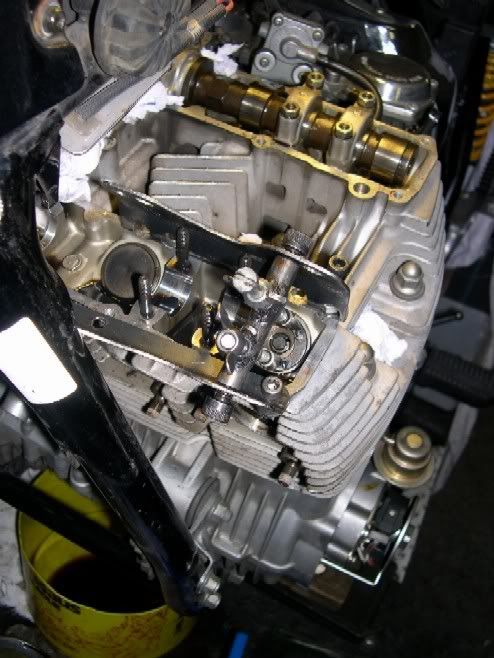
    I've recently aquired a '79 XS11 Special. Cylinder #1 was blowing blue, looks like the valve stem oil seals (compression was good - 135/130/135/140.)

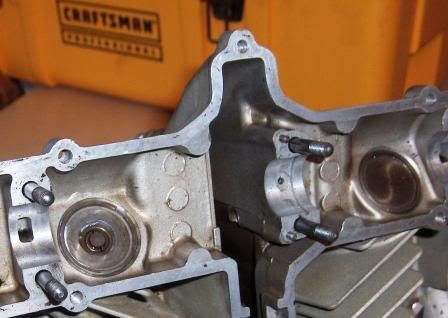
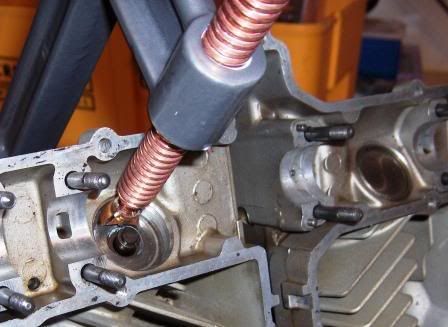
    Ordered the seal/head gasket kit from PNM, got the head off with no problem, but I'm having the hardest time finding a valve spring compressor that will fit. I've tried snap-on and partsource, but their spring compressors won't fit.

    None of the Yamaha (or other) dealers I talked to will touch this (two said to talk to them once the snow flies, but I'd like to ride it this year.)

    So - does anyone know where to find a valve spring compressor near Edmonton, Canada?

    TIA
    -Karl
    XS1100 SF

  • #2
    HERE's how I did it. Look near the bottom of the page.
    I used a piece of 3/4" pvc with a notch (to fish the keepers out with a magnet). I used the drill press as the compresser. Rags balled-up under the valves held them in place.
    Pat Kelly
    <p-lkelly@sbcglobal.net>

    1978 XS1100E (The Force)
    1980 XS1100LG (The Dark Side)
    2007 Dodge Ram 2500 quad-cab long-bed (Wifes ride)
    1999 Suburban (The Ship)
    1994 Dodge Spirit (Son #1)
    1968 F100 (Valentine)

    "No one is totally useless. They can always be used as a bad example"

    Comment


    • #3
      Thanks, Pat - although I don't have a drill press I'll keep that in mind if I can't get a 'real' one.

      Just curious - how easy was it to replace the keepers with that rig?
      XS1100 SF

      Comment


      • #4
        Hey Karl,

        In the tech tips, repairs, engine, you'll find THIS TIP that Ken Talbot posted a while back about what he used.

        I found a nice 8" C clamp, and took some 1" diameter metal pipe, about 3" long, cut a 1" slot/wedge out of it, not quite 180 degrees, more like 120 so the remaining amount would be stable against the valve spring cap, and it allows easier access to the keepers for both removal and re-installation. Put the solid foot of the C clamp against the valve head, used the screw portion with the pipe to compress the springs! If I had my welder at the time, I would have tacked the pipe to the wobbly end of the clamp, but you might be able to use duct tape or such to keep it stiff!
        T.C.


        T. C. Gresham
        81SH "Godzilla" . . .1179cc super-rat.
        79SF "The Teacher" . . .basket case!
        History shows again and again,
        How nature points out the folly of men!

        Comment


        • #5
          In the tech tips, repairs, engine, you'll find THIS TIP that Ken Talbot posted a while back about what he used.
          Yeah, I'd read that, but discounted it as I'd like to be able to put it back together, too
          I found a nice 8" C clamp, and took some 1" diameter metal pipe, about 3" long, cut a 1" slot/wedge out of it, not quite 180 degrees, more like 120 so the remaining amount would be stable against the valve spring cap, and it allows easier access to the keepers for both removal and re-installation.
          Thanks - that looks like what I might end up doing - although I'm wondering if Pat's suggestion of PVC might be 'safer'. There's already a fair number of scratches around the top of the lifters, where it looks like the PO had 'fun' replacing the valve shims.
          XS1100 SF

          Comment


          • #6
            I got my valve spring compressor at "princess auto". it is for small engines and was not very costly at all. The part that is supposed to sit perfectly on the top of the spring is a little small but it works well I have done 3 top end jobs with it so far. I would if I were you try a search on e-bay. There's lots and lots of tools on e-bay

            edit here's a search result link 2nd one down is just like mine.

            http://search.ebay.com/search/search...sor&category0=

            Rob
            KEEP THE RUBBER SIDE DOWN

            1978 XS1100E Modified
            1978 XS500E
            1979 XS1100F Restored
            1980 XS1100 SG
            1981 Suzuki GS1100
            1983 Suzuki GS750S Katana
            1983 Honda CB900 Custom

            Comment


            • #7
              A friend of mine hand built one himself. With it we changed the valve stem oil seals with the engine still in the frame.

              The device consists of two wing nuts screwing in a modified cap (with a hole) over the existing springs. With a J-like tool the valve is kept in its place. When screwed in deep enough the two half moons fall apart and everything can be taken out. With special cut up and rewelded pliers the seal could be removed easily. The wing nut device has multiple mounting holes so it can be used for all valves.

              Here are some pics:


              Last edited by Mathh; 12-25-2009, 10:58 AM.
              XS1100 3X0 '82 restomod, 2H9 '78 chain drive racer, 3H3 '79 customized.
              MV Agusta Brutale 910R '06.
              Triumph 1200 Speed Trophy '91, Triumph 1200 '93.
              Z1 '73 restomod, Z1A '74 yellow/green, KZ900 A4 '76 green.
              Yamaha MT-09 Tracer '15 grey.
              Kawasaki Z1300 DFI '84 modified, red.

              Comment


              • #8
                I used a piece of 3/4" diameter hard copper pipe and a large C-clamp similar to what Pat Kelly did. I made a jig out of 2x4's that held the c-clamp on its back and made a place for the head to rest so the valve was in line with the clamp. This allowed use of both hands to work the clamp and retrieve the keepers. Had all 8 valves out and parts segmented in an old egg carton in about 15 minutes.
                Mike Giroir
                79 XS-1100 Special

                Once you un-can a can of worms, the only way to re-can them is with a bigger can.

                Comment


                • #9
                  That is pretty ingenious. It is no good for lapping the valves or other such work, but for replacing those seals it looks like the cats meow!

                  Originally posted by Mathh
                  A friend of mine hand built one himself. With it we changed the valve stem oil seals with the engine still in the frame.
                  Skids (Sid Hansen)

                  Down to one 1978 E. Stock air box with K&N filter, 81H pipes and carbs, 8500 feet elevation.

                  Comment


                  • #10
                    Like many here I just modified an 8" C clamp. I have several spare parts around, so not everyone can do this, but I drilled a hole in the center of a shim bucket (Dang hard metal) and then ground the foot of the C clamp to a small half-moon shape. The bottom foot of the clamp fits right against the valve face. Just use that bucket in each valve.. screw the clamp down and the keepers fall right off the valve.


                    Tod
                    Try your hardest to be the kind of person your dog thinks you are.

                    You can live to be 100, as long as you give up everything that would make you want to live to be 100!

                    Current bikes:
                    '06 Suzuki DR650
                    *'82 XJ1100 with the 1179 kit. "Mad Maxim"
                    '82 XJ1100 Completely stock fixer-upper
                    '82 XJ1100 Bagger fixer-upper
                    '82 XJ1100 Motor/frame and lots of boxes of parts
                    '82 XJ1100 Parts bike
                    '81 XS1100 Special
                    '81 YZ250
                    '80 XS850 Special
                    '80 XR100
                    *Crashed/Totalled, still own

                    Comment


                    • #11
                      &quot;That's pretty clever!&quot;

                      Hey Mathh,
                      Buy your friend a beer... on me.
                      (well, you buy him the beer... but tell him it was from me.)
                      "Damn it Jim, I'm a doctor, not a mechanic!' ('Bones' McCoy)

                      Comment


                      • #12
                        There's lots of proof in this thread that where's there's a will ... there's a way. What even method you use just be careful not to damage the walls of the bucket wells and DON'T MIX UP THE BUCKETS !!!
                        Rob
                        KEEP THE RUBBER SIDE DOWN

                        1978 XS1100E Modified
                        1978 XS500E
                        1979 XS1100F Restored
                        1980 XS1100 SG
                        1981 Suzuki GS1100
                        1983 Suzuki GS750S Katana
                        1983 Honda CB900 Custom

                        Comment


                        • #13
                          &quot;An up and coming...&quot;

                          Two more, 79XS11F!
                          "Damn it Jim, I'm a doctor, not a mechanic!' ('Bones' McCoy)

                          Comment


                          • #14
                            Re: &quot;That's pretty clever!&quot;

                            Originally posted by prometheus578
                            Hey Mathh,
                            Buy your friend a beer... on me.
                            (well, you buy him the beer... but tell him it was from me.)
                            heheh, I will !
                            Don't try to copy this, I think he patented it worldwide
                            XS1100 3X0 '82 restomod, 2H9 '78 chain drive racer, 3H3 '79 customized.
                            MV Agusta Brutale 910R '06.
                            Triumph 1200 Speed Trophy '91, Triumph 1200 '93.
                            Z1 '73 restomod, Z1A '74 yellow/green, KZ900 A4 '76 green.
                            Yamaha MT-09 Tracer '15 grey.
                            Kawasaki Z1300 DFI '84 modified, red.

                            Comment


                            • #15
                              Thanks for all the replies.

                              I took Rob's advice, and went to princess auto - lo and behold, they had one that looks just about perfect - cost was good too, $50.
                              XS1100 SF

                              Comment

                              Working...
                              X