 Tweet
Tweet
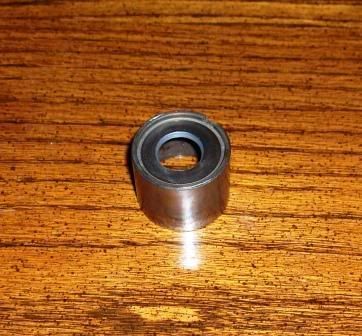
If anyone is wanting a cheap valve spring tool, I made this one today and it seems to work pretty well. The hardest part is the first step. I took an old shim bucket, and with a diamond bit on my dremmel tool, eventually got a hole in the center of it. I used abrasive stone bits after this and SLOWLY widened the hole out. I have never seen a spec on or ever heard about a shim bucket wearing out, but I believe that there is a reason for this. This is made out of the hardest ^%$# metal I have ever tried to drill. I didn't have a drill bit that would touch it. I don't own a drill press though and that probably would have helped. So here is the bucket with the hole in the center... wide enough to get past the valve retainers.
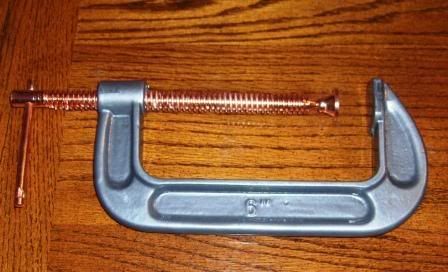
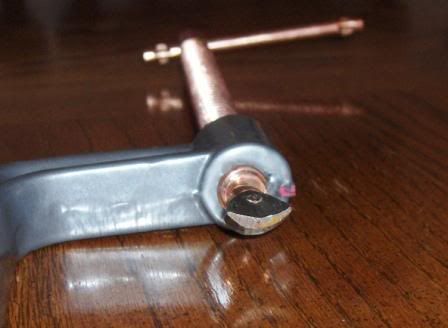
Next, I had bought a 6 inch "C" clamp. I used the dremmel tool and cut two grooves (One on each side) of the clamps foot and pried it off to facilitate the aggressive grinding I was about to do to it. I had to use this foot, because without it, when you try to tighten the clamp, the foot walks all over the place.
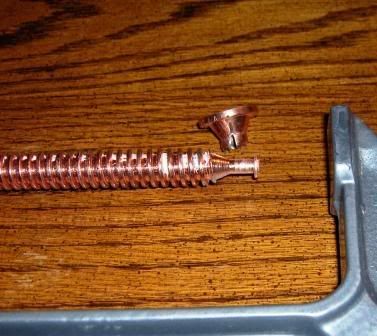
And this is what I ended up with after the grinding... spoon shaped to allow more room to get the valve retainers out.
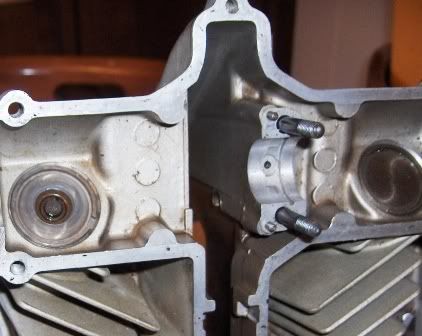
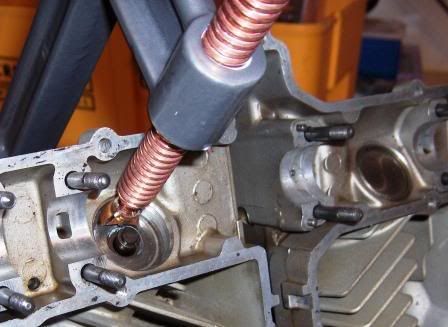
Next, put the "C" clamp over the valve you want to take out that already has the modified shim bucket on it, put the modified foot on the edge of the bucket, and screw down the clamp... compressing the spring. The shim bucket makes sure everything compresses straight and true.
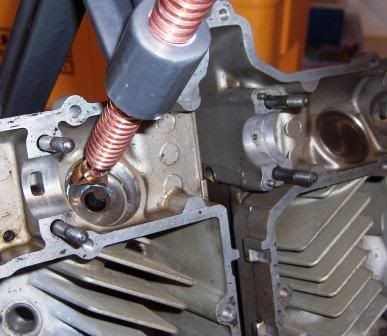
When you screw it down far enough, the valve retainers will simply come out with a magnet.
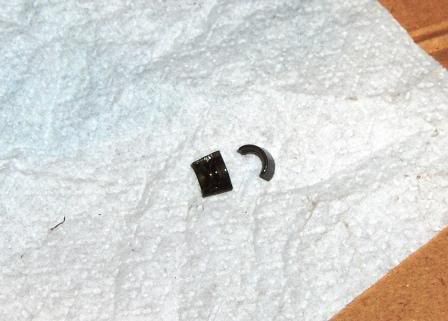
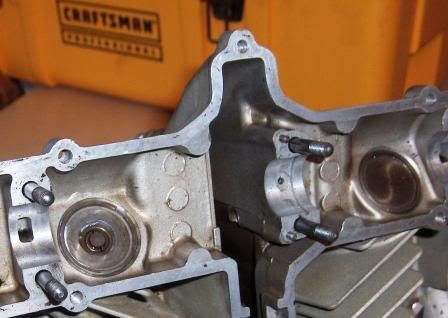
Release the "C" clamp, and the spring retainer will lift right out.

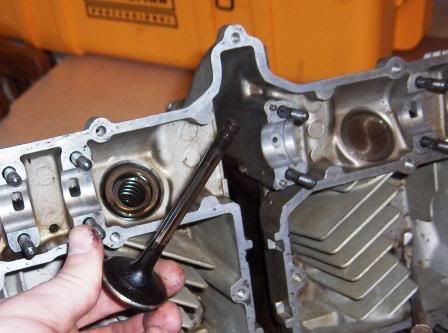
Slide the valve down through the bottom. (Hopefully the valve stem hasn't been mushroomed out) You can see that I am not a true Guru.... no rubber gloves! lol
To assemble, simply put the spring retainer back on, put the modified shim bucket over that, compress the spring with the "C" clamp again, install the valve retainers, and ease the clamp back off.... making sure the small retainers stay put. You're done.
I already had the tools I needed to modify the clamp and the shim bucket, so total cost for this tool was 4.99 plus tax for the "C" clamp. Hope this helps someone else.
Tod
Next, I had bought a 6 inch "C" clamp. I used the dremmel tool and cut two grooves (One on each side) of the clamps foot and pried it off to facilitate the aggressive grinding I was about to do to it. I had to use this foot, because without it, when you try to tighten the clamp, the foot walks all over the place.
And this is what I ended up with after the grinding... spoon shaped to allow more room to get the valve retainers out.
Next, put the "C" clamp over the valve you want to take out that already has the modified shim bucket on it, put the modified foot on the edge of the bucket, and screw down the clamp... compressing the spring. The shim bucket makes sure everything compresses straight and true.
When you screw it down far enough, the valve retainers will simply come out with a magnet.
Release the "C" clamp, and the spring retainer will lift right out.
Slide the valve down through the bottom. (Hopefully the valve stem hasn't been mushroomed out) You can see that I am not a true Guru.... no rubber gloves! lol
To assemble, simply put the spring retainer back on, put the modified shim bucket over that, compress the spring with the "C" clamp again, install the valve retainers, and ease the clamp back off.... making sure the small retainers stay put. You're done.
I already had the tools I needed to modify the clamp and the shim bucket, so total cost for this tool was 4.99 plus tax for the "C" clamp. Hope this helps someone else.
Tod


Comment