Announcement

Collapse
No announcement yet.

Aluminum rehab

Collapse
X
 
  • Filter
  • Time
  • Show
Clear All
new posts

  • #31
    Ben asks:-
    Would this buffer work well enough for XS11 polishing?

    Or would this buffer be better?

    Hi Ben,
    I make do with a Sears 8" bench grinder that was bought in their 1/2-price tool sale with a grinding wheel on one side and a buffing pad on the other, but to answer your question;
    yes and yes.
    You don't get what you don't pay for.
    Fred Hill, S'toon
    XS11SG with Spirit of America sidecar
    "The Flying Pumpkin"

    Comment


    • #32
      Surprisingly, the 8" Harbor Freight bench buffer that I purchased has worked quite well.

      The good:
      - It's inexpensive
      - It is larger/sturdier than it looks in the picture
      - It has pretty smooth bearings
      - It has plenty of power
      - The shafts are long enough to be useful

      The bad:
      - 3400 RPM single speed, may be too fast for some buffing
      - shaft diameter is 3/4", which is too large for the washers that came with the buffing wheels, and large enough that you may have to look around a little more when you want new wheels, washers, etc.

      The 8" buffing wheels worked ok. I only used the stiff wheel. The drill attachment kit worked well on the wheel rims, valve cover, etc.

      Notes:
      - When buffing, the wheel threw felt all over the place. Have a mask, apron... something to cover your face. You don't want to breathe polishing compound or the felt fibers. It gets in your hair, your face, etc. Tickles like crazy and will drive you mad....
      - Buffing builds up a lot of static electricity on the work peice. Every few seconds, while buffing, if you touch the grinder body you get shocked as the electricity discharges. If you are able to attach a grounding wire from the work peice to ground, maybe that would help. This annoyed me and constantly getting shocked is not comfortable.
      - This buffing setup can't be used for everything. The valve cover, in places, is tricky to buff, especially if you try to find the grain of the peice and buff with the grain.
      - I used the drill attachment buffers for hard-to-reach places, but they eventually load up quite easily, and I don't have a buffing wheel cleaner.
      - Remove any parts that can be removed and buff them on the bench
      - If you've sanded your aluminum parts before, make sure that the last sand paper that you sanded with was very fine. I sort of stopped in the middle of sanding on some parts and buffing did not remove the deep scratches.
      - Etc.

      I'm somewhat pleased with the buffing result and experience. Some parts turned out with a really nice finish, especially the forks. But if you want it to look nice, plan to spend hours and hours. The parts should be sanded from rough to fine long before buffing. If you do it right, you have no trouble bringing out a very mirror-like finish on your parts.

      The bad thing is, all of your time and effort has to be done again and again over time, unless you clear coat over your work. The clear coat I use is very difficult to sand, so I've elected to not clear the parts. It's easier to buff something to a shine that was buffed last year, than it is to buff something that hasn't been polished in 25 years.

      So overall, the equipment choice I made was fine. It works well enough if you have the time and patience.

      Ben
      1985 Yamaha VMX12n "Max X" - Stock
      1982 Honda XL500r "Big Red" - Stump Puller. Unknown mileage.
      1974-78 Honda XL350 hybrid - The thumper that revs. Unknown miles.
      1974 Suzuki TC/TS125 hybrid. Trials with trail gear. Invaluable. Unknown miles.
      1971 Honda CL350. For Dad. Newtronic Electronic Ign. Reliable. Unknown miles.

      Formerly:
      1982 XS650
      1980 XS1100g
      1979 XS1100sf
      1978 XS1100e donor

      Comment


      • #33
        The polisher from Harbor Freight is a good one. I have a friend that has used one for several years.
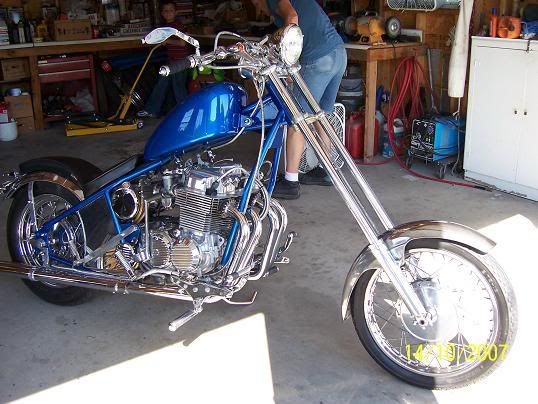
        I hope you don't mind a few pics of other brand bikes.
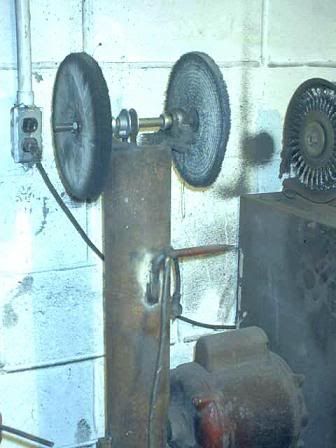
        I built a polisher,buying my parts from tarheelparts. They sell the shaft with pulley and i had a motor so i built my own.I bought the 10"buffs. I paid around $10.00 for the shaft. I bought $200.00 in buffs and supplies. That is a lot of material and will last me for years.


        My friend spent several weeks polishing the parts on this bike.


        Polishing is a dirty nasty job. But the results are awsome.
        Roy Bean ebay moniker roy-b-boy-b
        1982 Xj 1100 2002 V Star

        Comment


        • #34
          Caswell rocks

          I purchased a polishing kit from Caswell.com, I think it was around $40 and included several types of wheels and spools and media. I had a flexshaft with 1/2 hp drive and it's easy to polish things without even taking them off the bike sometimes.
          You can't stay young forever, but you can be immature for the rest of your life...

          '78E "Pathfinder" Show bike...
          Lovingly restored by Dave Delzell
          Drilled airbox
          Tkat fork brace
          Hardly mufflers
          late model carbs
          Newer style fuses
          Oil pressure guage
          Custom security system
          Stainless braid brake lines

          Comment


          • #35
            best effort shine suggestions

            All the above tips are quite useful. I would add this ... don't mix rouge / compounds on the same buffing wheel.
            Black, heavy duty rouge goes always on the same buffing wheel (on one side). White / or red rouge, for the fine stuff, always goes on the same buff wheel. I separate them: black on the left, white on the right.

            Remember, any deep pits, gouges or scratches must be removed first by heavy sanding and fine file work or your later efforts will be wasted.

            For heavy stains and scratches I go right to a 200-300 grit emery cloth and employ fine grained fingernail files, the kind used in beauty salons. I use white grit on a black plastic core so it bends.

            Fine sanding prep: Hand work - polish the alumin. piece progressively with 600, 1000, 1200 grit 'wet or dry' 3M paper with a good quality chrome polish behind it. I use Turtle Wax Chrome Polish as a lubricant. Rub it in using the wet or dry paper until it turns heavy & gross black, then wipe it off with a piece of real cotton towel. Use an overlapping; To & Fro pattern (no circles). Repeat the fine sanding-polishing process until you get down to a really fine finish. This can take hours and loads of patience. If the part now looks like it has an oily brushed-sheen on it you can call it good and stop there (approx. 2000 grit) or go on. It depends on what you're looking for.

            Caution using the Black Compound: If you omit the fine prep / chrome hand polishing and use the black rouge buffing alone a lot of 400-600 grit hatch pattern (micro scratches) will show up "underneath" as the metal's top surface gets progressively shinier / finer on the wheel. Its worth the extra effort to get the surface finely tuned the first time.

            For those hard-to-get inside lines, screw holes / tiny recesses / inside flats I prefer to use a 1/2" Dremel roll buff shaped to a smooth point and their metal cleaning red compound.

            Last Step that I prefer for that Show Bike shine with tons of highlights: Now you can throw the nice fine-sheened part onto your buffer if you want a hard, brilliant, show-quality shine on a cover, riser, bracket etc. I usually go straight to the white rouge if the metal part has been hand-processed / finely finished as above.

            I used this method to dress finish the engine/carbs/side covers on The Gunfighter custom; see it: www.yamaha-triples.org > Albums > Norwich49

            Recently I used the primary "oily-sheen" with catylized clearcoat process to lend a custom look to a set of oem XS650 rims on a fellow rider's street tracker.

            Any road grime, oil, carb spray, brake fluid must be wiped off immediately if you leave the metal raw (no clearcoat). One may use Meguiar's Carnuba / Yellow Showcar wax to protect the new finish.
            79 XS11 Standard F stock "Big N Blue"

            Comment


            • #36
              Sonic scrubber

              with S100 will give you the original aluminum color and finish without much effort and following sanding the rough spots down to about 320 to 400 paper, the black buffing compound followed by the brown will give a real chrome like finish. I'm about the laziest when it comes to polish, but I have had great luck with this short route. The trick is the polishing machine/equipment. Very little "elbow grease".
              You can't stay young forever, but you can be immature for the rest of your life...

              '78E "Pathfinder" Show bike...
              Lovingly restored by Dave Delzell
              Drilled airbox
              Tkat fork brace
              Hardly mufflers
              late model carbs
              Newer style fuses
              Oil pressure guage
              Custom security system
              Stainless braid brake lines

              Comment


              • #37
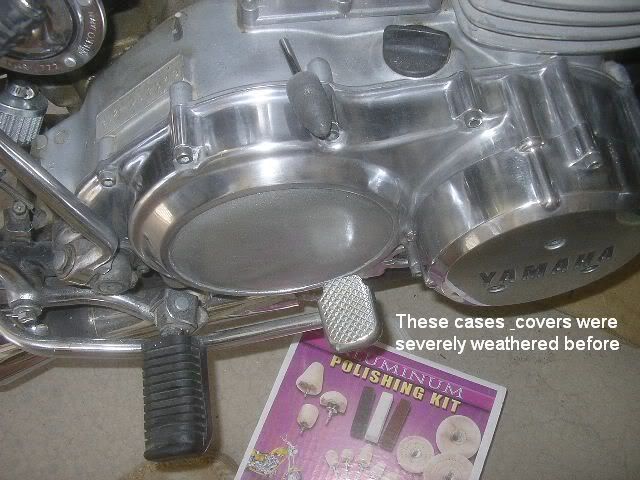
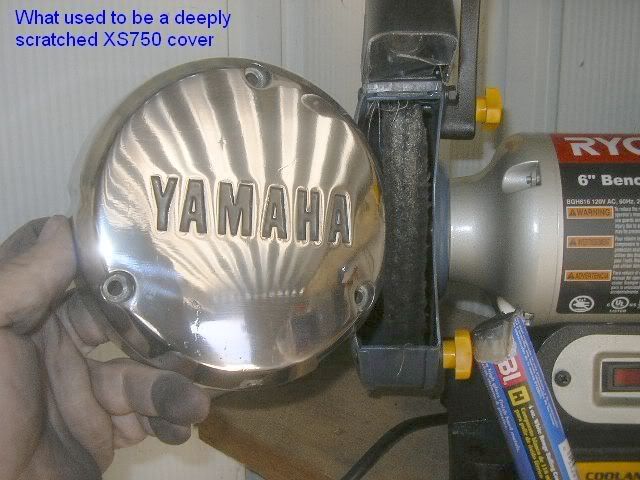
                severely weathered case & cover PICS

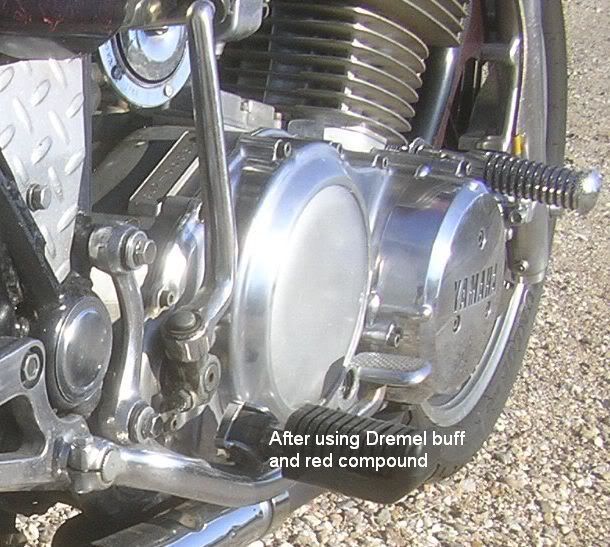
                Here's a set of heavily weathered cases and a right cover from the XS850 project after a first effort [about an 80% state of finish]. After two decades of weather and stains they were in a state far beyond cleaning.
                Final detailing with a Dremel buff roll and red cleaning compound helped achieve a high polish in recessed areas - see last pic.


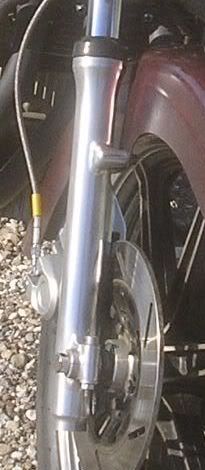
                Here's the same bike's front forks wearing a 600 grit + Turtle Wax Chrome Polish shine. Job began using 220 grit emery cloth to remove pitting.


                Rusty & stained front disc was dressed with medium grade steel wool to near oem condition.
                79 XS11 Standard F stock "Big N Blue"

                Comment

                Working...
                X