 Tweet
Tweet
Hey guys,
NOW that winter's HERE, many of us have to turn to other projects instead of our bikes.") SO...I thought I'd start a thread on some of the other things we who are directed by SWMBO's get to do when we are not biking/wrenching. Here's one that's been sitting around all summer long that I finally got around to working on.
SO...I thought I'd start a thread on some of the other things we who are directed by SWMBO's get to do when we are not biking/wrenching. Here's one that's been sitting around all summer long that I finally got around to working on.
We had this cheap dining room table...I mean cheap because it was a decent particle board 3 piece top but it had a laminate of real wood on it, along with a real wood ball/claw footed pedastal base. Anyways, I had pulled a scented oil/plug in type air freshener out of the wall and layed it on the table....it leaked and actually dissolved the less than paper thin varnish/stain finish on one section!
  SO...swmbo wanted to get a new table = $$$. Being the FRUGAL guy I am, I said..."NO"....I can fix it.
Well, I finally got around to doing just that this weekend. I pulled out the 3"x21" belt sander I "received" as part of a stash of tools and such from a coworker...who's father passed away a few years ago, and they couldn't use/needed them...so I graciously accepted them! Anyways, went to Lowes, got a pack of 5 120 grit belts, some Rustoleum stain and clear gloss urethane, it had quicker dry and repeat times vs. the Min-Wax stuff, some disposable natural fiber brushes, and went to work. Because of the outside temps being in the 40-50's, I couldn't work on it in the garage or on the back deck....so I did it right there in the Dining room! I brought out my shop vac and stopped often to clean up the dust and such from on the table....we are going to be replacing the carpet soon so wasn't too worried about it.
Okay, here are the photos since we all like photos! The original sizes are ~1024 x 768 so you can click to enlarge if you desire a closer inspection!
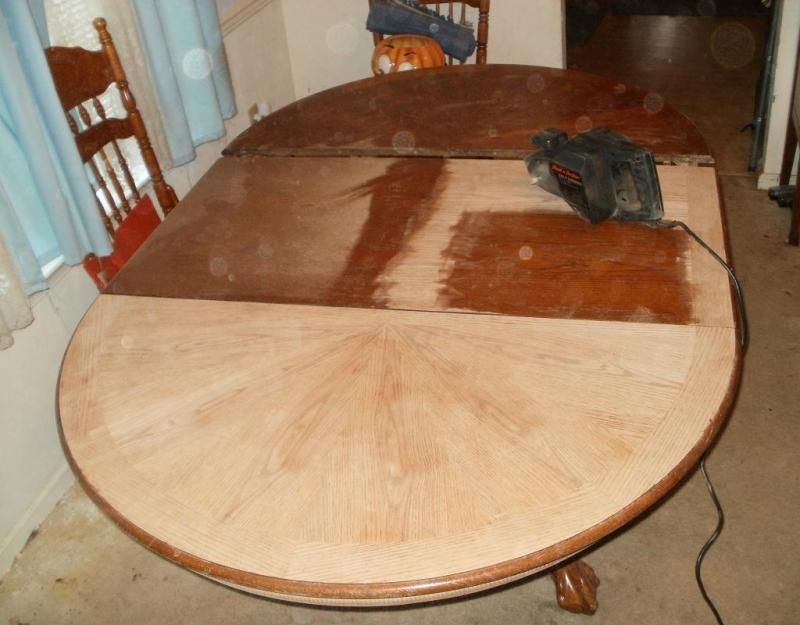
I forgot to take a shot showing the original damaged area, but it looked like an oil spill snaking all across the table end section...hence why I started there.
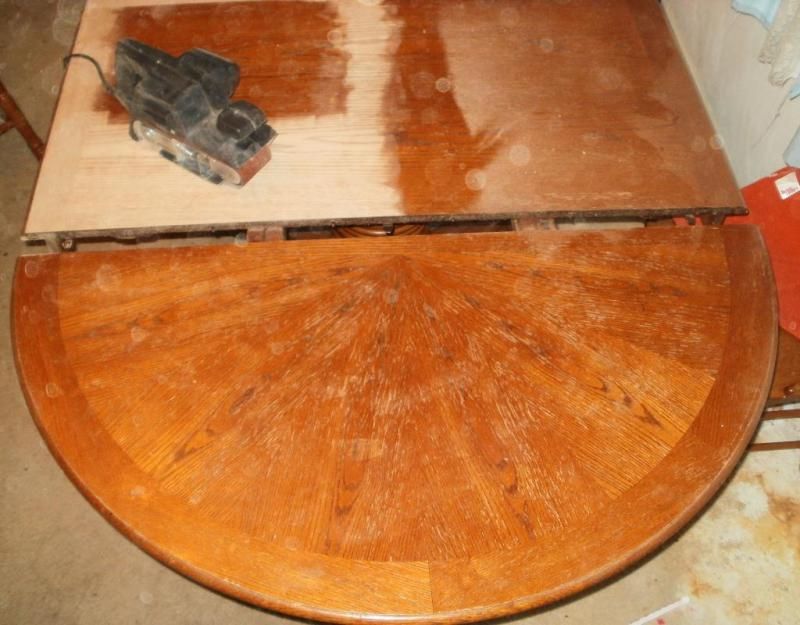
As I said, the laminate/venier was also quite thin...and due to a slight warpage/thickening of the edge of the center leaf I ended up sanding THRU it slightly into the particle layer!  Oh well!
This shot of the other end of the table shows how the extremely thin varnish layer was also wearing through!
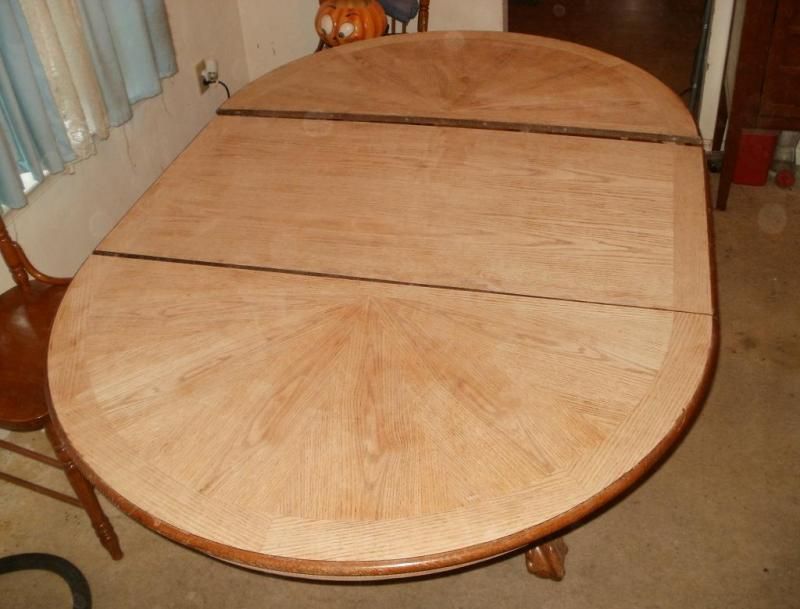
So...here's the whole table fully sanded down to bare wood.
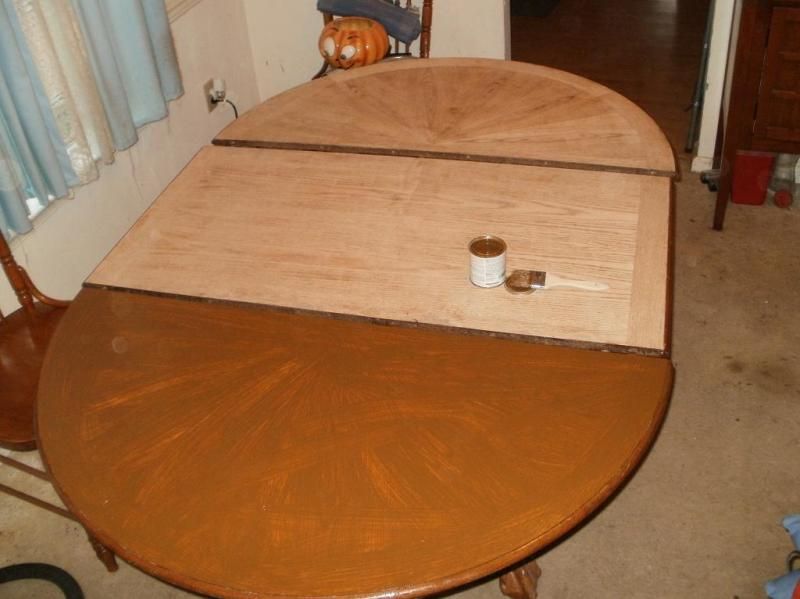
Here's the Stain on the first section.
Here it is after fully stained and excess wiped off and dried. The original color was a warm OAK but had darkened apparently over time. The Rusteoluem selection had an OAK, but it was too light/yellow in color, so I chose the next darker shade...can't remember now what it was called, wasn't as dark as a walnut, but just a tad warmer/browner.
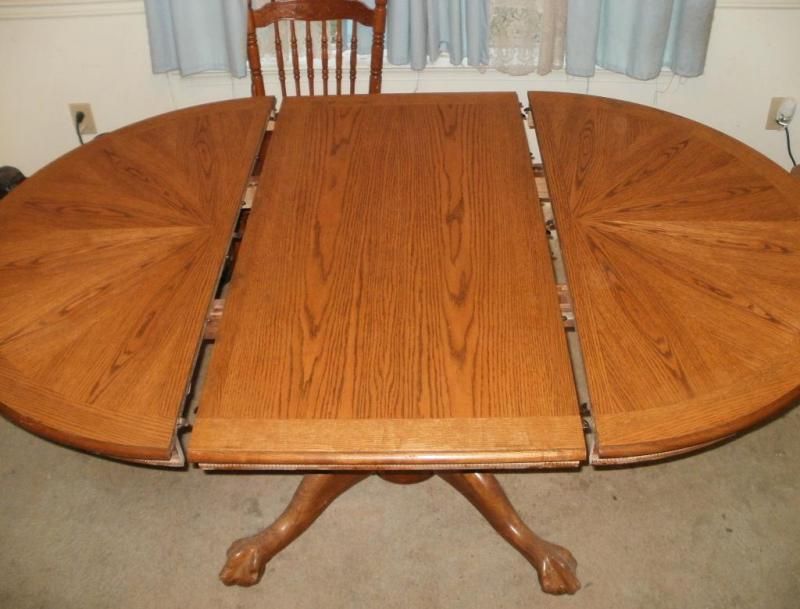
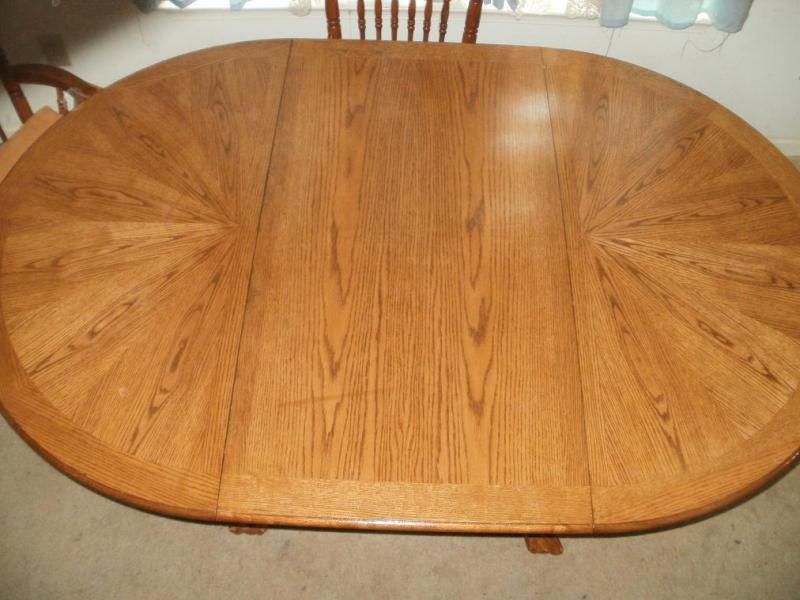
Here's a shot using the flash of the finished 3 layered/coats of Urethane applied and dried....only required 2 hours per coat vs. the 4-6 of the Min-Wax, you can see the nice warm oak color.
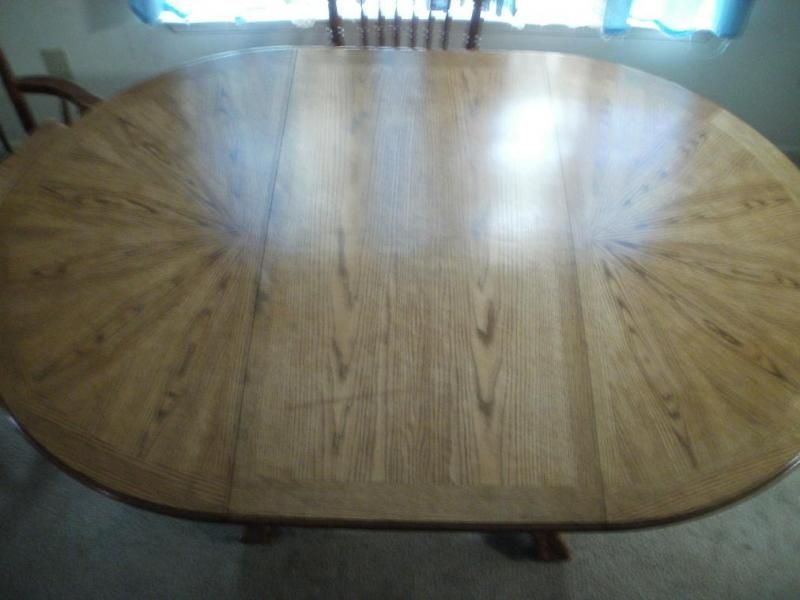
This was a no flash to try to get the window light reflection to show the SHINE of the surface, it is artificially darker and looks more like a darker brown walnut color....but isn't really....sorry for the poor focus. BTW, I had my portable 500 watt Halogen shop light shining on it ALL NIGHT, along with a stand fan and the dining room window open to keep the toxic fumes out of the room/ventilated.
Anyways....that was my project. Hope you enjoyed the show. The total cost of supplies was about $35.00....bought way too much Urethane=quart, but have plenty left over for possible other projects. Just a few hours of labor not counting the 6 hours of wait time between coats, and saved me I'm sure many hundreds of $$ vs. having to buy a NEW TABLE...and I'm sure would have had to buy matching chairs as well!
So...let's see and hear about some of your honey-do projects!
T.C.
NOW that winter's HERE, many of us have to turn to other projects instead of our bikes.
SO...I thought I'd start a thread on some of the other things we who are directed by SWMBO's get to do when we are not biking/wrenching. Here's one that's been sitting around all summer long that I finally got around to working on. We had this cheap dining room table...I mean cheap because it was a decent particle board 3 piece top but it had a laminate of real wood on it, along with a real wood ball/claw footed pedastal base. Anyways, I had pulled a scented oil/plug in type air freshener out of the wall and layed it on the table....it leaked
and actually dissolved the less than paper thin varnish/stain finish on one section! SO...swmbo wanted to get a new table = $$$. Being the FRUGAL guy I am, I said..."NO"....I can fix it. Well, I finally got around to doing just that this weekend. I pulled out the 3"x21" belt sander I "received" as part of a stash of tools and such from a coworker...who's father passed away a few years ago, and they couldn't use/needed them...so I graciously accepted them! Anyways, went to Lowes, got a pack of 5 120 grit belts, some Rustoleum stain and clear gloss urethane, it had quicker dry and repeat times vs. the Min-Wax stuff, some disposable natural fiber brushes, and went to work. Because of the outside temps being in the 40-50's, I couldn't work on it in the garage or on the back deck....so I did it right there in the Dining room!
I brought out my shop vac and stopped often to clean up the dust and such from on the table....we are going to be replacing the carpet soon so wasn't too worried about it. Okay, here are the photos since we all like photos! The original sizes are ~1024 x 768 so you can click to enlarge if you desire a closer inspection!
I forgot to take a shot showing the original damaged area, but it looked like an oil spill snaking all across the table end section...hence why I started there.
As I said, the laminate/venier was also quite thin...and due to a slight warpage/thickening of the edge of the center leaf I ended up sanding THRU it slightly into the particle layer!
Oh well!This shot of the other end of the table shows how the extremely thin varnish layer was also wearing through!
So...here's the whole table fully sanded down to bare wood.
Here's the Stain on the first section.
Here it is after fully stained and excess wiped off and dried. The original color was a warm OAK but had darkened apparently over time. The Rusteoluem selection had an OAK, but it was too light/yellow in color, so I chose the next darker shade...can't remember now what it was called, wasn't as dark as a walnut, but just a tad warmer/browner.
Here's a shot using the flash of the finished 3 layered/coats of Urethane applied and dried....only required 2 hours per coat vs. the 4-6 of the Min-Wax, you can see the nice warm oak color.
This was a no flash to try to get the window light reflection to show the SHINE of the surface, it is artificially darker and looks more like a darker brown walnut color....but isn't really....sorry for the poor focus. BTW, I had my portable 500 watt Halogen shop light shining on it ALL NIGHT, along with a stand fan and the dining room window open to keep the toxic fumes out of the room/ventilated.
Anyways....that was my project. Hope you enjoyed the show. The total cost of supplies was about $35.00....bought way too much Urethane=quart, but have plenty left over for possible other projects. Just a few hours of labor not counting the 6 hours of wait time between coats, and saved me I'm sure many hundreds of $$ vs. having to buy a NEW TABLE...and I'm sure would have had to buy matching chairs as well!
So...let's see and hear about some of your honey-do projects!
T.C.

")


Comment