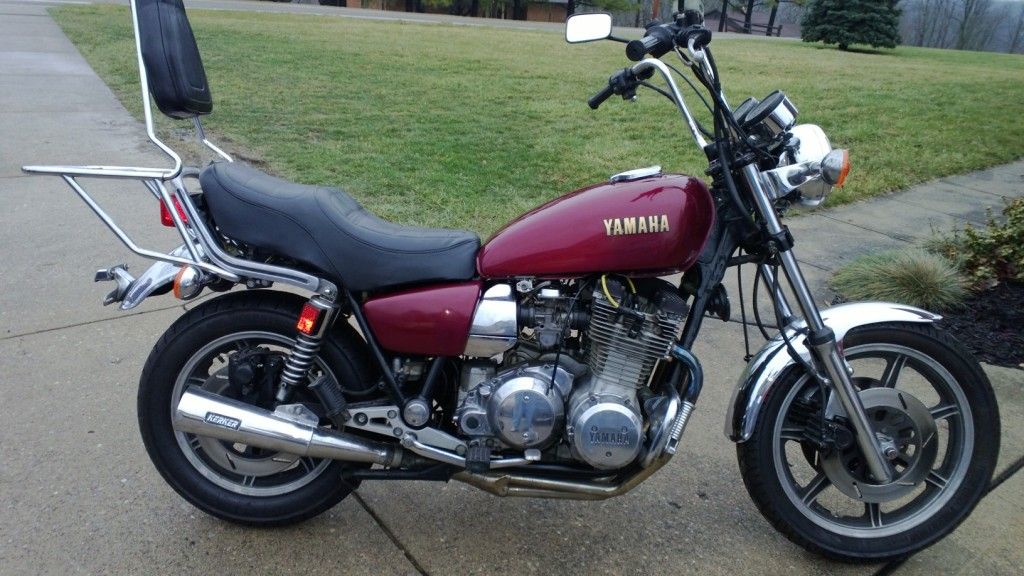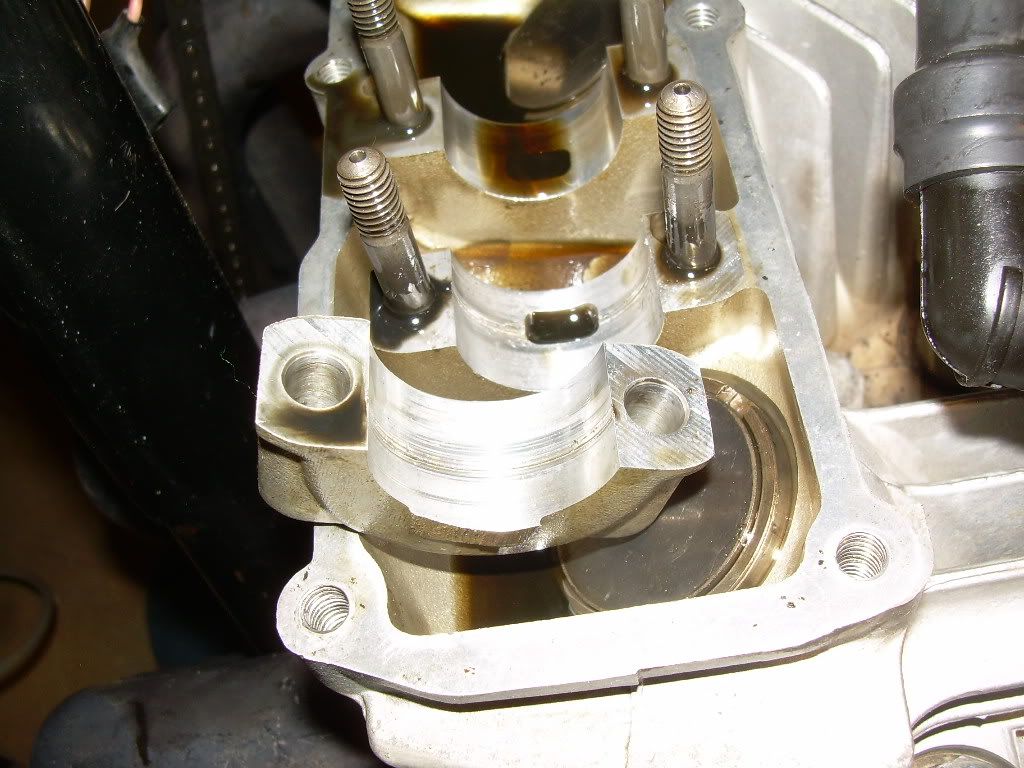
This is mine. I put it back together, and I'm running it. It has been running like this for ????
Announcement
Collapse
No announcement yet.
A Project Begins....Again!!
Collapse
X
-
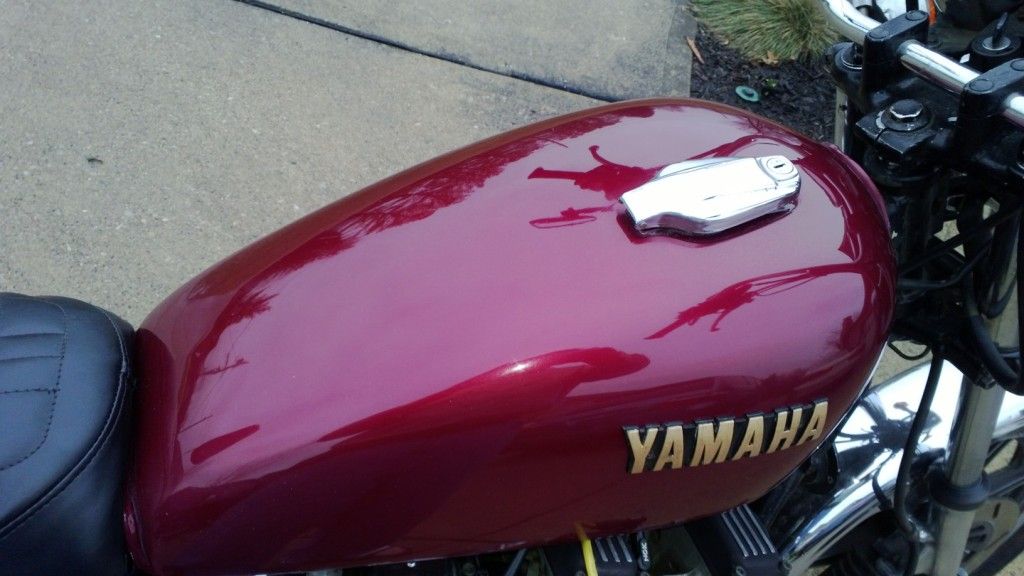
OK,, been a while since I updated this. Mostly because I was waiting on paint to dry....well...weather to paint in the first place also. After a couple attempts, I got my HVLP gun adjusted, all my screw ups sanded out, and a nice base coat on the tank and side covers. Added a few coats of clear. And finally my first attempt at color sanding. For the novice like me, the term "color sanding" is a misnomer, your really sanding the clear coat. I was absolutely amazed at the improvement!
I watched several videos on Youtube about the process before tackling it. Out of all of the videos I studied, here is the process I developed that worked for me.
I discovered that for the 2 part clears, start sanding with 1500 grit wet sanding until it is all nice and even, this takes a bit of sanding, but it is almost hard to sand through the clear with 1500, so it works out well. A couple keys to this was to use CLEAN water only, and LISTEN for stuff to get in the sand paper or water, you can hear the sound change. When you hear it, stop immediately and put some clean water on the part and rinse off the paper. Do not get worried because your new paint now looks horrible, like milk. But it should all look evenly milky. Then hit it with 2000 grit wet sanding. Now it will still look kind of cloudy, don't worry, the next step is like voodoo black magic.
I used a 6" palm buffer/polisher I got from HF for $20, use the cotton buffer pad with Polishing Compound. I used the Turtle Wax product, all green can, white compound. I did not use Rubbing Compound, redish brown stuff. I used my fingers to spread it over the painted area, then put some on the pad as well. After the first use, I only applied it to the painted surface with my fingers. I also periodically stopped and used a screw driver to brush/scrape the pad back up. This got the paint back to a nice smooth look, almost done now. Takes a little while to polish it out.
Next I switched to the terry cloth pad/cover for the palm buffer and use TW scratch and swirl remover, it is in a black bottle and is liquid form. This brought it all up to a glass like finish and shine.
Here are a couple pics of my results.
Life is what happens while your planning everything else!
When your work speaks for itself, don't interrupt.
81 XS1100 Special - Humpty Dumpty
80 XS1100 Special - Project Resurrection
Previously owned
93 GSX600F
80 XS1100 Special - Ruby
81 XS1100 Special
81 CB750 C
80 CB750 C
78 XS750
Comment
-
Don, looks awesome and should hold up well to gas spills. When I wet sand paint or clear, I always put a few drops of liquid dish soap in the water as a lubricant, seems to help.2H7 (79) owned since '89
3H3 owned since '06
"If it ain't broke, modify it"
☮
Comment
-
Thanks Phil! I read and saw two schools of thought on the soap. One is to use it as a lubricant. The other says if it lubricates, it keeps the sand paper from doing its job. The second made sense to me.Life is what happens while your planning everything else!
When your work speaks for itself, don't interrupt.
81 XS1100 Special - Humpty Dumpty
80 XS1100 Special - Project Resurrection
Previously owned
93 GSX600F
80 XS1100 Special - Ruby
81 XS1100 Special
81 CB750 C
80 CB750 C
78 XS750
Comment
-
Originally posted by DGXSER View PostThanks Phil! I read and saw two schools of thought on the soap. One is to use it as a lubricant. The other says if it lubricates, it keeps the sand paper from doing its job. The second made sense to me.
you are going to the wrong school.
Wet sanding with soapy water instead of plain water keeps the grit clean and longer lasting by washing the sanding debris away from it.Fred Hill, S'toon
XS11SG with Spirit of America sidecar
"The Flying Pumpkin"
Comment
-
Hi ! Don !
BEAUTIFUL JOB !
I'm about ready to do the emblems on the side covers and the tank on my 81 LH, any advice, tips ?
Yours look great !
Don };~)76 XS650 C ROADSTER
80 XS650 G Special II
https://ibb.co/album/icbGgF
80 XS 1100 SG
81 XS 1100LH/SH DARKHORSE
https://tinyurl.com/k6nzvtw
AKA; Don'e, UD, Unca Don'e
Comment
-
Hey Don,
For the emblems, I sanded down any rough edges of the original gold chrome (Your LH will be more silver I believe). I hand painted them with black for the base, just carefully cutting in around the letters, then I used model paint for the gold. All brushed on. When that had dried I used spray can clear coat on them. I did not do any sanding or buffing of those. The one part (single stage) clear goes on smoother.
There are several threads where folks have used gold leaf or I think Marty used a gold leaf pen to do them.Life is what happens while your planning everything else!
When your work speaks for itself, don't interrupt.
81 XS1100 Special - Humpty Dumpty
80 XS1100 Special - Project Resurrection
Previously owned
93 GSX600F
80 XS1100 Special - Ruby
81 XS1100 Special
81 CB750 C
80 CB750 C
78 XS750
Comment
-
+1 on the soapy water. It really helps to wash all the crap away so you can see what you're sanding. Also when sanding the clear, the best way to know if you are finished sanding, is to look closely for little shiny spots. Those shiny spots indicate that you have not taken the surface down enough to sand out all of the miniature spray droplets. Imagine the surface of the paint as a lot of little ball bearings. I love the turtle wax polishing compound too. I like to spread it on like wax, then let it dry and hit it with a cotton wheel on a drill. I hadn't thought of using the swirl remover. I think I'll give it a shot on my paint. Looks great DG."The Hooligan" XJ1100, Virago Gauge Pods, Screaming Eagle Mufflers, K&N Filter, hand made rear fender, side covers, and solo seat, round bar conversion, small headlight, tail light, and cat eye turn signals, chip fuses, rewired the right way.
Pics: http://s1236.photobucket.com/user/ya...?sort=6&page=1
Comment
-
I'm sold on Meguiers compounds for paint finish. I use their Mirror-glaze Ultra-Cut 105 compound (after wet sanding with 1500, 2000, then 3000 paper) followed up with Ultra Finish 205 polish. No machine buffing needed, you can do it entirely by hand, so no worries about leaving swirl marks or burning through.
Downside is this stuff isn't cheap; about $90 for a 32 oz bottle of each (which unless you paint bikes for a living, may be a lifetime supply). And you can't find it just anywhere; this is a professional product so you'll need to get it from an auto-body supply or direct from Meguiers. But it makes the rubbing-out process almost as easy as applying a coat of wax...Fast, Cheap, Reliable... Pick any two
'78E original owner - resto project
'78E ???? owner - Modder project FJ forks, 4-piston calipers F/R, 160/80-16 rear tire
'82 XJ rebuild project
'80SG restified, red SOLD
'79F parts...
'81H more parts...
Other current bikes:
'93 XL1200 Anniversary Sportster 85RWHP
'86 XL883/1200 Chopper
'82 XL1000 w/1450cc Buell, Baker 6-speed, in-progress project
Cage: '13 Mustang GT/CS with a few 'custom' touches
Yep, can't leave nuthin' alone...
Comment
-
It was a beautiful day today!! So I got out to the man cave and finished up the SG. Needs some final tuning, but otherwise it is ready to go!!
Started off with the side cover fix I posted. Got the rest of it put back together. Fired it up, idled nice, got warmed up enough to drop the choke to half. Then I shut it off and got my jacket and helmet on.
Got back on, started it up, idled rough, took it to put some fuel in the tank. Got to the gas station and noticed wet spots under the bike. Leaking fuel. So got it home, looked under the tank, gas was dripping from no 2 carb where the air box inlet meets the carb body. Long story short, pulled the carbs, got the float gasket cut down, and cleaned out the needle seat. Put the tank back on, took it out with no air box. Everything worked great.
Now for my big surprise of the day, looked at the airbox which I had pulled out. The air inlet tube for the no 1 carb was burnt!! The gas recirc tube was melted badly!! I recalled that when I fired the bike up a month or two ago, I had smoke in the airbox. Turned fuel off and the bike off and it still smoked for a few minutes. I looked things over but not close enough.
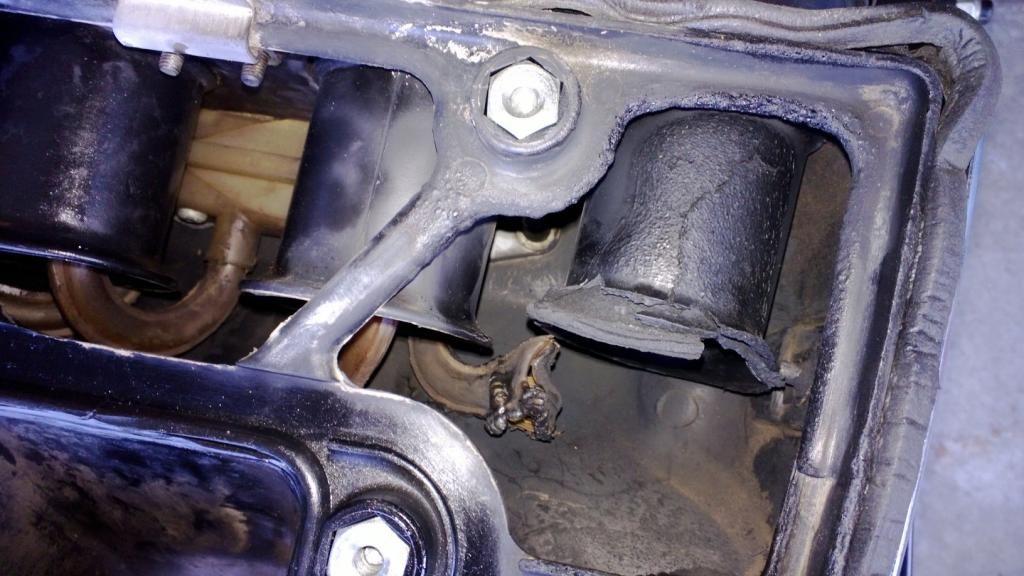
So, I went to plan B, the pods that came on the bike when I bought it. It will need some tuning and a good synch yet, but it runs really nice.
So here is a vid of a walk around of the finished product.
SG Completed
And here is a vid of it running and idling. That Kerker does have a unique sound, and I like it!
SG running
Only issue I found in the test run is the tach is a little bouncy. Will need to check all connections again.Life is what happens while your planning everything else!
When your work speaks for itself, don't interrupt.
81 XS1100 Special - Humpty Dumpty
80 XS1100 Special - Project Resurrection
Previously owned
93 GSX600F
80 XS1100 Special - Ruby
81 XS1100 Special
81 CB750 C
80 CB750 C
78 XS750
Comment
-
It sure is Marty, I went over some of my efforts on it on page 2 of this thread. Installing it is not to difficult. My installation had two hick ups.
One was the condition of the seat pan. Some of the tabs were rusted out or snapped off when I opened them back up. I used pop-rivets as an alternative, which the Saddleman instructions show you to do that in this situation.
The other glitch was my failure to lay it out properly. I got all the way around to the back of the seat and did not have enough material to pull it over. Had to remove the cover and start over.
So, lay it out well. I used spray on fabric glue on the main seating areas to glue it down. Have a heat gun or blow dryer ready, as it does help to heat the material up while your installing it. This is also in the directions. And get your fingers and hands ready for a work out.
Maybe it was because I did it twice, but my fingers and hands were done by the time I got that completed. Seriously, if you lack finger and hand strength due to arthritis or similar, this is not a job you want to take on. But for the average office geek like me, it is very doable.Last edited by DGXSER; 03-31-2013, 08:13 AM.Life is what happens while your planning everything else!
When your work speaks for itself, don't interrupt.
81 XS1100 Special - Humpty Dumpty
80 XS1100 Special - Project Resurrection
Previously owned
93 GSX600F
80 XS1100 Special - Ruby
81 XS1100 Special
81 CB750 C
80 CB750 C
78 XS750
Comment
-
To officially complete this thread, Ruby has a new home. I did advise the owner of this site. She will be on her way to New York (the bike) end of summer.Life is what happens while your planning everything else!
When your work speaks for itself, don't interrupt.
81 XS1100 Special - Humpty Dumpty
80 XS1100 Special - Project Resurrection
Previously owned
93 GSX600F
80 XS1100 Special - Ruby
81 XS1100 Special
81 CB750 C
80 CB750 C
78 XS750
Comment
-
Aa long as it went to a good home,'80 XS1100 SG
Don't let the good times pass you by..grab all you can
https://www.youtube.com/watch?v=x_Z4cjUlIo4
Comment
Comment