 Tweet
Tweet
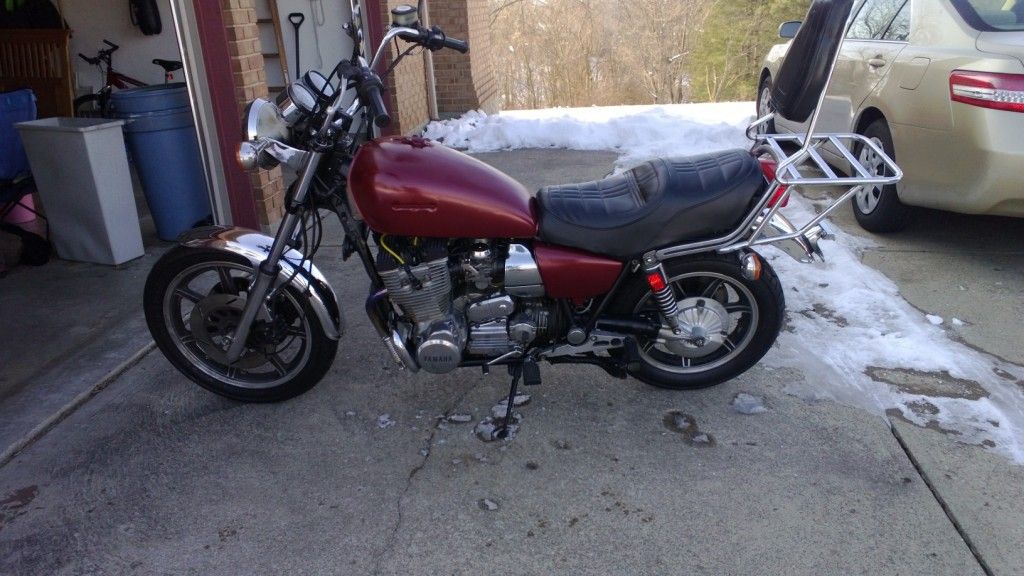
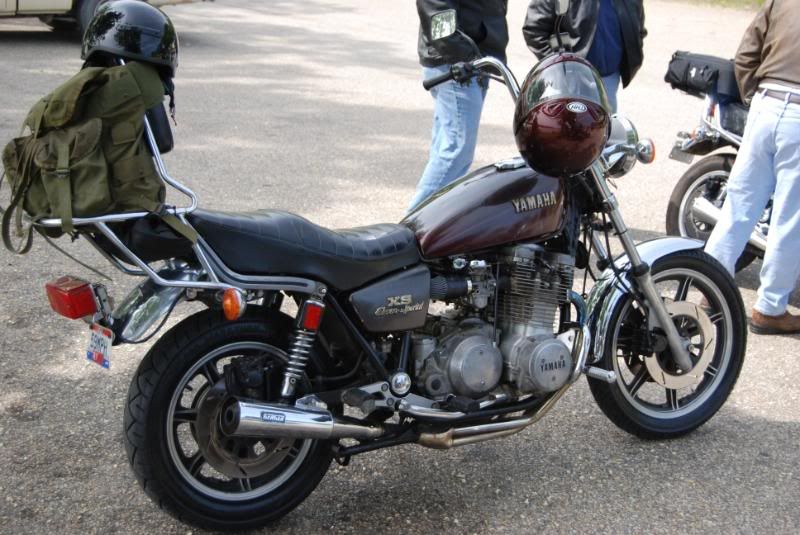
Well this was a day of joy and day of misery. Started off with the bike running but a bit like crap, on the 78-79 carbs. So I switched those out for the 80-81 carbs I just finished the float repair on. Joy of Joy, the float works great, the bike ran decent. Go it idling up, synched the carbs, vacuum tuned, then took it out for a 1 mile ride (it was raining).
After the ride I noted no 1 was still skipping every so often, I also noted I do NOT like ape hanger bars. Feels very uncontrolled for turns and cornering.
So I decided to verify the info that the valves had been recently shimmed. Well no 1 intake has a large gap. all the other intakes were in spec. All the exhaust were on the tight side of spec, but within spec. So I wanted to look at the shims on all of them to see what I might change.
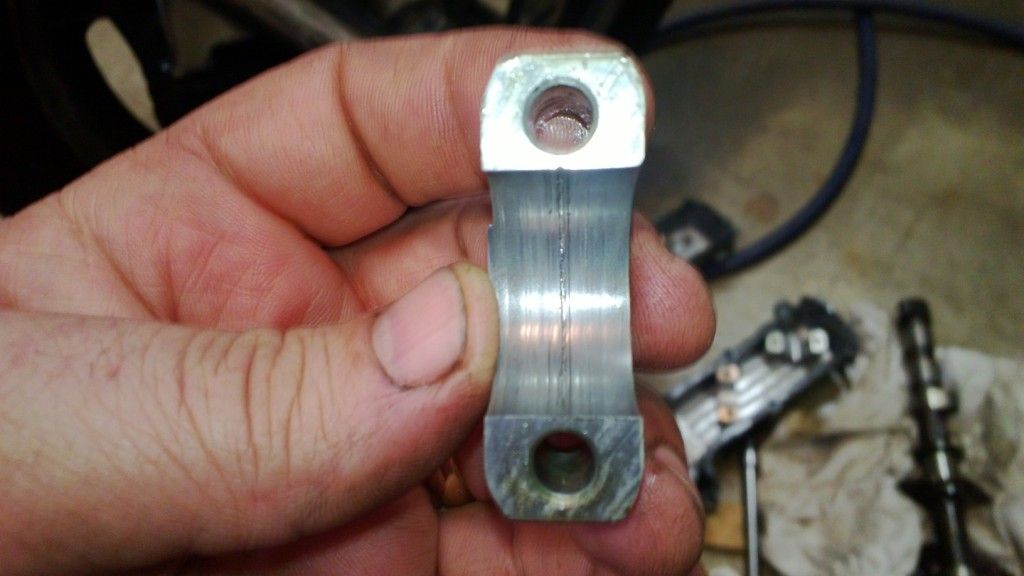
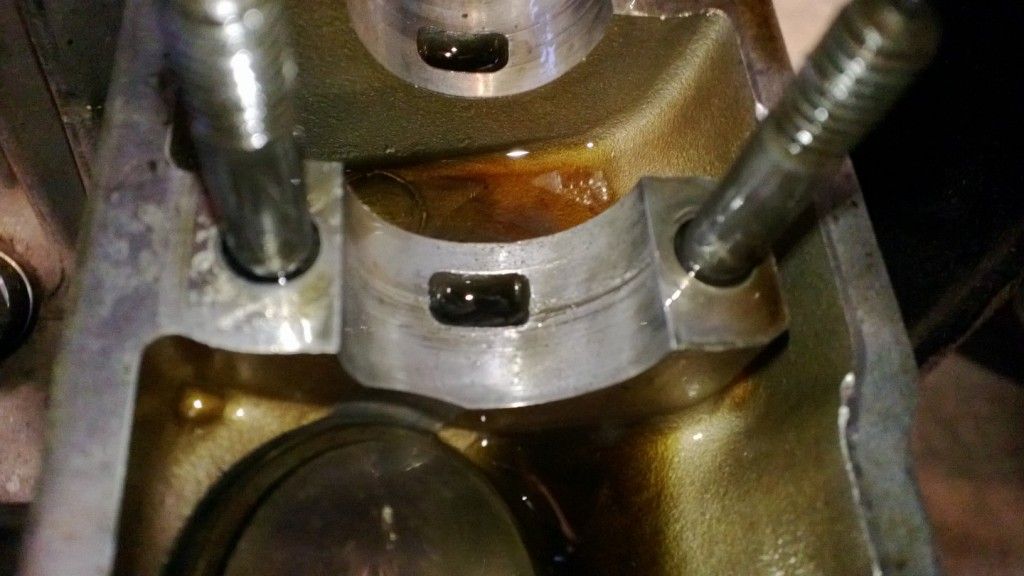
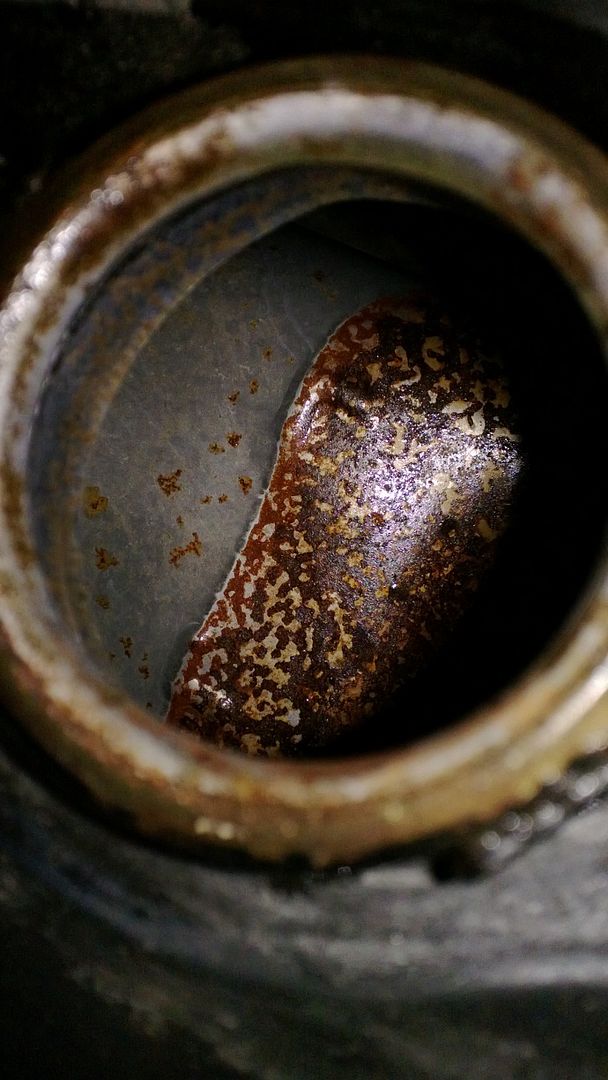
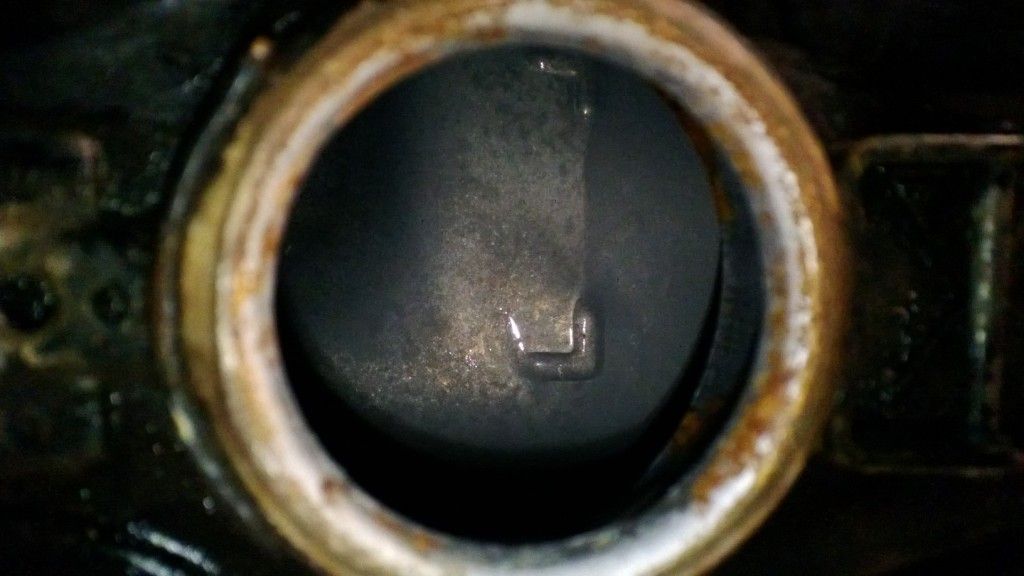
Now comes the misery, here is the pics of the 5th cam lobe of the exhaust cam and the shell and head "bearing".
Cam Cap
Head Bearing surface
Cam
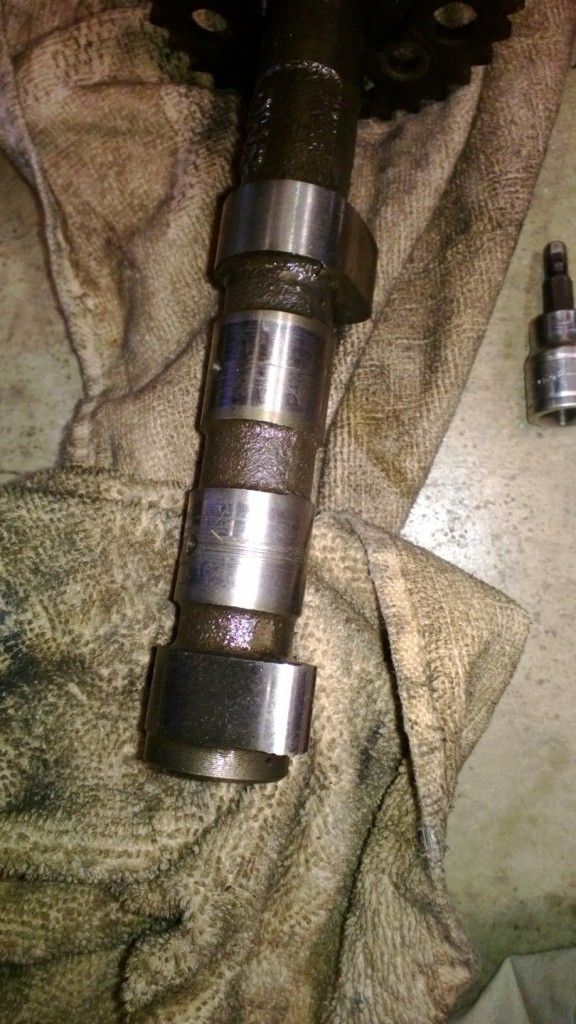
Yes, there is a grove or several really in the cam, the cap and the head bearing surface, about the width of the oil galley hole. Obviously not a factory groove, as it has several valleys to it.
So, now I am faced with options. Clean up what I have and use it, had decent compression as is. Replace cam and cap, or replace the entire head. Really seems overkill to replace the head. I am leaning toward taking some 2000 grit sandpaper to it and cleaning it up as best I can and put it back together.
After the ride I noted no 1 was still skipping every so often, I also noted I do NOT like ape hanger bars. Feels very uncontrolled for turns and cornering.
So I decided to verify the info that the valves had been recently shimmed. Well no 1 intake has a large gap. all the other intakes were in spec. All the exhaust were on the tight side of spec, but within spec. So I wanted to look at the shims on all of them to see what I might change.
Now comes the misery, here is the pics of the 5th cam lobe of the exhaust cam and the shell and head "bearing".
Cam Cap
Head Bearing surface
Cam
Yes, there is a grove or several really in the cam, the cap and the head bearing surface, about the width of the oil galley hole. Obviously not a factory groove, as it has several valleys to it.
So, now I am faced with options. Clean up what I have and use it, had decent compression as is. Replace cam and cap, or replace the entire head. Really seems overkill to replace the head. I am leaning toward taking some 2000 grit sandpaper to it and cleaning it up as best I can and put it back together.

 Learned something to day...now I can go to bed


Comment