Very nice seat. I bought a cover a couple years ago off ebay and couldn't get it to fit. I finally had to use the old cover to make a template and make one from scratch. I have done a couple since then too. One thing you can do is use a heat gun to gently heat areas that don't fit quite right and the cover will conform to the foam better.
A Project Begins....Again!!
Collapse
X
-
Rick, I did have to use a heatgun (hairdryer in my case), to heat the material up to get it to pull enough in a few places. It definitely took some serious tugging and pulling to get it to go on in a few spots. My fingers and forarms are still a little sore.
I have been concerned over some of those ebay covers. I am sure I could have saved a few bucks going with an ebay part, but I liked that this one obviously matched the factory look and pattern as well as being from a known name. I am happy with the quality of the product so far. Of course, only time will tell how well it holds up.Life is what happens while your planning everything else!
When your work speaks for itself, don't interrupt.
81 XS1100 Special - Humpty Dumpty
80 XS1100 Special - Project Resurrection
Previously owned
93 GSX600F
80 XS1100 Special - Ruby
81 XS1100 Special
81 CB750 C
80 CB750 C
78 XS750Comment
-
This may be of help to someone else recovering a seat:
P&K Classic spike strip
There is a how to video on the page.Marty (in Mississippi)
XS1100SG
XS650SK
XS650SH
XS650G
XS6502F
XS650EComment
-
Right idea, poor implementation. The tabs have their edge resisting the stretch of the cover, which, if there is much pressure against them, will split the cover, and allow it to loosen up.This may be of help to someone else recovering a seat:
P&K Classic spike strip
There is a how to video on the page.
If anyone knows a tinner, who actually knows how to fabricate sheetmetal products, he will have what are called notchers. They are a pliers like device that takes a pointed notch out of the edge of a piece of sheet metal. The included angle is about 30 deg.
If they are not closed all the way, they make a pointed tab on 26 ga sheetmetal that is a good approximation of the original tabs.
I make some strips about 5/8 of an inch wide, and a foot or so long. Cutting short pieces where necessary. I can pop rivet the pieces on to completely surround the pan.
Check with a trade college, or a tin shop. They throw out all sorts of scrap that would serve, and if you talk to one of the workers, on his way out, and explain what you need, he might do it for a beer. The owners are usually out for big bucks, and probably want 15 or 20 bucks to make them.
Hell, for that kind of money, I'd make them.
And if you want to do it yourself, here is where to start; <http://www.bing.com/shopping/search?q=sheet+metal+notchers&qpvt=sheet+metal+not chers&FORM=HURE#x0y97>
CZLast edited by CaptonZap; 11-30-2012, 07:23 PM.Comment
-
Right idea, poor implementation. The tabs have their edge resisting the stretch of the cover, which, if there is much pressure against them, will split the cover, and allow it to loosen up.
If anyone knows a tinner, who actually knows how to fabricate sheetmetal products, he will have what are called notchers. They are a pliers like device that takes a pointed notch out of the edge of a piece of sheet metal. The included angle is about 30 deg.
If they are not closed all the way, they make a pointed tab on 26 ga sheetmetal that is a good approximation of the original tabs.
I make some strips about 5/8 of an inch wide, and a foot or so long. Cutting short pieces where necessary. I can pop rivet the pieces on to completely surround the pan.
Check with a trade college, or a tin shop. They throw out all sorts of scrap that would serve, and if you talk to one of the workers, on his way out, and explain what you need, he might do it for a beer. The owners are usually out for big bucks, and probably want 15 or 20 bucks to make them.
Hell, for that kind of money, I'd make them.
And if you want to do it yourself, here is where to start; <http://www.bing.com/shopping/search?q=sheet+metal+notchers&qpvt=sheet+metal+not chers&FORM=HURE#x0y97>
CZ
I'm all in CZ. I can buy the notcher on the web. Would it be best to use steel for the strip? I live in a tiny little town. Where is best to seek out the sheet metal strips? How wide would you make it? Would 3/4" be enough?Marty (in Mississippi)
XS1100SG
XS650SK
XS650SH
XS650G
XS6502F
XS650EComment
-
I would be willing to bet any sheet metal shop or HVAC shop that makes its own ductwork will have scraps that would be fine for what your after. Best part is ductwork is always (almost always) at least galvanized sheet metal. And around 26 ga is typical. So find a local HVAC shop that makes their ductwork, or find out where they buy theirs from.Life is what happens while your planning everything else!
When your work speaks for itself, don't interrupt.
81 XS1100 Special - Humpty Dumpty
80 XS1100 Special - Project Resurrection
Previously owned
93 GSX600F
80 XS1100 Special - Ruby
81 XS1100 Special
81 CB750 C
80 CB750 C
78 XS750Comment
-
Don,
You did a fine job on that seat. I'm motivated. Rather than hijack this thread, I started a new one with upholstery in the title. I welcome your comments there.
Marty (in Mississippi)
XS1100SG
XS650SK
XS650SH
XS650G
XS6502F
XS650EComment
-
Thanks Marty, it was your lead on the Saddleman cover that made the project work. The product they provide is great quality and really is a great fit. They have excellent directions with it as well.
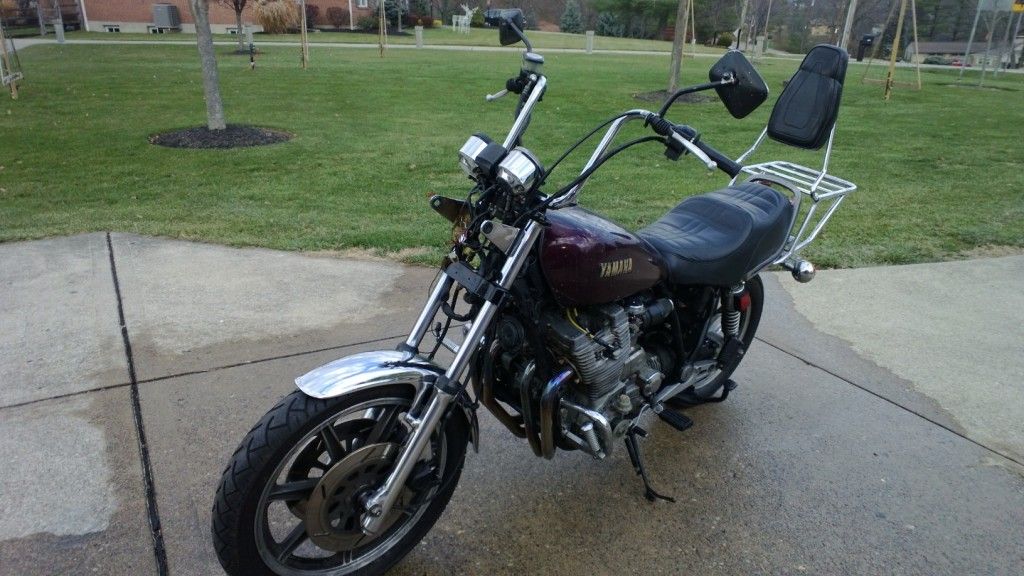
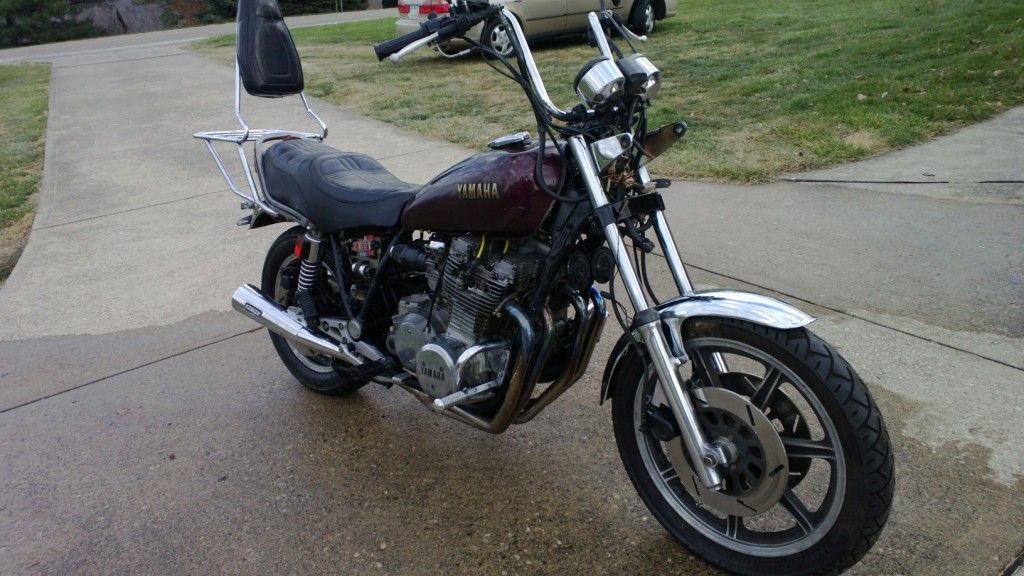
So, for the progress to date. Most of it is not visible, as it has been changing fluids and rebuilding brake systems, greasing bearings. I have taken the time to clean up a few things. So here are some pics...
I am waiting for an electrical connector for the key switch to arrive to finsih the wiring up front, and then I am in the process of investigating a stock headlight assembly so that has not been put back on....

You may also notice the timing cover is removed, I am trying my hand at making it a little shinier. These covers have some deep cracks and gouges that I am not going to try to remove, so I am sure they will pale to some of the polishing work I see on here, but as long as they are improved I will be happy.
Here is the other side of the bike...

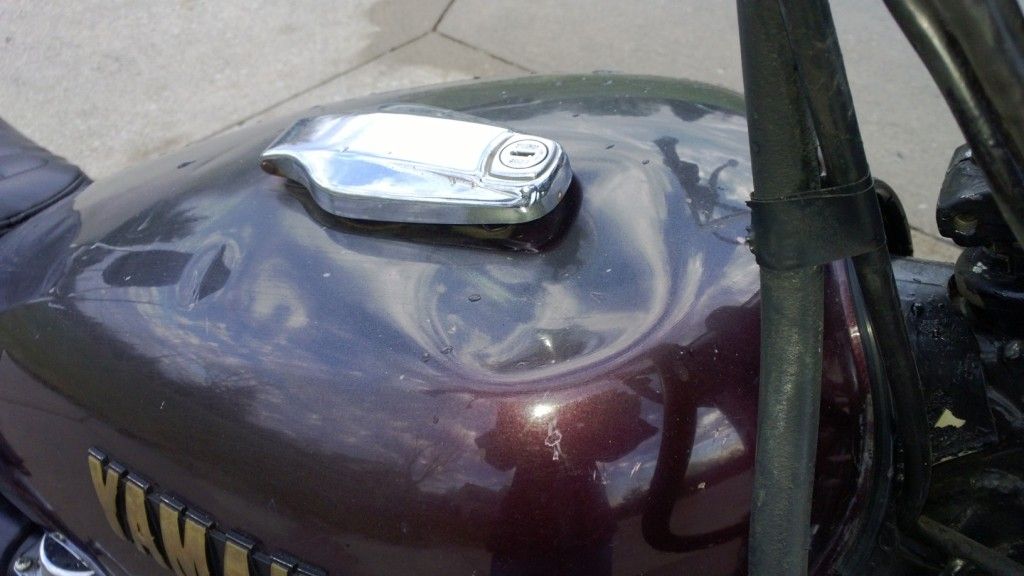
On the gas tank, I have tried like mad to make a dent in repairing this dent, and so far I can not get the metal to budge!!

Have yet to get it running on gasoline, but I have an airbox on the way. I jetted it closer to stock, 45 pilots with 112.5 mains. Not sure how it will like that with PODS and the 4-1 exhaust. So once I get the airbox installed I may swap tanks with my SH to get this thing fired up and maybe some tuning accomplished.Life is what happens while your planning everything else!
When your work speaks for itself, don't interrupt.
81 XS1100 Special - Humpty Dumpty
80 XS1100 Special - Project Resurrection
Previously owned
93 GSX600F
80 XS1100 Special - Ruby
81 XS1100 Special
81 CB750 C
80 CB750 C
78 XS750Comment
-
Yep, that would work. Another thought is to go to Home Despot and get ,
no, better yet,, scare up a 5 gallon metal can, such as solvent or paint thinner comes in, and take a pair of tin snips and cut some strips. The metal might be a little thin, but will work. There will be someone at some airport who does minor repairs to aircraft, and they will have the snips. Do not use aircraft aluminum, unless the mechanic swears it is in "O" condition. Aluminum will crack after one or two bends.
As DGXer said, 26 ga galvanized is real common. Roofers will have roles of flashing tin, housing re modelers will tear out old duct work and throw it away, sheet metal is everywhere, just start looking. Auto body repair places throw crashed body panels away, and it is usually "killed steel" which is formed by stamping, and is less apt to crack when you bend it. Now you got me going, dammit! Find your own sources.
When you get your metal, it will take a little experimentation to find out how much to squeeze the handles, to get the spike, and not go all the way through, taking out the entire V. Once you get that spacing, cut a block of wood or something, and tape it between the handles, so that you can only squeeze the handles that close together, and your spikes will all end up the same size. Until your metal gage changes.
You can space the spikes closer in the places that need more support, and put them at the ends of the pieces that go on the curves.
Good call, you can't go wrong buying tools. It would be nice if you could inspect the tip of the notching blade before you buy, because they are not all equal sharpness on the tip, but Internet sales are sort of what you get is what you get. Good luck, CZ
CZ
Comment
-
Don I am impressed with the job you did on those forks I think they look better than mine. You made a good choice on the Saddleman cover nice quality at a good price it's the same one I have on the project bike. If your timing cover is really scratched to deep to polish up ok you can usually find decent ones pretty cheap.Comment
-
DGXer, do you weld, or know someone who does? TIG would be best. If I had to fix that tank, I would cut a hole about two inches round in the bottom, and get a sandbag and a hardwood dowel that was rounded on the end. Take the gas cap stuff off, and place the tank, upside down, with the dent over the sandbag. Poke the dowel through the hole, and using a mallet, start pounding the dent out. If you have never done dent removal, let me suggest that you should start going around the edge, and work your way to the middle, like a spiral. After you get it as smooth as you figure Bondo will hide, TIG weld the hole shut, and check for leaks with soap water and LOW pressure air. If you know how to weld thin metal, you shouldn't have any problem with warping. There are precautions to take when welding on gas tanks, so research the process, if in doubt.On the gas tank, I have tried like mad to make a dent in repairing this dent, and so far I can not get the metal to budge!!

Have yet to get it running on gasoline, but I have an airbox on the way. I jetted it closer to stock, 45 pilots with 112.5 mains. Not sure how it will like that with PODS and the 4-1 exhaust. So once I get the airbox installed I may swap tanks with my SH to get this thing fired up and maybe some tuning accomplished.
The beauty of this method is that if you get too rambunctious with the mallet, you can take your body hammer and pound the lump back down. Sort of a snarling iron, in reverse.
CZComment
-
+1 on this method, its exactly the method I use, only I use MIG to weld a small patch on the hole I make at the bottom of the tank, MIG isn't as neat as TIG but if the hole you cut is in the tank "tunnel" it is never seen once the tank is refitted.DGXer, do you weld, or know someone who does? TIG would be best. If I had to fix that tank, I would cut a hole about two inches round in the bottom, and get a sandbag and a hardwood dowel that was rounded on the end. Take the gas cap stuff off, and place the tank, upside down, with the dent over the sandbag. Poke the dowel through the hole, and using a mallet, start pounding the dent out. If you have never done dent removal, let me suggest that you should start going around the edge, and work your way to the middle, like a spiral. After you get it as smooth as you figure Bondo will hide, TIG weld the hole shut, and check for leaks with soap water and LOW pressure air. If you know how to weld thin metal, you shouldn't have any problem with warping. There are precautions to take when welding on gas tanks, so research the process, if in doubt.
The beauty of this method is that if you get too rambunctious with the mallet, you can take your body hammer and pound the lump back down. Sort of a snarling iron, in reverse.
CZ
Before doing any tank welding I read a lot about how explosive it can get welding gas tanks, it made for scary reading, all I can say is that I havn't experienced any of the issues I read about - EVER. I started by washing out the tank with kerosene then soapy water before welding, then just kerosene without the soapy water wash, no issues. The other method I read which I havn't tried is using a garden hose shoved into your car exhaust, the other end into the tank gas cap hole to drive out the oxygen whilst welding. On the XS11 tanks theres also the fuel sender hole to get a knocing stick in through and I've even gone in through the petcock holes before.
Another method of dent removal I've used was made a 3/4" round bar puller, warmed the round bar up with a gas torch and curved one end right round, snaked it into a tank and pulled the dent out from outside. I've never got them perfect but as CZ says, good enough for a thin layer of bondo.
Go for it.Tom
1982 5K7 Sport, restored to original from a wreck
1978 2H9 (E), my original XS11, mostly original
1980 2H9 monoshocked (avatar pic)http://i145.photobucket.com/albums/r...psf30aa1c8.jpg
1982 XJ1100, waiting resto to originalComment
-
It is the welding part of that holding me up from it. I do nto have a welder, nor do I know how to weld. I tried it once many years ago in a factory training project. Tig welded up some parts for a jet engine. None would ever go on one, they failed X-Ray and Hydro. I know a few folks that do weld, but I do not think they will be keen to weld on a gas tank.
But, I will probably try this anyway, but also get another tank for the project bike. Worse case I end up with a spiffy looking tank with a hole or two in the bottom. Life is what happens while your planning everything else!
When your work speaks for itself, don't interrupt.
81 XS1100 Special - Humpty Dumpty
80 XS1100 Special - Project Resurrection
Previously owned
93 GSX600F
80 XS1100 Special - Ruby
81 XS1100 Special
81 CB750 C
80 CB750 C
78 XS750Comment
-
This is what I meant when I said I used a crowbar. I went in through the filler opening with the hook end, then by 'pulling' on the bar used the hook to knock most of the dent out of the top of the tank. A bit crude and took some time, but I got the tank good enough that not much bondo was needed....Another method of dent removal I've used was made a 3/4" round bar puller, warmed the round bar up with a gas torch and curved one end right round, snaked it into a tank and pulled the dent out from outside. I've never got them perfect but as CZ says, good enough for a thin layer of bondo.. Fast, Cheap, Reliable... Pick any two
'78E original owner - resto project
'78E ???? owner - Modder project FJ forks, 4-piston calipers F/R, 160/80-16 rear tire
'82 XJ rebuild project
'80SG restified, red SOLD
'79F parts...
'81H more parts...
Other current bikes:
'93 XL1200 Anniversary Sportster 85RWHP
'86 XL883/1200 Chopper
'82 XL1000 w/1450cc Buell, Baker 6-speed, in-progress project
Cage: '13 Mustang GT/CS with a few 'custom' touches
Yep, can't leave nuthin' alone...Comment

Comment