
shim
I did a valve adjustment a few months ago and had a pronounced clicking on the right side. I figured I did a boo-boo but wasn't too concerned. I took it apart Saturday and found that I probably applied the exhaust specs to the #4 intake and had a .265 shim installed when I should have had a .275. Got the right one in and it now has just the right amount of noise. The last time I did the valves, I had the cams out, so I didn't need to use the shim tool. It has been a few years since I had used the tool and forgot that the valve needs to be depressed by the cam beforeinstalling the tool. I sat there for 30 minutes trying to figure out what I was doing wrong before breaking down and looking in my manual.
-
I put the old girl to bed. Was 43* out, so I did the ATGATT thing with my brand new hi-vis yellow helmet and had a nice run. When I got home, I put in the startron additive and covered her up in her blankie. This was only the 2nd ride of the year due to circumstances beyond my control. More riding next year for sure.
Leave a comment:
-
-
Oil Leak with Easy Fix
In the mid-summer, I developed an oil leak at the bottom of the stator cover on my SF. If I rode for a half-hour, 2-3 drops would accumulate at the bottom of the cover.
We know the possible causes are:
(a) galley plug o-ring
(b) crank seal.
I bought both parts and procrastinated....until now.
Last night I pulled the cover, and I could see it was the galley plug leaking.
This fix took 15 minutes because I was careful to wipe everything super clean.
Moral: Don't be afraid of this fix, it's super easy.Leave a comment:
-
XS Friends,
In keeping with the theme.... What I'm doing today is a valve adjustment.

My newest project has 6/8 valves out of adjustment. Doesn't appear that:- The owner EVER cleaned the motor
- The valves were EVER touched.
Like Jeff, I'm trying to make the VYR with this machine although the chances are slim. Also like Jeff, the rear has to be pulled apart and properly inspected and lubricated. All of these systems and sub-systems have to be taken care of to assure SAFE and RELIABLE driving.Leave a comment:
-
As you know..I love the ST11's... great bikes..solid platforms and a good overall machines...not exceptional but very good...didnt know you had one...
Jeff..great job...you do what everyone should be doing to these bikes before you trust your life on a 40 year old machine...Most ppl here do not have the means to do it properly...Last edited by madmax-im; 08-11-2018, 04:22 AM.Leave a comment:
-
Xs1100E
Jeff,
It looks like taking that driveline apart was a good idea. I would guess that may be the first time since new. Looks like this E will make it to the VYR. Good job.
I was having a little less fun last week. Worked on two BMWs (K1200GT, K1200LT) and one Honda ST1100. The Honda will make the rally.Last edited by MPittma100; 08-10-2018, 06:00 PM.Leave a comment:
-
Ah, six month delay is over
FAST FORWARD
Update: Aug10
That post was six months ago. Frightening it has sat like that for so long.
Certainly didn't use that bike during the Florida Rally.
Finally getting back to work on going through this new to me machine.
Goal this time is to ride this bike up to North Carolina for our Vintage Yamaha Rally at the Iron Horse Sept 28-30th.
I'm happy to report that after six month delay I did remove the Final Drive.
Was some grease at the FD end but NO Grease on the front

Looks like somebody had put some grease via the Zerk fitting but of course that did nothing but make a mess at the FD end of the swing arm
Flushed and bled the rear brakes today too. Next is Carb check, Valves check and clean ALL the electrical connections.
Then bike should freshened up to ride to the VYR I-H Rally.
After that, start on long overdue 10K service, check stator and put Geezer regulator on my other 78E. yippie
JeffLeave a comment:
-
Here you go. I marked the pilot tower fuel levels and the pilot jet location at the bottom of its screwdriver slot on the jet inlet face.
The carburetor body 'lip' used to check the fuel levels externally with the clear hose goes away at the carburetor inlet. I had to measure the float bowl gasket surface offset to 'zero' the float gauge so I could square the gauge, then measure and mark the pilot tower fuel levels at 2mm, 3mm, and 4mm.
The internal fuel levels are 4.5mm, 5.5mm, and 6.6mm from the float bowl gasket surface that's used to set the float height.
XJ1100 float bowl gasket surface offset 2.5mm

XJ1100 pilot tower fuel levels marked 2m to 4mm with jet height

Leave a comment:
-
levels
to clarify. I shoot for 3mm down but anything from 2-4 mm is going to work as designed.Leave a comment:
-
Levels
I always use the lowest part of the carb body where you had your caliper in the top photo, and have never had them leak with mikuni seats and metal on metal needles. I did a running test at various rpms with my LH and marked the levels from idle to 5.5 k. Of course the bike was on the center stand so it wasn't under load but it confirmed with the assistance of TC's cutaway that, plus or minus 2mm from the lowest edge of the carb body ensures that the pilot jet is always feed. I believe that there was 4mm to spare. My thoughts were that once your into the mains over 5.5 k there is lots of fuel, and the bowls recover amazingly fast so when you chop the throttle back, the pilot cct has plenty to provide the smooth transition when the butterflies start to close. Works for me anyways. If PB was still working I could retrieve the photo's I did.Last edited by mack; 06-24-2018, 08:21 AM.Leave a comment:
-
A Tale Of Two Millimeters
That was interesting, there is as tab/flange on all XS1100 and XJ1100 carburetor bodies as shown in the illustration, it's a step up in the carburetor body on the inlet side and, fortunately, you can't really get a measurement from that point so there's no way to flub the measurement.
I set a float gauge to 4mm and took some pictures.
The written 3mm spec is closer to the actual 4mm fuel levels measured from the carburetor body when the float height is set to 23mm.
The illustrated 3mm spec is closer to the illustration when it's measured from the float bowl casting step.
Based on the fuel levels I measured with the floats set to 23mm, I'll take a wild guess that 3mm is measured from the carburetor body, not the float bowl casting step, but it seems to me that it would be a little high if it went all the way up to the 2mm upper limit.
I'll reset the float heights to get a 2mm fuel level and see if it runs or dumps fuel out the air box.
XJ1100 4mm from carburetor body with 2mm and 3mm marked

XJ1100 4mm from float bowl casting step

Step-up in the 1982 XJ100J and 1979 XS100SF carburetor body inlets and, yes,
I do know that the washers are missing on the '82 float bowls, they're working spares


The illustration once more with feeling from the fine manual

Leave a comment:


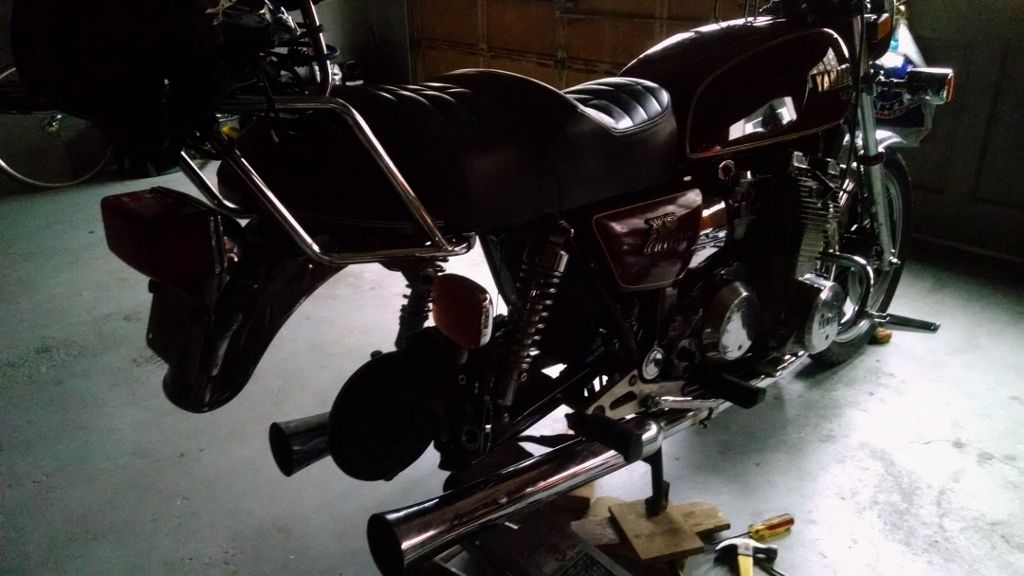
 lol With the findings up front, a Rear brake flush is needed too. Used the tool kit cable to remove the rear axle so since the cable hooks to the FD and left shock I'll have to jockey around to get the cable off and remove the FD for inspection and greasing.

Leave a comment: