
(Reposted from the XSSE 2016 Rally thread in case you weren't following it vs. this thread.)
Okay,
After a good night's sleep, I'm now ready to expound on my total XSSE 2016 Rally experience, hope you're ready for a ride!
 For those of you that have not seen/followed my rebuild thread, I decided to do a frame up rebuild of Godzilla this year, but a couple of months into it, realized that the pace I had chosen was woefully too slow, and then cranked up my activity to a fevere pitch over the last few weeks to get it done and ready for the rally. Amazingly I got it completed and in running condition so it could be inspected Thursday, and we could then leave Friday AM for the trip.
 I now bring your attention to this first photo courtesy of JetMechMarty:
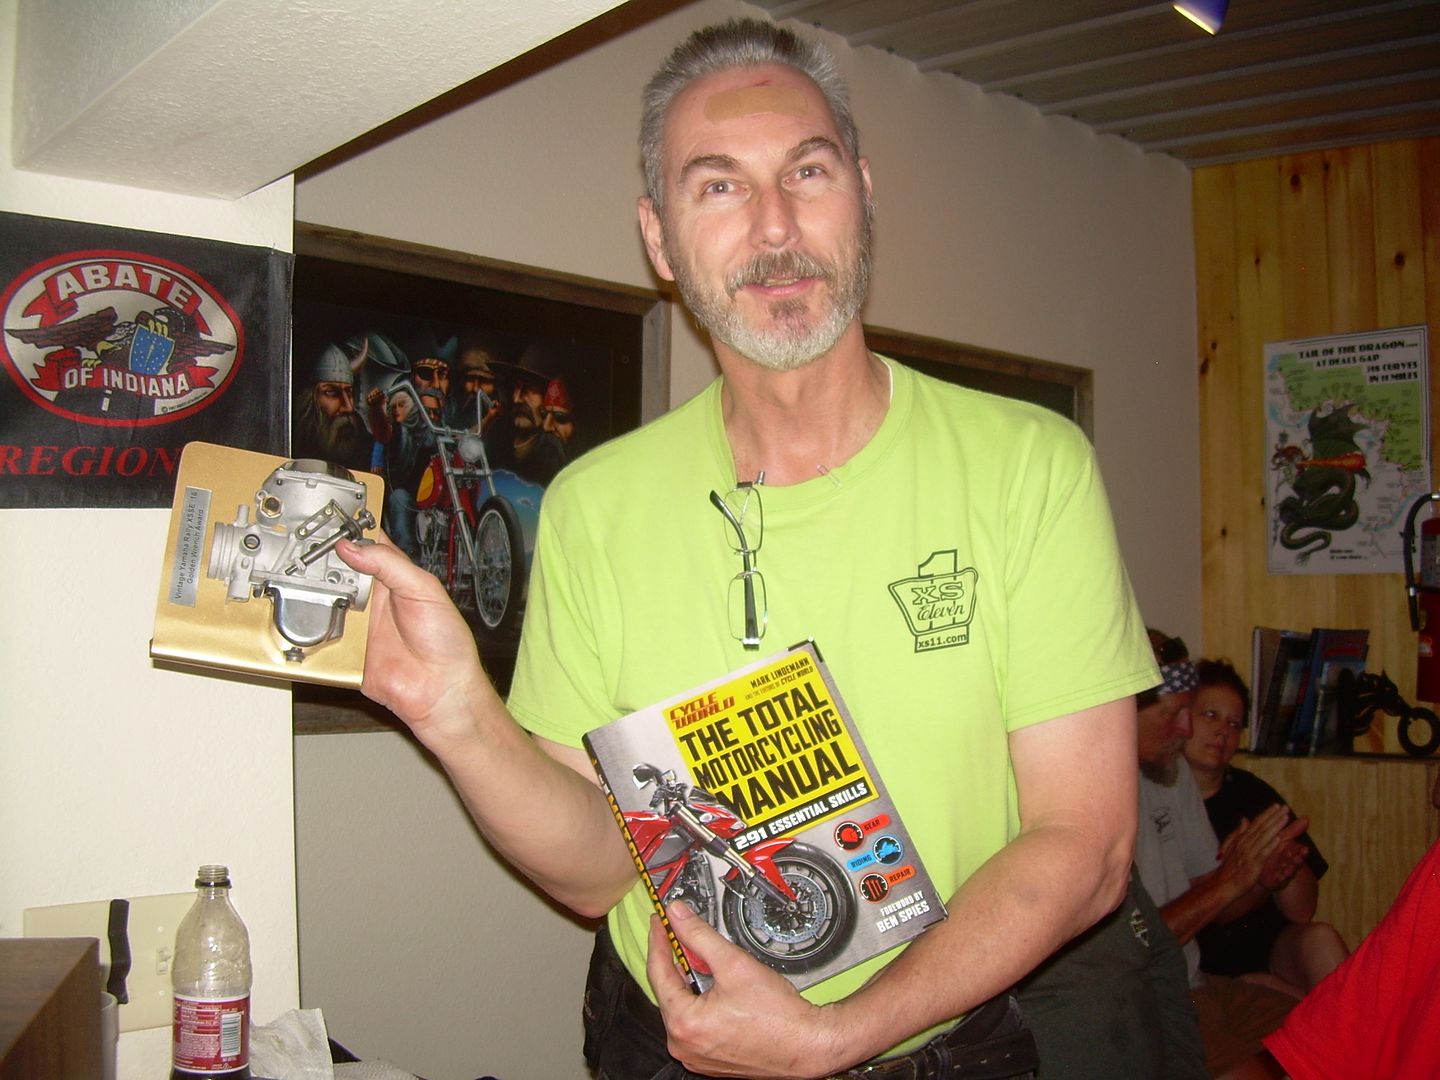
Note the bandaid across my forehead. This should have been the first OMEN for me!
 I had the bike on the CenterStand and on the bike lift, fully loaded saddlebags/trunk, and I needed to take it off the centerstand. The way you usually do that is to get a good rocking action and then a strong forward lunge/push on the handlebars to push it off of the CS. I wasn't yet wearing my helmet, and had forgotten that I had just put on the windscreen....BLAM....hit my forehead on the sharp edge of the top of the screen and gave myself a nice 1.5 inch long deep scrape up my forehead!
  DOH! Drew BLOOD even!
 Okay, got it outside, George arrived, fired up and we were OFF! But after just the first 1.5 hours worth of riding on that Harley Single seat...I realized I wouldn't be able to survive on my skinny white bony butt, and I also wished I had made time to install my engine guard/cruise pegs!
 So...we stopped at a local LOWE's store, found a nice outside chair lounge cushion....in green even....and also got some 1" square tubing 3 feet long with some SS U-clamps and mounted it up high on the frame just above the headers. Problems solved, we were off again.
 George had calculated fuel stops about every 120 miles, but I was running out right around 100....and even after I would switch to RESERVE it wouldn't act right, felt like it was still running on just 2 cylinders, so I chalked it up to the more slanted angle of the tank, and that with the extra weight, windscreen, and 70+ mph speed was just eating my mileage!
 This problem will show up later!
So...we made it about 300+ miles to near Asheville when I again ran low on fuel, pulled off the highway, and tried to get to the station, but my clutch wasn't working right! We checked it out, went to the fullest cable handlebar adjustment and still wasn't right, SO...took off the engine cover and found that the throwout lever locknut had worked loose and fell off! After putting all back together and locktited, the handlebar lever still didn't feel right and was still at the fullest adjustment! It was a NEW clutch cable, but generic, and so we surmised that it had stretched! Thankfully I had packed my old cable as a backup! We tried to fish it thru the frame ziptied the old onto the end of the new one, but it kept hanging up under the tank, so we had to pull the tank off. But I had BOLTED my backrest to my luggage rack, and it extended over the rear end of the seat, so we couldn't just lift the seat to allow clearance for the tank, SO we had to unbolt the seat from the frame, then we got the tank off. THEN we saw that I had included the clutch cable into a ziptie that I had used to secure some of the other harness wires to the frame....that's why it wouldn't just fish thru!
Okay, got it done, back together and we were off again. Hit some nasty stop and crawl traffic on I-40 just past Asheville, and so we took a GPS detour, had planned to get onto the BRP near there anyways for the last leg to the IronHorse. But while running down the road I happened to be watching my voltmeter, and saw that it wasn't getting above 12V, wasn't sure how long it had been that way. So... we pulled off into a gas station, and took the cover off just to see if the drive belt had broken or what. I was intact, but the pulley was burn fingers hot, and with the recent previous stop/crawl traffic and 85+ temps and enclosed alt case/cover, that perhaps the ALT had an overheat protection circuit that cut it off?
So...we waited there a 1/2 hour trying to let it cool down, finally even got some empty soda bottles and filled them with tap water and slowly poured them over the pulley/case trying to speed up the cooling. Got the pulley and case cooled down, and so we decided to fire it up and see if the ALT would show charging, left the cover off for better wind cooling....but once the engine started, we saw that the belt was SPINNING AROUND the ALT pulley, but the ALT's pulley wasn't spinning! We then took a wrench to the pulley nut to see if it would spin, and it wouldn't, it had totally mechanically grenaded....bearings burned up, pieces falling out thru the vent slots! I jokingly quipped..."at least the crankshaft seals aren't leaking"! That will bite me in the a$$ later! It was already after 6 pm. We went to an auto parts store just a mile down the road, but they didn't have anything they could cross reference, they had internet access, and was able to find my special Mini Race Alt model #, 8162, but nothing that could work! Called Swmbo to let her know, she reminded me that I had AAA, called them, but it was only for CAR.....I would have had to have upgraded to RV/recreational vehicle level to cover Motorcycle!
 I was running out options, ideas. To get a replacement ALT I thought I would have to order one online and express ship it, possibly get it by Monday, install and finally be able to at least get back home...but miss the Rally rides completely. The local car rental place was already closed, so I couldn't get a car to drive back home to get my SUV/trailer and then drive back, pickup bike and then drive home again!
 So...George was able to get thru to RichV, and he was able to get Harry/Bigfoot to graciously come the 50+ miles with his truck/trailer and haul me at least to the Hotel I was staying at in Robbinsville, where I could then plan my repair options. Dropped the bike at the Hotel, rode back to the I.H. with Harry, and then after unhooking the trailer, he made a magnanimous offer to let me borrow his truck while chasing my repair options while he was riding at the rally.
Got back to the hotel, and started researching, found the manufacturer's website:

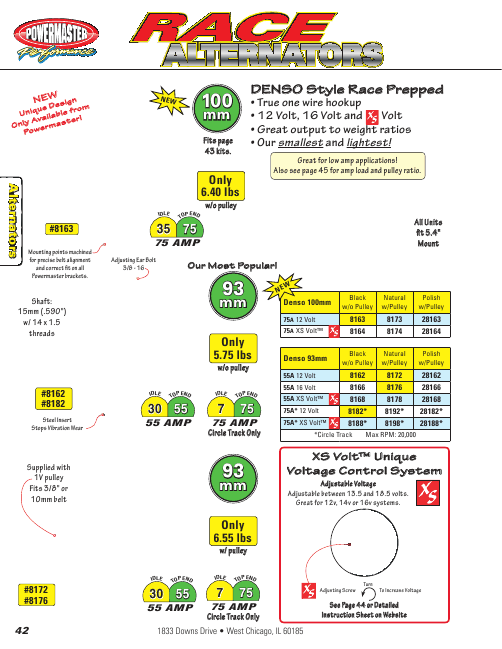 and they had a DEALER Locater link, searched places within 30, then 50 then 100 miles, most places were basic parts places, but didn't list the ALT on their webpages. Finally found a place called Tennessee Speed & Sport,
showed a brick/mortar location in Chattanooga, and their website listed the Alt In STOCK...but they were closed at 1 am Saturday morning! Got up at 8:00, called their 800 number, verified they had the ALT, they were open from 8-6pm, put my name on it, and took off for Chattanooga across the mountains. Some 2 hours later arrived at the address.....BUT no store!
I then called the regular phone # for that location I had also written down...and got the "NO LONGER IN SERVICE" message! I called the 800 number again, and THEN found out that they had closed that location 2 years earlier, but it was still listed in the Manufacturer's Dealer listing! It was only ~11am, so I got the address of the ACTIVE store location...and set my GPS....to NASHVILLE some 140 miles farther! Arrived at 1:30pm, got the ALT in my hands, had to pay ~$220 full retail....was only ~$85.00 ONLINE! But I had it in my hands Saturday vs. having to wait till Monday/Tuesday, along with Express shipping charges and such! Okay, drove the 4 hours back to the hotel. Had to remove the old one, also the PULLEY and swap it onto the new one. The main aluminum housing mounting hole had a steel sleeve in it that made it too small for the bolt I had....but was able to knock/punch out the sleeve so that it would fit. Had stopped and gotten some extra 3/8's washers for spacers to help align the pulley/belt in case it was slightly off due to manufacturing variances...but got it installed, and VIOLA, was working and charging. I now would be able to Drive/Ride home....and also get to attend and RIDE Sunday's Rally ride. Rode the bike back the I.H. for the Saturday night's awards ceremony and such. Rode back to the Hotel to get a good night's sleep so I could enjoy the next day's ride.
Got up, dressed, and decided to top off the tank since I would be 30 miles short due to the 10 mile trips back and forth from the hotel in Robbinsville to the I.H. Lodge, but when I stopped at the station just a minute after running the bike, I saw SMOKE billowing up from the engine! I looked down and saw not just a few drops, but a 3 inch diameter PUDDLE of oil on the floor, and all over the headers!
This first photo is after I had moved the bike to the side of the station, but you can clearly see the oil sheen on the headers....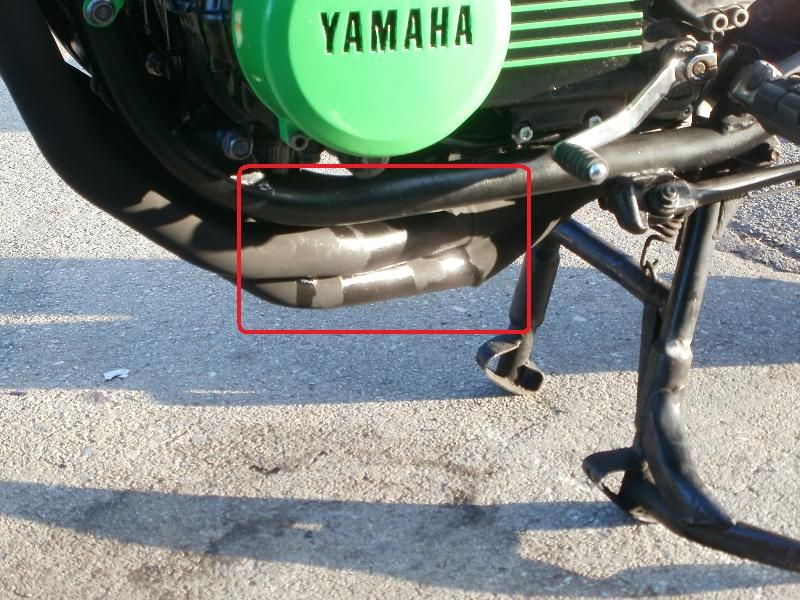
And the trail of oil down the front of the tranny case above the drain bolt where the SOFA's seal had apparently broken and leaked out! I had re-installed it a few years earlier, had used the BLACK RTV for oil, but my SOFA was an earlier design with a square channel for the round O-ring, and it had compressed/flattened due to the years/heat. SO...I called George and let him know that I would be missing breakfast and at least the morning's leg of the ride. I then had to remove the SOFA to reseal it! I didn't have my oil drain bowl from home....realized I didn't need a 5+ quart bowl, just something for the ~3.5 quarts. Went to the store and got a gallon jug of drinking water, poured it out, cut off the top, and dried it out with the roll of paper towels I bought, was also able to get a can of spray carb cleaner to degrease things. Then tore into it, had to pull the muffler, headers off, drain the oil, and then the filter, and then get the SOFA off, cleaned/scraped the old RTV off, the O-ring, then layed a nice layer of ThreeBond down in the O-ring channel, placed/press the O-ring into it, then slathered the 3bond along the top as well, and then was able to reinstall it, the pipes, and reuse the OIL!!
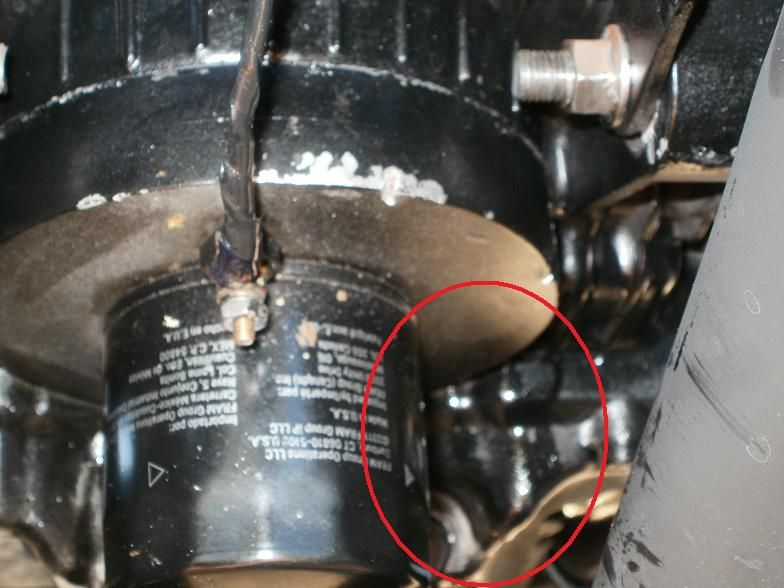
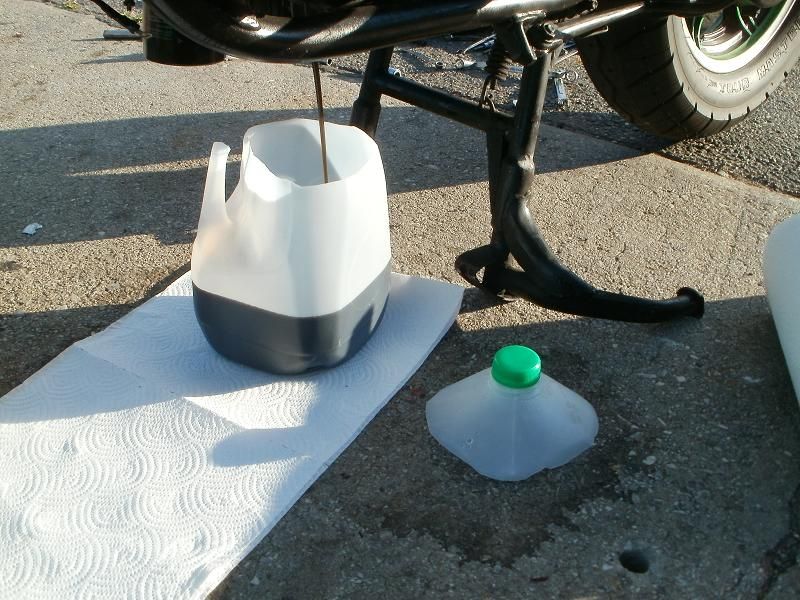

Fired it up and nary a drop leak!! It was ~11:00 am, rode to the I.H. to see if there was anybody there that could tell me where the rally group was going for lunch.
Evidence of Godzilla at the I.H. Sunday AM.
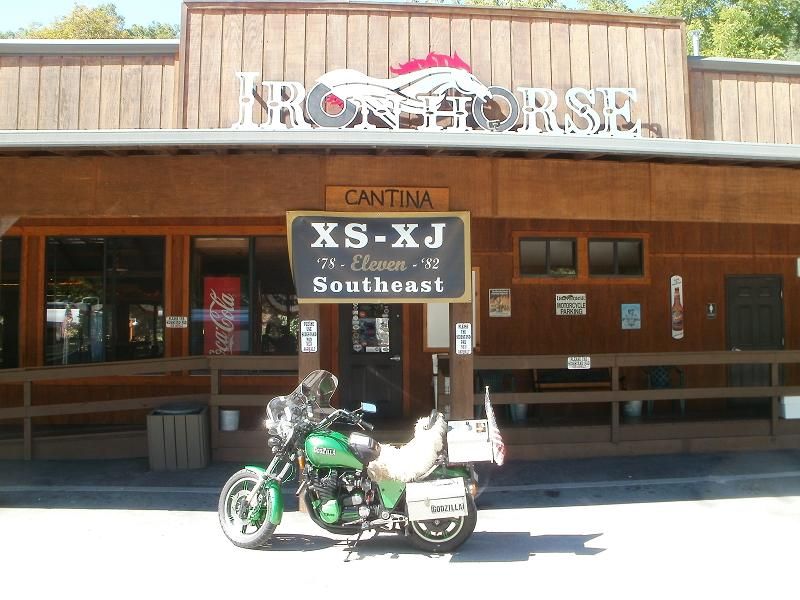
Greg had stayed behind due to his little drop incident, had showered and said he was wanting to also meet up with the group, so we decided to ride together, went the reverse direction up the Cherahola skyway to Tellico Plains/Etowah to the restaurant. Had lunch, and was able to do the final leg of the rally ride back to the hotel/lodge. Was having a great run about halfway thru the parkway, when the XS Gods felt I wasn't yet worthy to have so much fun...and so we got RAINED ON for 5 minutes, and wet the roads enough to not be able to do any fun yanking and banking for the rest of the ride back!
Returned Harry's Truck to him, had dinner and socialized a bit, and then back to the hotel to prepare for the trip home.**But wait...there's MORE** ! !
Next morning, had breakfast and then George and I took off for home. Due to the lack of twisties I got to experience, we again planned a route including a section of the BRP just after Asheville to Boone before getting on 40E. Also planned a stop at Grandfather Mountain and the mile high swinging bridge I had visited as an early teenager some 40 years earlier!
Okay, on the highway at around the 60 mile mark....my bike started cutting out like it was starving for fuel again. Hit/switched to reserve, but no help, pulled off into a station to see what was happening. Filled up with fuel, but only took 2 gallons?
Found an auto parts store just a few blocks up the road, so we went there. I then pulled the fuel lines and the small cone lawnmower filters, test blew into them, one was easy, but one had a surprising amount of resistance. Flipped it around and saw this! Sorry for the focus, but you get the idea! 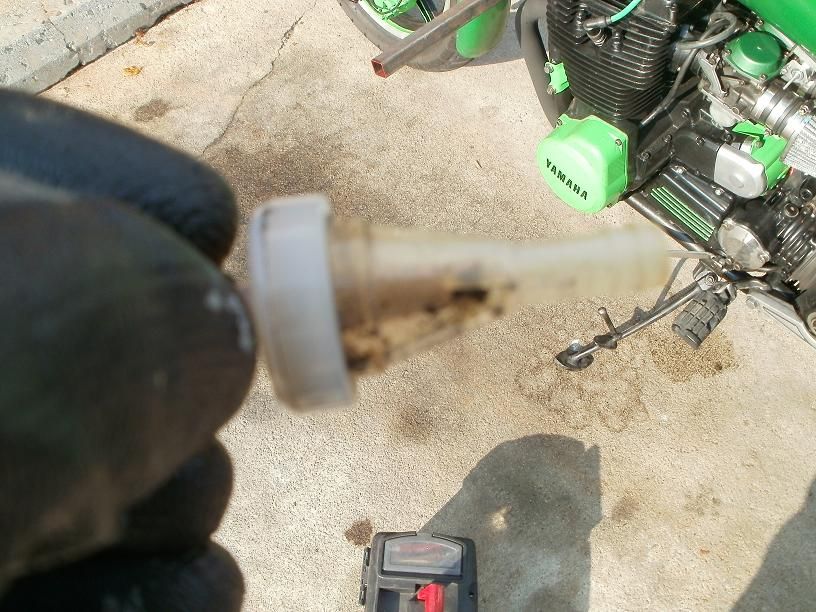
Got a replacement and put it on, and it was then hitting on all 4 again....this also explained the previous lack of effectiveness of RESERVE on the trip down, wasn't enough gravity feed pressure to push it thru that partially clogged filter, so never could get the 1-2 carbs filled/working. We were off again. Got to the BRP and had a good hour's run, had to pass a few cars along the way....
but made it to Grandfather's Mountain swinging bridge and lookout. 
We then drove off the mountain and away from the BRP, but hit some wet roads where it had just rained before we got there. We then stopped for gas....we had been watching a band of rain clouds approaching, and decided to don our rain gear after we heard the thunder booms! While there I noticed some OIL on my right boot toe and a few drops on the ground. First thought it might be from the galley plug/ O-ring that is normally sealed by the OEM Alt cover, I had adapted my Alt Mount bracket to do the same thing, and had replaced the O-ring when I had put the Alt on, but that was back in 2011. Checked the oil level, and we took off, hit some serious rain getting thru town and a ways down 421 until we got far enough away, rode to the next fuel stop and late lunch stop where we could then take off the rain gear and chow down. The amount of oil on my boot was much more, and several more drops on the floor. Looked closer, and then saw the oil trail from the crankcase seal area behind the alt flywheel/pulley. But it's a bit slower leak, not as severe at the SOFA leak was, so we checked the oil, topped it up, I even put a little towel around the area to try to cut down on the splattering from the dripping.
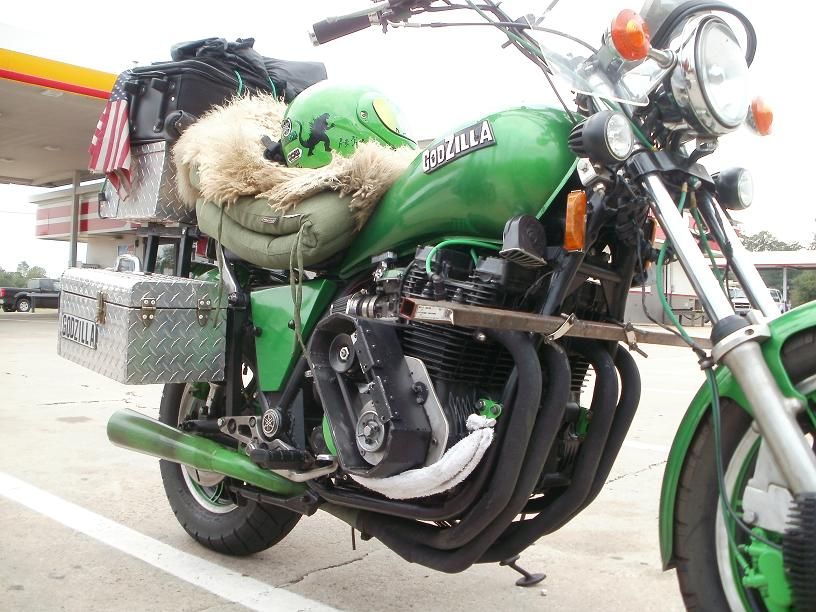
Ended up using a whole quart to get the 300+ miles home from that point, but arrived safely and otherwise intact without grenading the engine/bike. BTW, I also had lost my left side turn signals...think it's in the switch, tested the bulbs/sockets by plugging them into the other side harness plugs, and they worked. Further diagnostics are required.
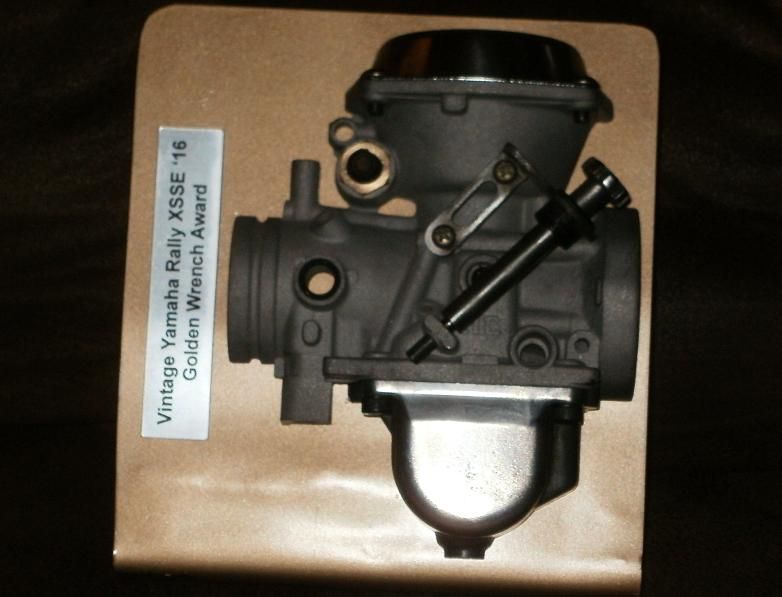
So...the first photo showed me holding the Golden Wrench award...which was mostly for having to repair the clutch/cable on the trip down. But after the weekend's events, that thing should be Platinum with Diamond clusters!!!

 .
. 
Almost forgot, the final slap in the face was that on the ride home during some first gear take offs, I felt the stutter affect of the dreaded 1st gear tranny problem that I had originally fixed in 2000, and up to just this spring before the tear down, had NO symptoms of repeat failure. Would have been nice to have known this WHILE I had the engine out of the frame and the tranny pan off! Not looking forward to having to tear into it NOW to repair the gears again!?
Scott, the muffler paint was 500degree engine paint, I didn't think the muffler section got anywhere near that hot compared to the headers where I used 1200 paint, but you can see the discoloration/blackening of the muffler paint. Not sure if another coat on top of it might help, it's ceramic based, can only try it??
Somehow my signature seems more apropos than usual!


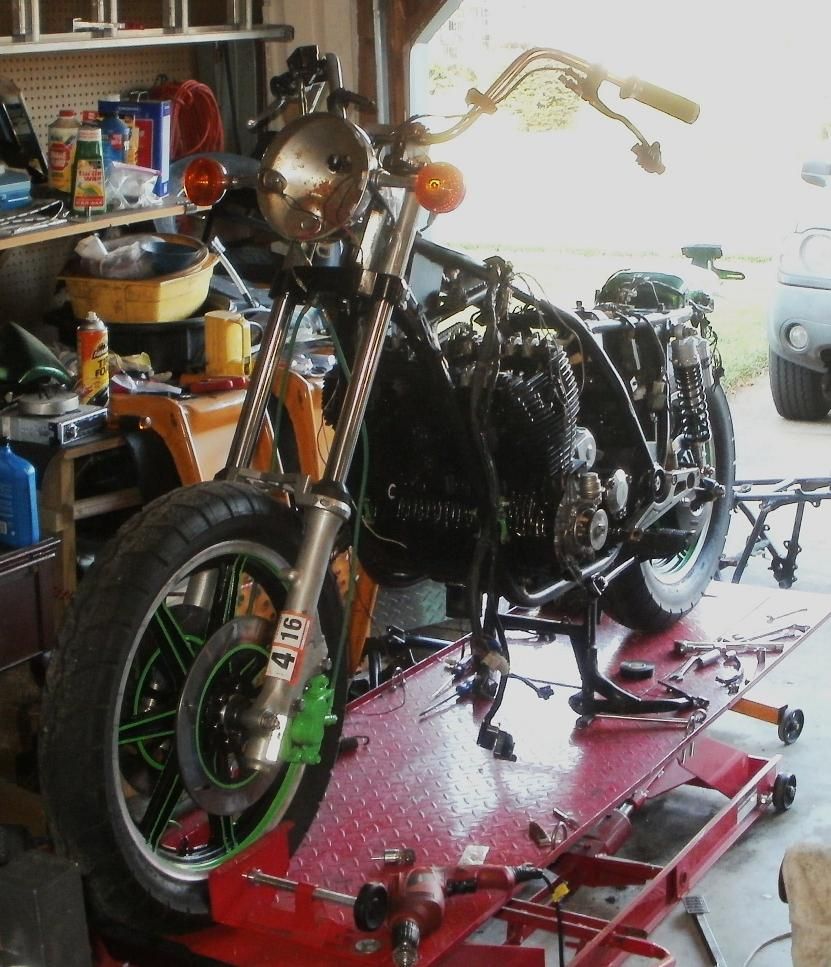
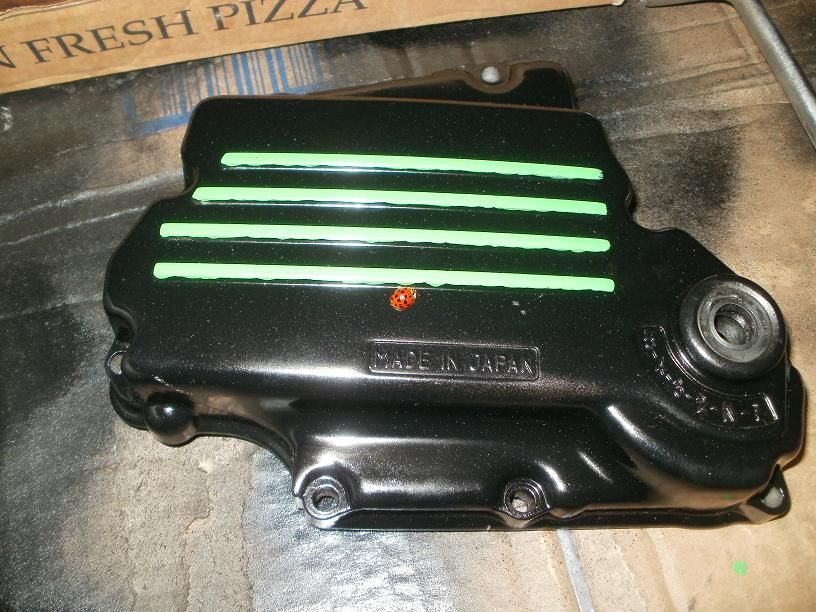
 Also, need to put the new oil filter and fill it back up with fresh oil, and get a nylon washer for the drain plug! Tomorrow I'll be getting the harness and wiring all done. I still need to get the backrest made and fitted to the saddlebag/trunk frame mount. I don't know if I'll have time to MOD the footrests in time for the trip!? Also need to put the petcocks on the tank, gas cap, and carbs and get them on and hooked up. Also need to put the intake boots, exhaust on. Also the LED headlight bulb swapped into the housing, and also the AUX LED lights mounted. But the TO DO list is getting much shorter!!!
Leave a comment: